So now you have your photos and your tone mapped image. Yous should still keep the original files, as you will need them for few steps. This part is not a step by step one, as you only need to do some parts, based on the photo.
Loading your photos into Photoshop
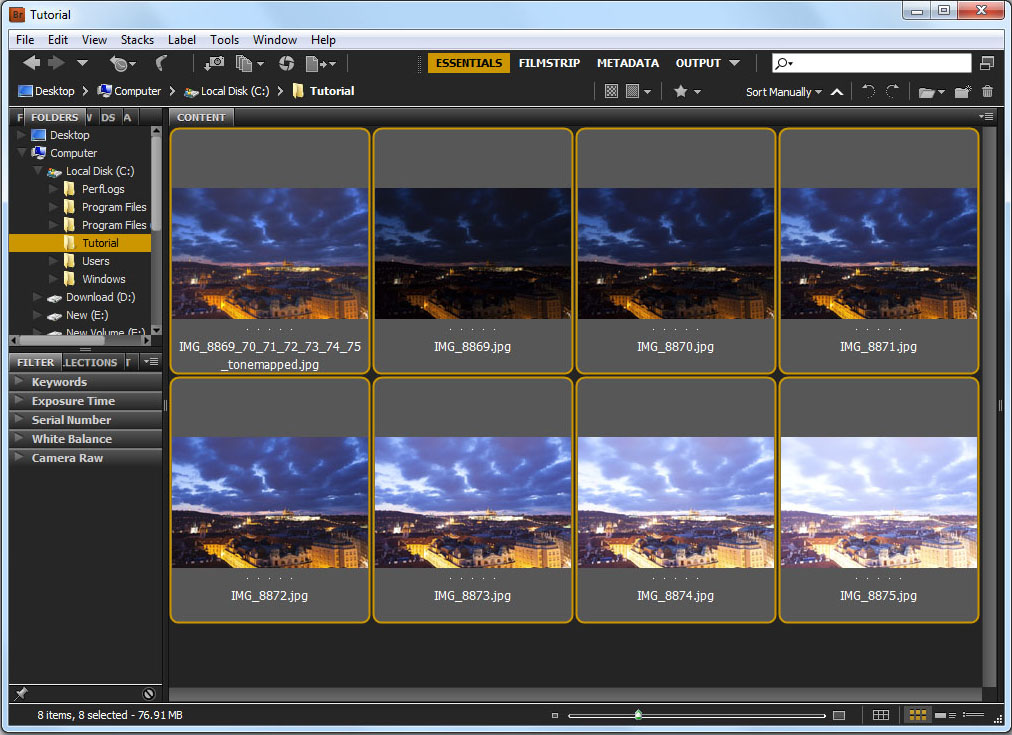
A lot of the corrections require that you load your original brackets and the final tone mapped image into Photoshop. The quickest way to get your files into Photoshop is to:
- open Bridge
- go into your work folder
- select the source files and tone mapped image
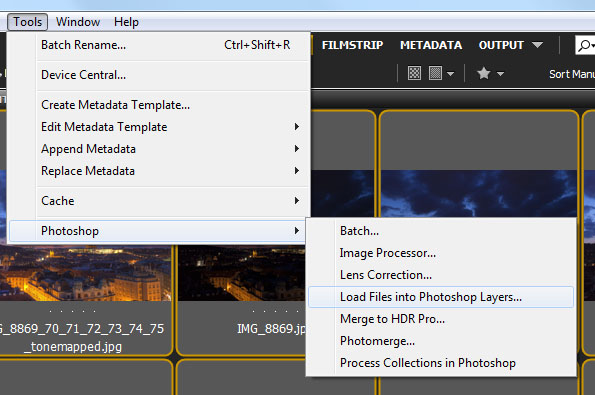
- choose tools-> Photoshop->load into layers
 |
-> |  |
-> | 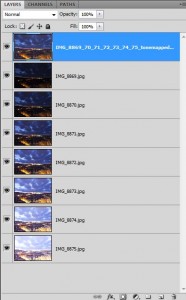 |
now you have all your photos in Photoshop and loaded into separate layers. I suggest you move the tone mapped image on top of the others.
You don’t have to load all of your source images, just the ones you will probably use (the ones, from which you need parts to correct problems in the tone-mapped image). I load all, for me it’s easier like this.
If you took your photos handheld, or they just dont allign completly, you should align them in Photoshop by:
- selecting all layers
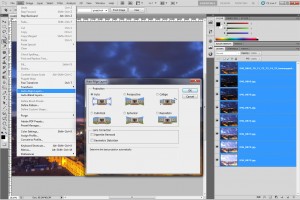
- choosing edit->Auto Align Layers -> select Auto -> OK
This works very well, but not always. Simple way to check your alignment is to change the opacity of the top layer, or just turn it on/off, so you see if the photo moves.
What you need to correct
Each photo is different, but most of the time you have to correct the same problems. The main areas you need to focus are: alignment, movement, overexposed areas, grey whites, very dark areas, colors, halos, noise, sharpness, over-saturation and strange trees.
Some of this is corrected in Photoshop, but some are easier to correct even before, mostly in Photomatix. Also one thing to remember. The better the original brackets, the less you need to correct.
Alignment
If your photos don’t align properly, it is a big problem for HDR. It creates shadows, ghosts and the whole image looks very soft. The main reason for bad alignment is camera movement when you took your shots. It happens all the time when you shoot handheld, but can also happen when on a tripod.
To get a better alignment you can use align in Photomatix – here you have three options
- no alignment – when you used a tripod and you are sure it didn’t move, also when you have a big moving subject in your photo (like fast moving clouds), selecting no aligment can prevent Photomatix to align based on that subject
- correcting shifts – should be used when shooting from a tripod.
- by matching features – when shooting handheld or when the correcting shifts is not enough. Usually creates very good results.
But if Photomatix is not enough, you still have other options. You can try to:
- combine photos into HDR using Photoshop. Just select the brackets in Bridge and choose Tools->Photoshop->Merge to HDR pro. Photoshop is very good at aligning photos, so it can sometimes create better results. Just save the file it creates as a .hdr file and then open it in Photomatix to continue.
- don’t use all your shot. If you took more shots (5+) it can happen that one or more of them are not aligned with others. For instance little wind while you were taking your shots can cause this. Just look through them and if you see one that is blurry, don’t use it. The information in all other shots should be enough to create a good HDR photo.
- use only one RAW to create your hdr. By using only one, no alignment occurs, so no problems can occur
- create a misaligned HDR from all brackets and a HDR from a single RAW and merge them in Photoshop. Just align them as best as you or Photoshop can, and then by using layer masks correct the parts you need.
If you really can’t create a nice aligned HDR, just use the single RAW method. You can try to mask in part from the original shots, to cover places where it isn’t aligned properly, but this takes a lot of time and the result can vary. I suggest you get a better tripod next time :)
Movement
A lot of people struggle with this, but to correct moving subjects in your HDR photos is actually very easy. There are two main approaches you can try, I use them both.
- use Photomatix ghost removal. Select the manual method and choose which areas are ghosted. This works much better if you have more than 3 brackets. You can also use the full automatic method, but the results here are mixed. They can be very good, if you use a lot of brackets (5+) and very bad if you use only 3. The manual works mostly better.
- use layers in Photoshop, to mask in parts of the original photos
 |
-> |  |
-> | 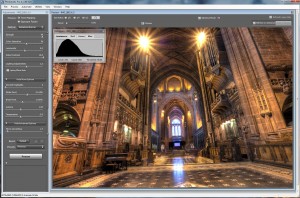 |
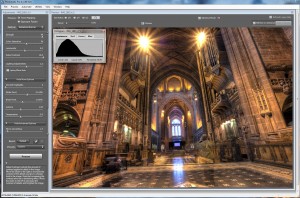
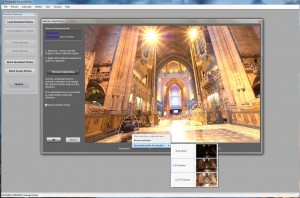
By masking using Photoshop layers you can correct many problems you have in your final HDR. You have to place your layers in an order, where you have your tonemmaped inage on top, and the source image you want to use parts of under it. Then select the top one and add a layer mask (the small icon in bottom right, which looks like a grey square with white circle in it). On the layer mask, white means the top layer is used, black the bottom. Grey is a mixture of both. Using a soft brush, at around 20%-30% opacity, start brushing on the layer mask, to reveal the original photo. Continue until the problem is corrected. Add you brush strokes softer on the sides, to create a better mixture of the two layers. If you went two much just switch to white color and brush over the same area, to remove from the mask. Don’t forget to check that you have the mask selected. If you have the photo selected you will paint into it instead of masking.
My favorite approach is to mask in what I need with a stronger brush (40%-50% opacity) and then switch to a softer (15%-20% opacity) white brush and soften the corners of the brushed area, to create the soft transition.
A lot of times you have to use parts from multiple source images (even all). Here you have two approaches you can do:
- after masking in one of the shots, merge it together (select both and Ctrl + E) with the tonemaped image into one layer, and then continue as before.
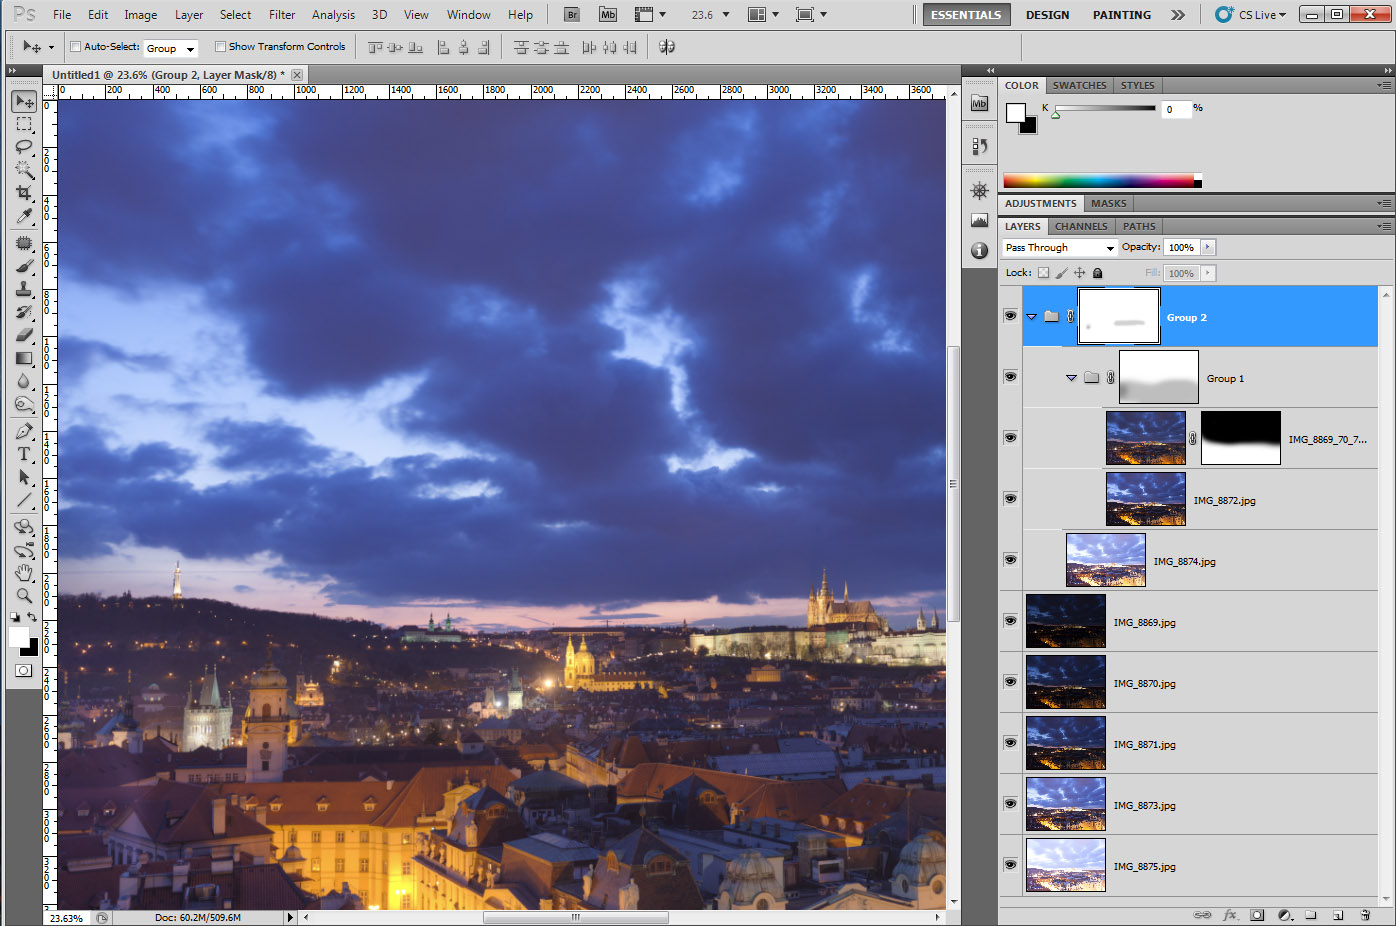
- group the two layers and then create a new layer mask on the group (check out the screenshot). Like this you can go back to layers you already worked on.
Here you can see how I removed the whole sky from one of the original shots, as the clouds were moving to much. I prefer to group layers, as I go back and forth between different layers and sometimes remix them in between each other.
This layer method of masking is simpler, when you have more brackets at your disposal, as you can find easily one that matches your tonemapped image. In the case none of the ones you have match it sufficiently, you can perform few tweaks on the source image before masking it in. For instance changing brightness, contrast, exposure and other photo tweaks can help.
You can even use a single raw HDR as one of the layers, or a tweaked image from Lightroom.
 Overexposed areas
It can happen that you just don’t have enough brackets, to cover the whole range. Tone-mapping usually creates very rough edges around this area and can make this areas dark, so you should always try to correct this. If you are aware of this before you start your tonemapping process, you can try underexposing your darkest photo in Lightroom by one or two stops, and using it as an additional bracket for Photomatix.
Other option is underexposing it directly in Photoshop and then using layers masks correcting the affected area.
I tent to try shooting brackets, so I have no overexposed areas at all. Only time when this is not possible, is when you shoot into the sun. Just use one of the original brackets to soften the areas, or to completely replace it.
Grey whites
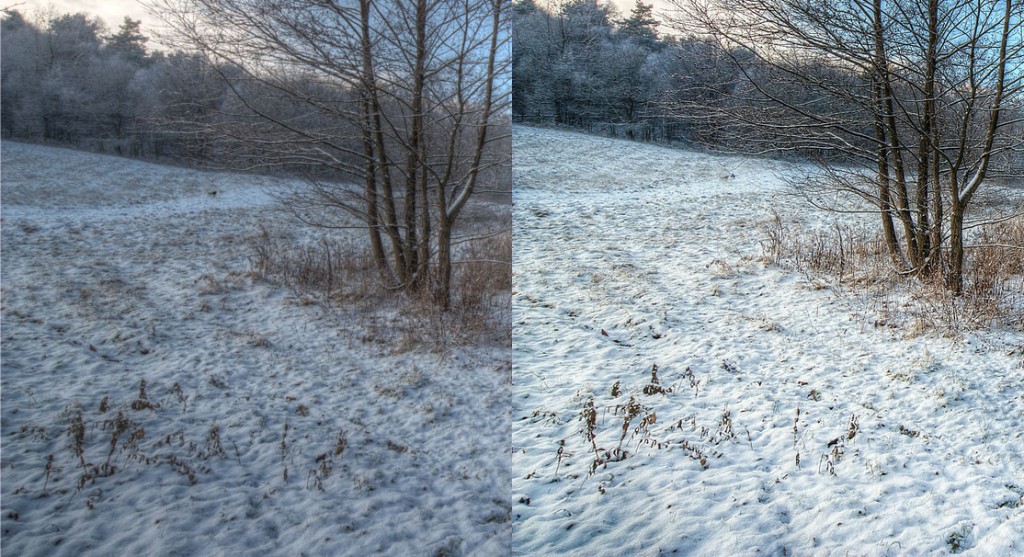
Overall white areas are a problem in HDR. The tone-mapping process tries to get details in them and so makes them look grey and dirty. Masking one of the original shots here is really a must. If you have a white area, white car, snow, or other white object in the photo, you should always make it brighter.
For instance, on the right you can see a winter photo, directly from Photomatix, and after masking and level adjustment in Photoshop.
Very dark areas
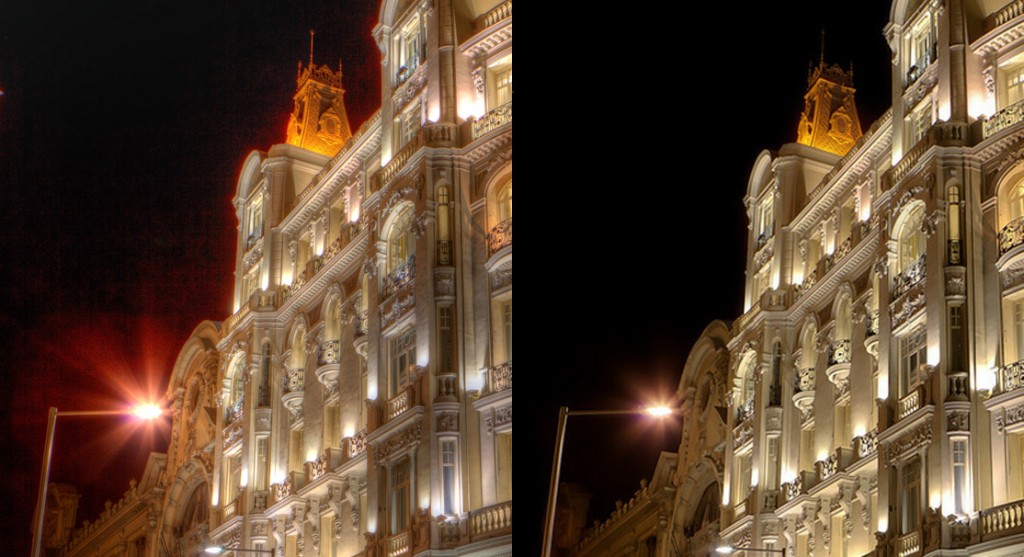
The opposite of overexposed areas. Just use one of you lighter brackets to make them lighter. Also Photomatix tends to create detail, where there is none. This usually results in strange artifacts, either red or purple, in your tonemmaped images. The only way to correct this is to mask the one of the original shots back in.
You will see something as in the picture on the left and you have to mask that part. This happens only if you have an area, for which all your brackets are pure black.
 Halos
Halos
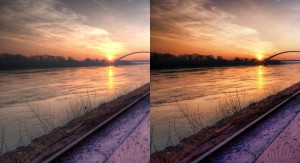
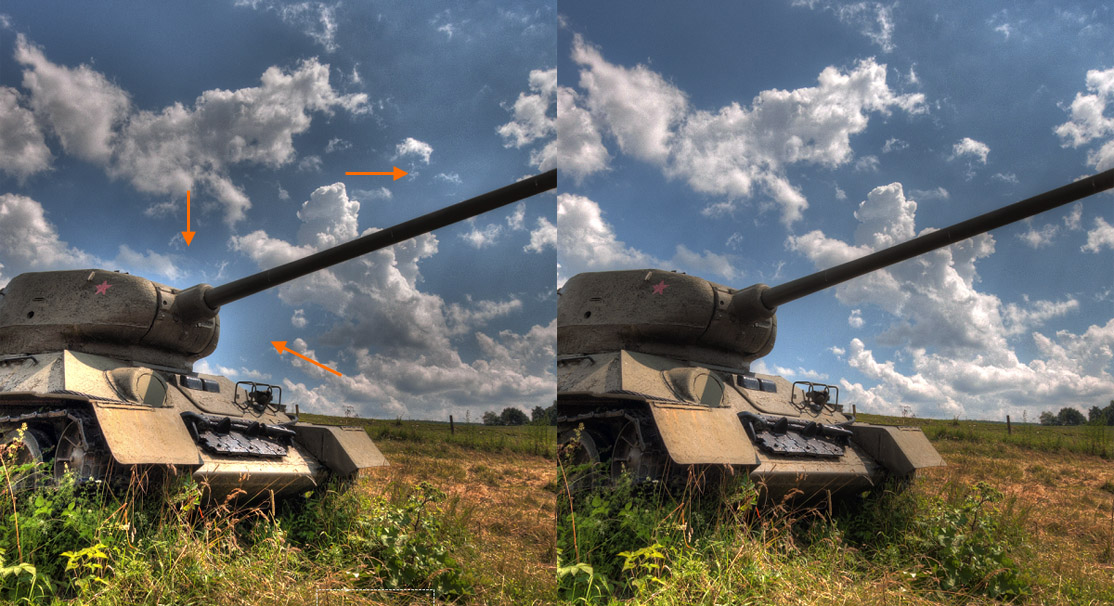
Or also known as the blue sky halos. I really suggest trying to get rid of them already in Photomatix. By lowering strength, using higher light smoothing, smooth highlights or luminosity, you can get rid of most of them.
But if it doesn’t work you still can choose one of your brackets, with the best sky and mask the whole sky into your final image. Trying to darken the halo is really hard and the final result are usually not good enough.
The photo on the right is just an example to show how halos look. I haven’t had this problem for a long time.
Also having more brackets reduces the change that you will get the halo. Having softer transitions between them creates better results here.
Noise
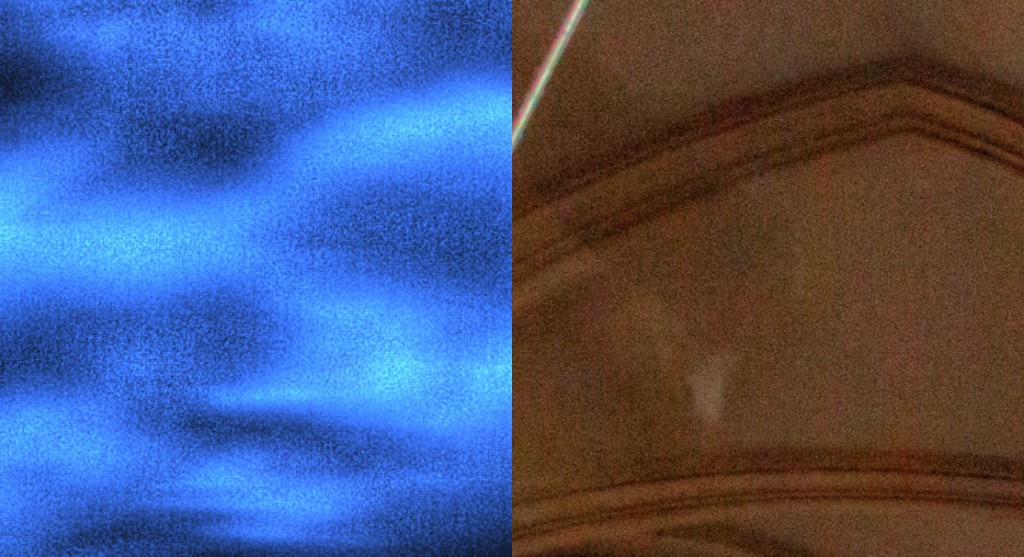 Noise gets worse in HDR, as the more noise you have in your brackets, the worse it it in the final image. But you should distinct between noise and grain. If you look at your photo in detail you will see the difference. Grain is crated by having a high Strength and Detail contrast in Photomatix. It just tries to add more detail to the photo, and mistakes the noise for detail, creating so grain. It’s usually very visible on cloudy photos. Noise is created by your camera, while taking the shot.
Grain vs Noise looks something like the image on the right.
To get rid of the noise, you should always shoot at the lowest ISO possible. Also having more input brackets can give you better results. For instance with the 5D mark II at ISO 100 and 7 bracket, I have almost no noise in my final HDR’s.
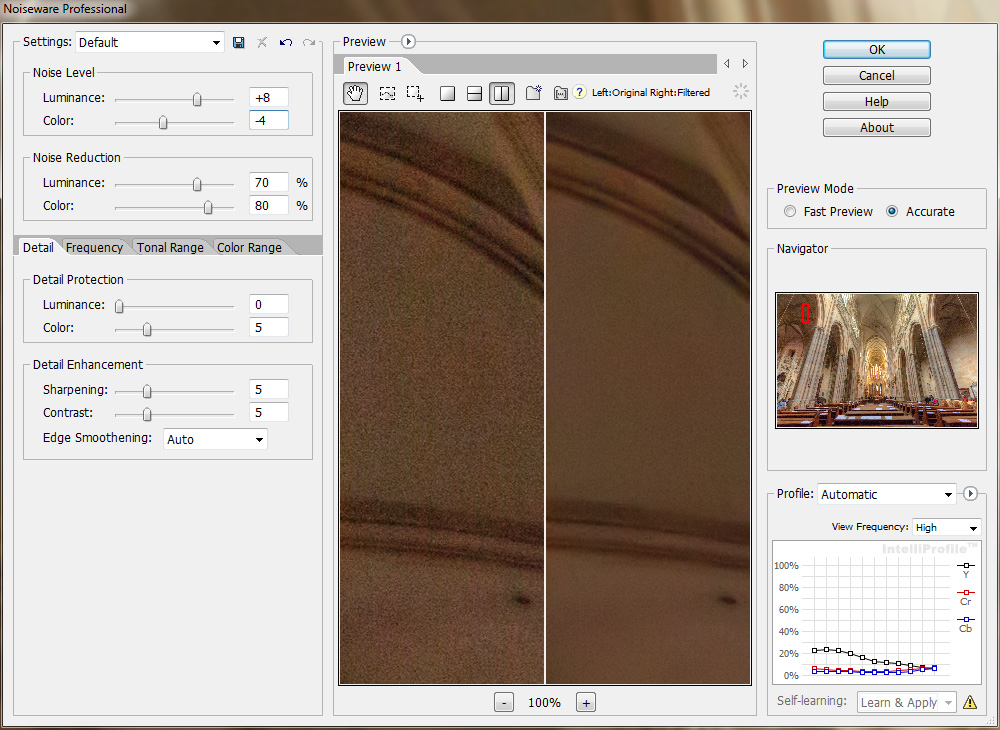 One of the best ways to remove noise is to use Noiseware Pro. This Photoshop plugin is in my experience the best in reducing all noise. If you use it, it should be done in two passes. Once for the sky and once for everything else. This is because we want to keep details in the structures, but don’t need so much in the clouds. So a higher setting for the clouds is still acceptable.
My usual setting here are quite low. I select the default preset and start with luminance around -7 and color at -20 (you usually don’t need color noise reductions). This settings are usually enough when you use ISO 100. But for instances like here, where the ISO was 2000 I had to go much higher.
Sharpness
Another very common problem with HDR, is that the photos are just not sharp. Even when your original photos were sharp, the final one isn’t. There are multiple ways you get get the sharpness back.
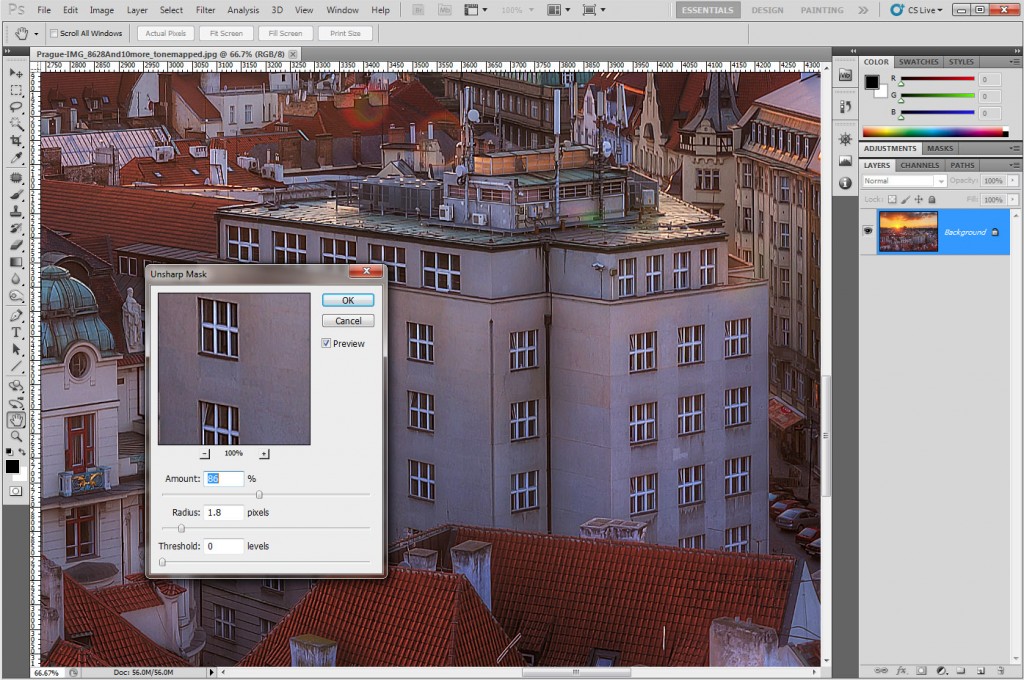
Unsharp mask in Photoshop, the easiest and for a long time my most favorite way. Just create a new layer by merging all your layers (Ctrl + Alt + Shift + E) and on this layer use Filters -> Sharpen -> Unsharp Mask. My standard settings here are 100%, 1.6 to 2 pixel radius and 0 threshold. I do this on a separate layer, because I don’t want it on the whole image. For instance you should not sharpen the sky, as it created additional noise. There also is a second approach to unsharp mask, where you choose setting of 10% and a high radios at around 40 pixels. This gives the photo a little different look.
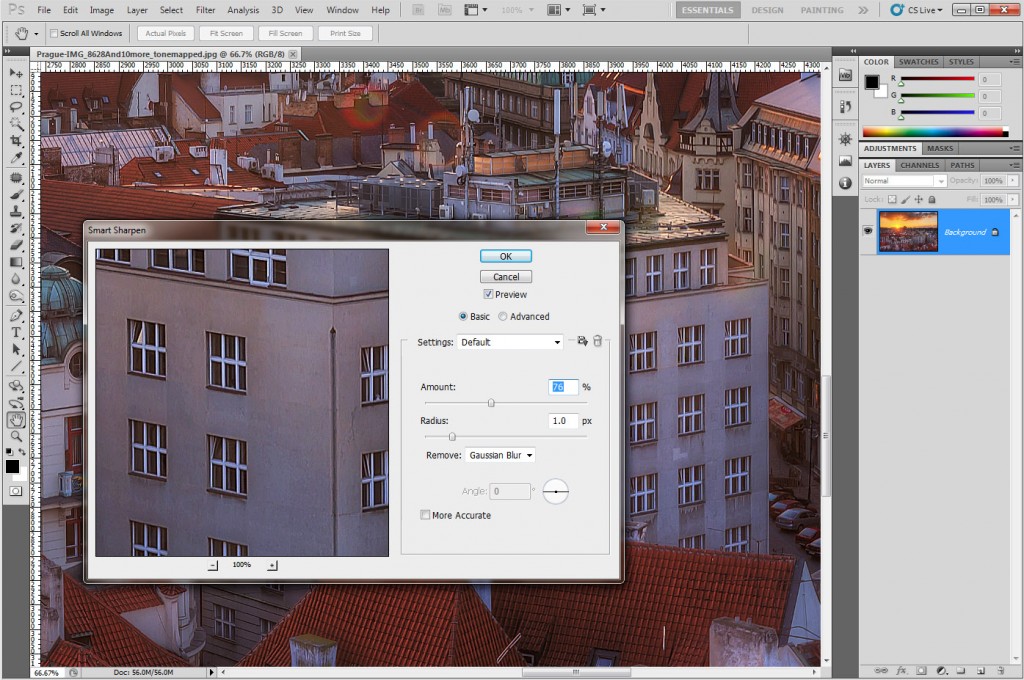 Smart sharpen is another filter in Photoshop. It is popular by some fotographers and it can create similar results to unsharp mask. It can be found under Filters -> Sharpen -> Smart Sharpen. I don’t use it very often but my settings here are around 80% and 1px radius.
The high pass method is a very popular method, done by a lot of HDR photographers. What you do is to sharpen is:
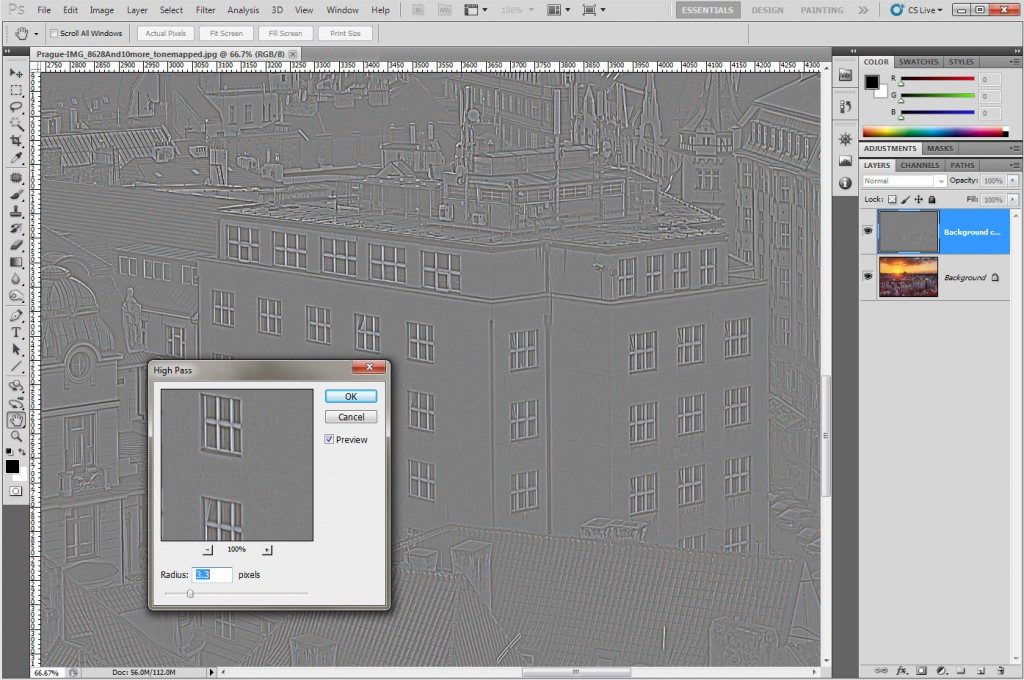 duplicate the layer
- use Filter -> Other -> High pass on this new layer
- play a little with the number of pixels, until you see the detail you want to have i the final photo. Smaller number work well here (2-4px)
- set the layer to soft light, overlay or luminosity (choose one that works best with your photo)
There are also dedicated sharpening filters, notably the Nik Sharpener, but I will cover that in the next part which is all about plugins.
Too much saturation
Not everything in a photo has the same level of saturation, so it can easily happen that something is over-saturated. For me it usually happens with bright red objects. There are two aproaches you can go here. You either:
- mask the object back from one of the original brackets
- create a hue/saturation layer and adjust the sliders until you are satisfied with the color. I suggest you also use the layer mask, so this saturation change only effects the area where you need it.
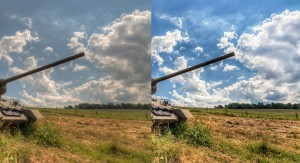 Dark clouds
You can see this in so many HDR photos. You just can’t have dark clouds during a sunny day. It just looks very unrealistic. It’s fine if you have a stormy or a blue hour shots, but never during a sunny day with a blue sky. Just use masking to brighten them back from one of the original shots.
You will also notice, that when you brighten your clouds, your photo will just look better.
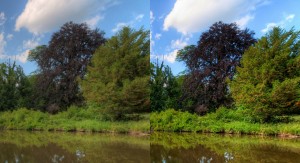 Messy trees and strange greens
Having trees in your photos, especially when there is no wind, is great. But when they crate one big green mess, they no longer looks so great. As the HDR process removes most of the shadows, it tends to flatten trees. So you should remix them with the original shot, to bring back their texture.
Also the green color on trees and other plants can look really strange if you were shooting during a sunny day. Toning down the yellow color using hue/saturation can give the back a more natural look.

