It’s so strange to have such a bright white in a photo. I usually tone it down a lot. But it’s not overexposed, it actually is how it should be. The chapel was nice an white, and it was in a direct sunlight at the time. So it really was shining. It was quite hard even to look at it directly.

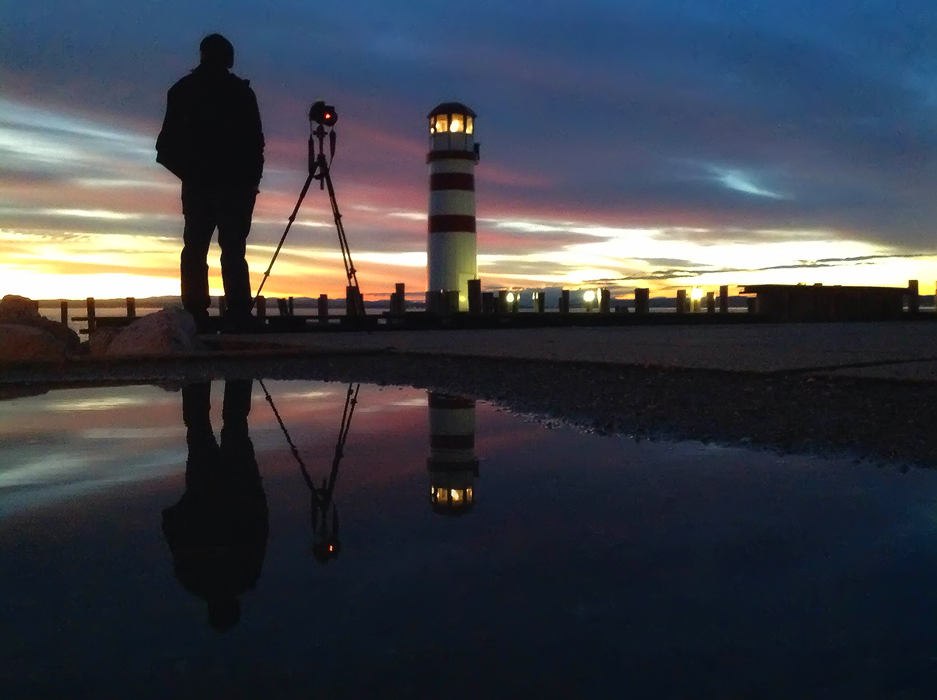
This time I used Photomatix to blend the exposures. I haven’t used it in a long time, and I wanted to try out the new beta version. I have to say I’m quite pleased with the result, and it looks like the new algorithm does a very good job. Will probably use it from time to time again. A lot of photographers have a specific way they edit photos. I don’t. I use manual blending, Oloneo Photoengine, Photomatix or any other software I find interesting. And sometimes I chose the one I use just randomly. It’s a good way not to be stagnant and finding new ways to edit and new looks for your photos. And it’s also quite fun to try things out.
In direct sunlight

Today I was joined for a little evening photo-shooting by Marek Kijevský from Marek Kijevský photography and his lovely wife. To bad they visited Bratislava so late in the year, as it was quite cold and cloudy. I think we got some usable photos, but probably nothing spectacular. Same with the photo I’m sharing today. I really like the colors on the bridge and that you can see few of the stones under the water, but I’m still missing a better blue hour sky here. A dark blue would looks so nice. Still good to know that they changed the bulbs on the bridge. They all look white to the eye, but have a distinct color to the light they provide. It’s really something worth revisiting.

This is a HDR created in Oloneo Photoengine from 7 exposures and the blended with original exposures in Photoshop.
So many colors

Me

I’m not such a big fan of photos I’m on. It’s probably the same by a lot of photographers. We like to be behind the camera, not in front of it. But I really like this shots, even if the quality is horrible (taken with an Ipad, one can’t expect a lot with so little light :)).
meme

A sunset lighthouse

As I mentioned yesterday, I got quite a lot of nice photos of this lighthouse. During the hour I was taking photos there, I got more nice photos than during some of my week long trips.

It was also very fortunate that I got there in Autumn. The place is quite busy in summer and I would never be able to get a photo without people in it. I always like to visit places outside of the busiest times. It usually works quite well, as the sunrise and sunset times are usually not the most popular for tourists and other visitors.

This is a manual blend from 6 shots.
A sunset lighthouse

DSLR controller app

Anyone of you tried this app? It allows you to control the camera using most android devices, via a cable. It looks pretty good and the delay is acceptable. I just cant see myself using it in the field. Maybe for some product style photography. What do you think?

Of course here I played with a recursion, where I placed the tablet in front of the camera. Just having a little fun :)
dslr-recursion

High above the river

I almost posted another lighthouse photo today :) I just like all the photos from that sunset so much. But then I decided for a different one, just so it’s not all the same here. But I will add the lighthouse tomorrow. This is a view of the Danube river from the Aggstein castle in Austria. You just have to wonder how much work it took to build this castle on top of such a high hill. I really would not like to move all the needed stones there :)

This is a manual blend form 5 exposures. Blended in Photoshop.
High above the river

How the week passed quickly. And again we have here another Tuesday and another process post. Today I chosen a very recent photos, as a lot of people liked it. So here goes.

To get this photo
The perfect sunset

I started as always in Lightroom, where I applied lens correction, removed chromatic abberations and applied a little noise reduction.
The-perfect-sunset-lightroom

After that I loaded all the brackets into layers in Photoshop. I used the following layers (numbered from bottom up):
1. 0EV exposure
2. +1EV exposure to brighten the foreground
3. +2EV exposure to brighten the foreground even more
4. +1EV exposure once more, to recover few areas. I’m including here a screenshot of what I had to correct. Blending can make colors look grey, and this has to be corrected.
The-perfect-sunset-process-2

5. -1EV to darken the sky
6. -2EV to darken the brigtest parts of the sunset
7. Color Efex Pro contrast to add more structure and local contrast to the photo
8+9. aded glow (check out my tutorial on this) but I removed it from the darkest parts of the image, as they got too dark
10. brightened the darkest spots on the rocks
11. brightened the whole photo by adding a little bit of exposure

The-perfect-sunset-process

And that was all.
Please continue to the full post to see the original 0EV shot.

Page 4 of 7« First ...3456... Last »
FREE EBOOK!!!
Subscribe to my newsletter and get a free Capturing fireworks ebook. 
Subscribe