Haven’t posted a before/after post in a very long time, so I hope you will like this new one. I chosen one a little more complicated from the ones I took in Dubai, so let’s go :)
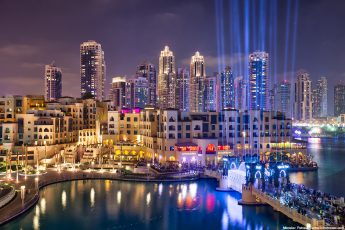
I took this image from the top of Burj Khalifa. This was the final image I had:

I started by taking two exposure series of 4 shots, from -2EV to +1EV. I usually take also the +2EV, but it was just not needed here, and it take a long time anyway. For the two series, once I focused manually onto the city and second time onto the glass wall in front of me. Here are the two 0EV exposures:


As always I started by loading all the shots into Lightroom, where I removed the lens distortion, chrome aberrations, a little noise and corrected the white balance.I also corrected the horizon line.

I then exported all the files into 16-bit Tiffs and created two HDRs with the same settings in Oloneo Photoengine. From there I got this two images:


Then I loaded this two files, together with the original images into Photoshop and did the following edits (layers numbered from bottom up)
1. the HDR from the photos focused on the city
2. HDR created from the photos focused on the glass with a manually painted mask to blend in the top and bottom part, and most of the sky
3+4+5. 0EV focused on the city, with a saturation and brightness modifier, from with I painted in parts of the roads, that had movement in them. The saturation and brightness were needed to adjust the look to fit into the HDR.
6. -2EV focused on the city to darken few bright spots
7. just a merged copy which I needed to be able to use Color Efex pro
8. Color Efex Pro contrast filter, but used a mask to remove it from few bright areas where it overexposed them too much.
9. Color Efex Glamour glow filter. I use this one when the photo has too many sharp details, and I want to soften them a little.
10. Added contrast to the whole image using curves
11. De-saturated magenta colors on a part of the image, where it was too distracting.
12. More contrast to the middle part
13. Played a little with the brightness
14. And once more a little more contrast to the whole image
15. Corrected the overall colors of the image, made it more cooler and greener.
And that’s all I did with this image. To find out more on how I edit, check out the guides and before after categories on this blog, or check out my video tutorial series here:


Leave a Comment