You may have noticed, that in the last year I have started using the Oloneo Photoengine for my photos more and more. It makes a great companion to manual blending, as it can be very easy to create a good starting image from it. You can see my favorite things about it in my Oloneo Photoengine review here.
And since I use it so much, I thought I share few tip for it. For what I do, and why I do it. Maybe some of you will find them interesting, or they will motivate you to try Photoengine out :) So here goes.
1. Use edited tiff files instead of RAWs as input.
You may think that using the RAW files as input is great, for providing as much info to the Photoengine as possible, but a 16bit tiff includes all the dynamic range anyway. And what one also can do, is to use a RAW converter of ones choosing, to correct lens problems even before the HDR editing.
What I do before opening files in Photoengine is that I correct the lens distortion, chromatic aberrations and sometimes noise in Lightroom. I also sometime tone down the highlights in the darkest shot, and brighten the shadow in the lightest shot, to make the blending even better. This is because in every HDR program, the smaller the dynamic range, the usually better, more natural, result one gets.
2. Don’t use all exposures
Again one would think that using more is better, but you are not only trying to get a big dynamic range, but also get a nice photo. Especially if you have taken very bright exposures (+2EV and more) including them in the blend can create an overall very bright image, that just looks awful. You can of course correct this by changing exposure and brightness, but just leaving the bright exposure out can make the thing a lot easier. Also, using less exposures will cause less ghosting, if you had any movement in your shots.
Here u see the same brackets with the same settings, just in the first one I used only 3 exposures, in the second one 4.
3. Try a single exposure as input
One would not believe how much detail and dynamic range can be found in a single photo. I like to use this mostly for my fireworks shots, as those are by definition only single exposures. As Photoengine keeps the sharpness of the photo and makes it so easier to brighten the darks, and recover the bright areas. And all that with a single slider.

4. Take advantage of the contrast sliders
You maybe noticed, there are two contrast sliders in the Oloneo Photoengine. One under High dynamic range tone mapping, the second one under Low dynamic tone. They both work a little differently. The first one works in conjunction with the Auto-contrast, and you just tweak how strong the auto-contrast is. The second one is a straight up contrast adjustment. I you change just one of those, you will not see any difference, but once you also change the strength, you will see it. I suggest trying both out, as I find a combination of both give me usually the best result.
5. Careful about the Detail Strength
It can be really tempting to just add a lot of detail strength to a photo, but I don’t use it at all. If you really feel that you need more detail, try adding it, but just a little. The combination of changing strength and contrast is usually enough, and the photo retains the original sharpness and natural feel.
Here is an example quickly the strength can be too much.

6. Use batch processing when editing panoramas
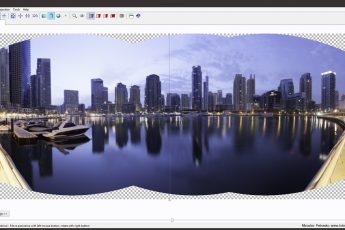
In my tutorial for HDR panoramas, I mentioned that I first create the panorama blends, and then do the HDR editing. But this approach does not work great for bigger panoramas, as no computer is able to work with such huge files without any issues. In those cases I prefer to use an opposite approach. First I export all the files as 16-big tiffs (of course with lens corrections already applied). I do the processing of the first series in Photoengine, and save the settings as a preset. Then I apply the same settings to all other series using the batch processing that is included in Photoengine and use the result for the panorama creation.

7. Try the natural mode
The natural mode is just a single check box, but it can make the result so much better. What it does, is that it tones down all over-saturated areas of the photo, making them more believable. Sometimes is better just to decrease the saturations, but that does not always ends with the same result.
Here you can see what a difference a single click can make, and no, I didn’t add any saturation for effect.
8. Create multiple version to be blended later
Another way to get the most from Oloneo Photoengine, is to created two (or more) different versions of the same photo. For instance, like in the photo from the yesterdays post, I created a darker version, from only 4 exposures and a lighter version, from all 5 exposures. Like this, I had a nice sky in the darker version and a nice foreground in the darker version. All I needed after that was just to blend them together.
These are all the tips for now, but of course there is much more to Oloneo Photoengine, and I will revisit this topic again later :)


Leave a Comment