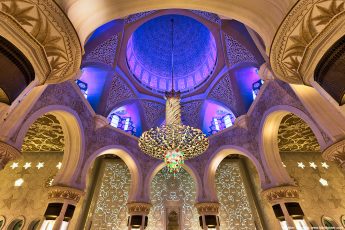
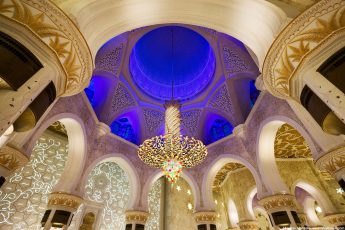
For today I chosen to show you how I edited this photo from the Grand Mosques in Abu Dhabi. This was the main entrance area, so quite busy. That why I chosen this compositin, trying to look more up, so getting a shot over everyone heads. It was also a scene with quite a high dynamic range, so I used 6 exposures, with a -3EV taken for the lights.
So lets look at the final image and the original 0EV exposure.
I started as always in Ligthroom. I corrected the lens distortion, removed the chromatic aberrations and corrected the angle. After that I exported all the files as 16-bit tiff files and loaded them into Oloneo Photoengine.
In Oloneo I just changed the strength and contrast, as I do most of the time. From there I loaded the HDR result and the original exposures into Photoshop, and did the following edits (layers numbered from bottom up):
1. Photoengine result
2.-3EV exposure to darken the lights
3. Curves to brighten the overall image
4. Just a merged layer I needed for Color efex plugin
5. Color efex Detail extractor, to get more detail from the photo. Set to default settings and then 50% opacity.
6. Curve to darken the brightest lists in the photo.
7. Merged layer for noise reuduction
8+9. Added contrast to the whole image
10+11. Desaturated the red color and added more saturation to yellow.
12. Color balance for the shadow areas to remove the red cast.
And that’s all I did with this image. To find out more on how I edit, check out the guides and before after categories on this blog, or check out my video tutorial series here:


Leave a Comment