Some time ago I posted an article with 11 tips for Lightroom, and today, I’m continuing it, with another list of additional 11 tips :)
Remove chromatic aberrations
I would think that this is widely known, but I see so many photos with visible Chromatic aberrations, that I have to mention it. Removing them in Lightroom is so easy, that not doing it, is just lazy. Just going in Develop under Lens Correction and checking the box next to Remove Chromatic Aberration. This will remove them in 95% of cases. In the other cases you also have to go under the Color tab (still under Lens Corrections) and play with the Amount sliders until there are no more visible.
There is only a very slight downside by using this, the overall sharpness will get a tiny bit lower, but this can be easily corrected and compared to Chromatic Aberrations, this is not visible.
Secondary window
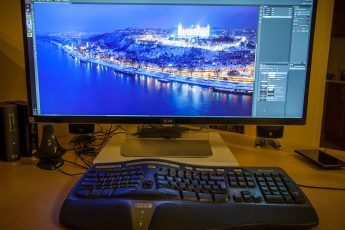
This is one thing I started using more with the new monitor. It’s a great thing if you screen is huge, or you are running a multi screen setup. Just go under Window/Secondary Display/Show (or F11) and a new window will pop up. Here you can choose what you want to see, I prefer the library or the compare view.
Full screen view & Lights out
Lightroom has a lot of tool-bars and sometime you just want to see the photo and nothing else. There are two ways to get a better view of the photo. You can either hit F to switch to a full screen view, or even better turn the light off. This is done by pressing L. Doing so, everything except the photo will get much darker, but you can still use all the tool-bars. Pressing L again will circle through three states Normal/Dimmed/Black background.
Survey view
Survey view should help you with selecting a photo from a set, but I use it for something else. When working with a HDR series, I like to switch the library view into this view, to quickly get rid of all the photos I’m currently not working on, and only see what I need. It’s also great for my Process post screenshots :) You can get to this view by clicking the button in the bottom left, or by pressing N.
Drag&drop to import
Lightroom is not that Drag&Drop friendly, as you just cant drag a photo from it into a second program. But one thing where this works great is by import. Just select what photos you want to import and Drag&Drop them into the Library view (will not work in any other). The import dialog will open with all the files in that folder, but those you dropped will be already selected and you just need to confirm it.
Rotate images
I don’t really understand the placement of the rotate image buttons in Lightroom. But if you were ever searching for them in the Development mode, search no more. There are none. Your only choice there, is to go under Photo menu and choose either Rotate Left or Rotate Right from there. But if you need to rotate more at once and just overall do it quicker, there are rotate buttons in the Library view. There are quite small and visible only if you hover your mouse cursor over a photos. Also, they will rotate all selected photos at once, so you don’t have to use them one by one.
Quickly filter your photos
It’s very easy to quickly filter your photos based on ratings. Just by pressing 0 to 5 on the keyboard you can add a rating to any photos, and then just filter by that. I like to give 5 starts to photos I want to edit, 4 stars to those I already edited and 1 to those I plan to discard. Like this, it’s very easy to find photos to edit, or photos I still have to look at.
To filter, just click on Atribute above the Library and choose the rating you want to see.
Use manual lens correction
The buttons under Lens corrections, like Level, Vertical, Full, are very inviting, but I would stay away from them. The Manual tab gives you much more control about the correction, and you can create a much better result. But still, I would avoid doing very strong corrections here. Lightroom will not resize the photo to include the expanded area and you will loose big parts of the photo. In that cases doing this in Photoshop is a much better option.
Avoid Constrain to Warp
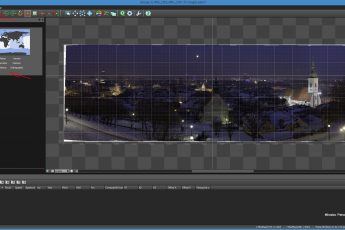
This is for when you are editing HDR series, as with single exposure there is no problem. Constrain to Warp automatically crops image, to avoid any empty space due to the distortion corrections. This is quite often great, as it’s easier than cropping yourself, but there are two big drawbacks. Firstly, Lightroom will crop usually much more that it’s necessary and a lot of stuff that is cropped can easily be filled in using Photoshops Content aware fill. Secondly, this crop is not synced properly between photos. So if you use it on one photo from a HDR series, and then sync, you will often end up with photos of a different size and that is not the best start for any HDR tonemapping. If you just crop manually using the crop tool, the problem is not there.
Change the camera calibration
From time to time you will see, that the color in Lightroom just don’t match what you have seen on your camera screen. The reason is simple. Lightroom automatically applies a Adobe Standard profile to all photos, and that can be different to your cameras profile. To correct this, you need to go under Camera Calibration, and choose the profile you used on your camera. The available profiles vary based on what camera you use and if Lightroom supports it.
Use the same color space
When one edits in more than one program, it’s best if the color space used is the same in all of them. So if you work for instance like I in Lightroom, Photoshop and Oloneo Photoengine, the best results are if all of them use the same setting. I use the ProPhoto RGB for all my edits (except when saved for web) and so I have it set up in all of the software. To have Lightroom export to Photoshop in this color space, go under Edit/Preferences and under the External Editing tab choose the Color Space for Adobe Photoshop.
That’s all for this list and feel free to ask if have any questions.


Leave a Comment