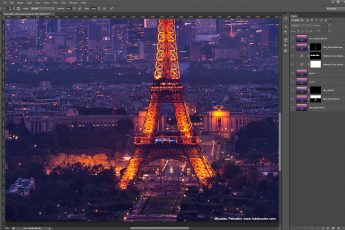
One of the more common problems with landscape photos, is color banding. It’s a very noticeable problem, that can give a photo a very ugly look. But there is actually a quite simple solution to this, to remove it, or at least make it less visible.
What is Color banding?
Each time you have a smooth transition between two colors in a scene, mostly in the blue shades of a sky, it can happen that in a photo of it, you will get these steps where you can see where one color changes into another, instead of a smooth transition.
This is due to a limited number of colors one can save in a photo file. Like this, the nearest available color is used and abrupt changes between shades of the same color are created. So the more colors, the less likely this will happen. If you ever edited a photo in 16bit mode, and then tried to save it as a 8bit file to web, you would find this problem rather often.
Here you have a typical scene for color bending. Even in this corrected version, you still can see a little of it due to the compression.

How to avoid color banding?
- Use bigger color space – The more colors available, the less color banding. This is of course not possible if you share to web, as browsers don’t work correctly with 16-bit files.
- Use smaller compression – The more a photo is compressed, the less colors it uses, the more visible the bending is. Of course if you upload to a service that does it’s own compression (like Facebook), you have very little power over this.
- Avoid noise reduction – Noise reduction is similar to lower quality, where it averages the colors so more banding is introduced.
- Avoid edits – The more filters or adjustments you put on a photo, the more you run into a chance to create more banding. Especially edits that add contrast tend to introduce more color banding.
- Avoid removing lens distortion – Especially in the sky, it can create unwanted color banding.
- Merge first – This is one Photoshop specific. When you put your adjustments into separate layers and then look at a photo, it may look like there is a huge amount of color banding. But this could be misleading. Before you try and correct it, try merging the layers into one (or create new layer from the merge). You will quickly see, that once all the adjustments are applied, the banding becomes much less dominant, or it disappears completely.
How to correct color banding?
So what to do once the banding is there? The solution is to add more variation to the color transition, so forcing the compress algorithm to use more colors and so creating a nicer transition. To do this, one has to add a little noise to the effected areas.

You can use the basic noise filter in Photoshop. Just go under Filter/Noise/Add noise. The settings you need are not always the same, as it depends a lot on the photo, but mine are usually 0.3%, Gaussian and Monochromatic. You can experiment with the strength, to see if you need more or less. I would suggest adding the noise to a new layer, a merged copy of the whole image, and then just masking in the parts where you need it.
Here is an example of a correction like this, before and after adding noise. Please note that even the screen-shots are influenced by image compression so the effect is not 100% as seen here.
If you have any questions or a great different solution how to remove color banding, feel free to share in the comments.


Leave a Comment