For this weeks process post, I will show you how I edited this sunset photo of the lighthouse on the Neusidlersee in Austria. So let’s get started.
As you can see form the comparison to the original photo, this was a perfect place to use HDR. I was shooting directly into the sunset, so the sky was quite bright, and the lighthouse was in the shadow.
I took 6 exposures in total here, but while reviewing them in Photoshop, I decided not to use the brightest one. The reason for this was, that when you use Oloneo Photoengine and you include a very bright (or very dark) exposure, it will make the result much brighter than you need (or darker) and further editing is harder. So by leaving that exposure out, the result is much better, and less corrections are needed. You can easily experiment with Photoengine to see the difference.
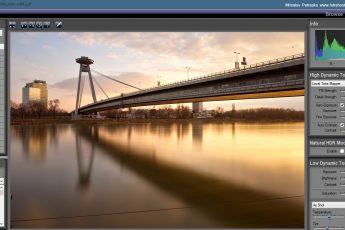
So I first corrected chromatic aberrations and lens distortions in Lightroom, from where I exported all the files as 16-bit tiff files. Then I loaded them into Oloneo Photoengine. There I tweaked the strength, contrast and fine exposure, to get a pleasing result. From there I continued in Photoshop with the following edits:
1. Oloneo Photoengine result
2. Just a copy of the 1st layer, on which corrected the rocks in the foreground. As there was a little camera movement while I took this shot, it created an ugly ghosting around them, and I had to correct that.
3. Cleaned few dust spots in the photo
4. Used the +1EV exposure, to brighten the lighthouse.
5. A little noise reduction
6. Color balance to make the shadows a little warmer.
7. Color efex Tonal contrast to get more detail into the clouds
And that’s all I did with this image. To find out more on how I edit, check out the guides and before after categories on this blog, or check out my video tutorial series here:


hi miroslav why do not you transferred the picture in picture engine passing
by File> extras> Photo engine?. and I also wanted to tell you that the new look of your blog is very well thank you for everything
The reason is simple. And actually happened also with this image :) As I don’t use all the exposures all the time, I sometimes try different number of exposures in Photoengine. If I just opened them directly, without export, I would have to return back to Lightroom, and let it export them again everytime I want to try a different number. Like this, I just change whats loaded into Photoengine.
And thank you. Glad you like the new look :)
I have to agree, the new look is great!! Just had a question. What is the difference between the Detail Extractor plugin and the Tonal Contrast plugin?? When would your use one and not the other?
Thank you Don. And the difference is simple. Detail extractor adds a lot of structure and detail, but removes contrast. Tonal contrast on the other hand adds a lot of local contrast, without pulling much more detail from the photo. So for instance, like here, the clouds had the detail already there, but all the detail was of a similar brightness, so not so visible. Tonal contrast helped there. If on the other hand I would like to have more detail in the foreground rocks, I would had to use Detail extractor, as Tonal contrast would just make them darker.