Some landscape photographers (it’s not really an issue if you take photos of people :)) don’t mind people in their photos, some do. And since I’m in the second group, today I will show you few ways how to get no people in your photos.
You may wonder why I don’t want people in my photos, and there are two main reasons. First is that I find them distracting, especially if I have a composition in mind and my goals is to show a certain landmark or scenery. The second reason is more pragmatical. Having people in a photo can prevent me from using the photo commercially, as in a lot of cases, I would need a permission from the person if its identifiable. And bluing out faces is something I really don’t want to do.
So here are few ways how you can avoid people in your shots.

1. Get up early, really early
Even the most popular spots tend to be empty of people before sunrise. It does mean that you will get no sleep, and have to go out when it’s still dark, but the feeling having a city just for yourself is wonderful. And the photos are people free without any extra editing.
From my travels, the only spot until now I never really seen completely empty, was the Charles bridge in Prague. Even between 4 and 5am, when almost everything is empty, the bridge just isn’t (that is, if the weather is horrible, there is a chance that it will be :)).
The first photo here from the Prague metro, was taken at 6am on Sunday, there was absolutely no one around at that time.
2. Take a long exposure
This can work during the day, but works much better and easier at night. The trick is to just use a long enough exposure (at least 30s) to blur all the people. As the camera captures light, everything that does not emit light, can be captured only if it reflects enough lights into the camera. So if the people move enough, they are not long enough on one spot to be capture completely, or when it’s dark enough, at all.
If you want to try this during the day, you will of course need a strong enough ND filter, or you will not be able to get a long enough exposure. Also, if the scene is just to busy, you will end with a big blurry mess instead of people. This may work fine for you sometime, but may not.
3. Take multiple exposures
The last way you can use, is to take enough photos (with the same settings) so you every spot in the photos people free at least in one of them. This can be 2 photos, but it can happen that even 100 is not enough. It really depends on the situation. If all the people move, you may get lucky, and with just few shots have enough. If people stand around, it can be even impossible.
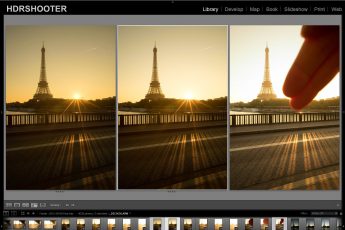
This is sometimes easier in HDR, as you take multiple shots either way, so you have more photos to work with from the start.
Once you have the photos, you can either:
 Try blending them manually
Just load them all into Photoshop layers, add a black layer mask to all but the bottom one, and then using a white brush, paint in the needed parts from the top layers. So for every person in the bottom photo, find a layers where that spot is empty in one of the other photos, and paint it white on the layer mas. Can take quite a while, but you get a nice quality results. In this photo from the Tower bridge in London, I used two separate exposures which I blended manually, to have no people visible.
Let Photoshop average the photos
One of the hidden features of Photoshop, is the ability to perform mathematical operations on a group of images. In this case, if one uses median, on enough photos, it may result in a completely people free photo. Again, this is not guaranties, and if there is just too much movement, it will not work. Be warned though, this can be very computer intensive if you try to use it on many photos at once. To do this, follow these steps:
– load all the photos into layers (if you don’t know how, check out this guide)
– select them all (click first, hold shift, click last)
– choose Layers/Smart Objects/Convert to smart object, all the selected layers will be grouped into one smart layer
– choose Layers/Smart Objects/Stack Mode/Median to choose the median mode
Now, you will see if it worked or not.

4. Use Photoshop retouching tools
The last option and the one that can be the most labor intensive is to just use Photoshop tools. The content aware fill can help in most cases (just select what you need removes, and hit Shift+Backspace and choose content aware) but sometimes it’s just not enough. What you need to do in those cases is:
– use the clone stamp tool. Don’t forget you can use the tool on a new empty layers, so you don’t affect the photo directly.
– paste over other parts of the photo, or parts from a second photo. My preferred process is to select a bigger part than I need, copy it to a new layer, move it to the required place, and then use the mask on that layer, to soften the edges, so it blends nicely into the background.
– remember to take advantages of symmetry. I you have symmetry in your photo, you can copy part of one side, flip it, and the use it on the other side. In this second photo of the Prague metro, I mirrored the left side, to remove the few visible people on the right.
And that’s all for this guide, in case you have any questions, feel free to ask in the comments.


Leave a Comment