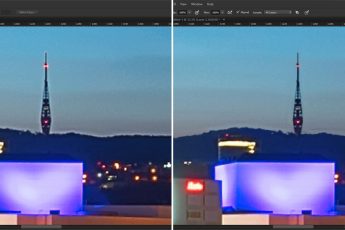
You have probably already heard about the new program from Macphun and Trey Ratcliff. Even I already posted about it. And today, I will share with you my thoughts about this new pieced of software. You can get Aurora from the StuckInCustoms store here or from Macphun here.
First of all, Aurora HDR is only available for Mac OS currently. For me that’s a bit of a complication, as I use Windows on all my devices. But so I can take a look at this software, I borrowed a Macbook Pro and tried it on that. It was not the newest model, so it was a bit slower when confronted with 36Mpix files, but it was still usable. But let’s get back to Aurora.
When looking at Aurora, in comparison to other HDR tonemapping software I use or used, I will define it as a middle ground between Photomatix and Photoengine, with a part of Lightroom sprinkled in. What I mean with this, that it’s not as straightforward as Photoengie, but does not overwhelm you with tonemapping options as Photomatix. And on top, it offers many edits that are very familiar from Lightroom.

If you look at Aurora more, you will quite quickly see what the goal is here. It’s to take the most used edits you perform on HDR photos, and instead of having them in multiple applications, they tried to put them all into one program. This may work for your work-flow, or may not. For instance if you have a whole library in Lightroom, it quite easier just to do a mass edits there, before you even start with HDR processing. On other hand, if you are just starting with HDR, and still looking for your work-flow, this may work just fine for you.
In my personal workflow, the tonemapping software is just one step, before I go into Photoshop. I prefer the more gradual control I can get there, to a more limited set that is usually available in tonemapping software. The most important thing for me there, is the quality of the tonemapped image. In this Aurora provide very good results. You can see this easily, just by loading the brackets into the software, and moving the tonemapping slider. If you see a strong HDR effect, light inversion and bright outlines, the algorithm is not the best.
Features
As I mentioned, Aurora offers a wide variety of possible edits. You get quite a long list, with Tonemapping, Tone, Structure, HDR Denoise, Image Radiance, Color, Details, Glow, Top & Bottom Lighting, Tone Curve, Color Filter, Color Toning and Vignette. Some are new, some will be familiar to you if you used other software. But again, as I mentioned, just from the list you can see what everything is put together in one place in Aurora.
You can of course skip any editing and just use the provided presets, but than you will miss all the fun of creating your own style.
Let’s look at few. I quite like the default tone-mapping that was applied to the images I tried. For most images I had no need to even tweak the Tonemapping, just the Tone. Here I actually had to tone down the Smart Tone quite a bit, as the default gives a too strong HDR look, compared to what I like. But going down into negative values, corrected this rather quickly. Also, the default made every single image too bright, so that had to be also corrected under tone. Additionaly, same as other tone-maping software, there is quite a lack of contrast in the results, and that has to be added. But what you get here, is already quite a nice tone-mapping result, and a good start to further edits.
I really liked that under Tone, you can find separate sliders for highlights, midtones, shadows, black and whites. I especially like the midtones slider, which is missing from Lightroom. Having these all right here, makes for much better control about the result. Next you have structure. It looks like a combination of clarity from Lightrom, with Detail extractor and Tonal contrast form Color Efex. It’s an interesting effect, which needs to be used very gently, as it’s very easy to just oversature your photo with detail.
Another very nice implementation is of the gradient filters. here its called Top & Bottom Lighting, and they added two separate exposures sliders, which makes it very easy to to balance the brightness, if your image is split along a horizon. Other edits you can do, is to de-noise your image or add sharpness, add radiance or glow. It really tries to provide a one software solution to most situations with HDR. Like this it even can be used when you goal is not really a HDR picture, as Aurora allows you just to add a single exposure as input.
Aurora also supports layers. This work quite similar to adjustment layers in Photoshop. So what you do is, you create a layer, make adjustments on it and then tweak the mask and opacity to where and how much the effect is used. This work very nice, if you have images where different parts need different adjustments. Of course if you need a more pixel based layers, if you do retouching and similar, Phothoshop is a must.
Overall
Overall I’m quite impressed with what all Aurora provides and what results it can bring. I still need more time to experiment more, and get used to it, but that will come after a Windows version is released. But for you, if you are using a MacOS computer, you should give it a try.
You can find a trial version on the aurorahdr.com website.
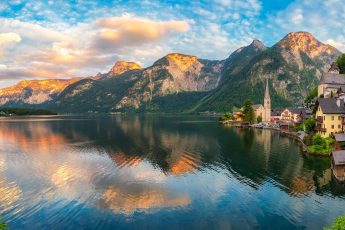
And to end this review, here you have 4 photos edited only in Aurora (with only some dust spots removed in Photoshop). I can imagine in all doing few more tweaks in Photoshop, or even more directly in Aurora, but in all cases, this is a very good result.


Thanks for the great in-depth review of Aurora HDR Pro!
Nice shots, by the way:)
If there are any questions or concerns regarding Aurora – you are more than welcome to contact us 24/7 via support@aurorahdr.com.
Thank you Alex.. and the questions will come when there is a Windows versions ;)