Luminosity selections and masks
Over the last few weeks, I have been posting about Luminosity selections and masks. Today I will expand on the topic again, but going into how to blend images using luminosity selections. If you understood the previous articles on this, you should be able to understand how it works really quickly and be able to use it right away.
But before I start, I will presume that you have checked out the previous articles on luminosity selections and are familiar with what they are and how to create them. I will not be going into the things I already explained there.
- Understanding masks in Photoshop
- Understanding luminosity selections and masks
- Editing photos using luminosity selections
Blending photos using Luminosity selections
The process here is almost exactly the same as when you are editing photos using luminosity selections. So as in the last article let’s take an example to show you how it’s done. I will be blending these three exposures here.
We will start again with a photo, for which we created the Bright 1 to 4 selections and Dark 1 to 4 selections. Additionally to that, I will put the brighter exposure and darker exposure on separate layers, both hidden (they have to be hidden when you create the luminosity selections, or else they will be made from them not the base image).
So what’s our goal here? If you look at the image, you will see some areas that are too bright and some that are too dark. The goal here is to brighten the dark areas by using the overexposed photo and darken the bright areas using the underexposed photo. You could look at it as if you cut up the photo into puzzle pieces and then put together a new one using all the best pieces from all the exposures. Let’s start.
Blending in the dark areas
- Make the brighter layer visible, and add a black mask to it (hold down Alt and click on the add mask button). This will again make the layer invisible.
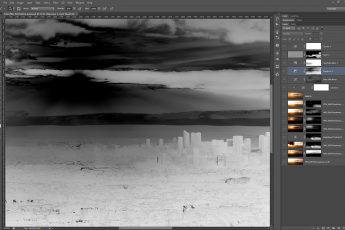
- Go into the Channels window and with Ctrl+click select one of the Dark selections. The best process is to select each one going from 1 up until you see the selections that best matches the area you want to blend. Just look at the marching ants that show the selection. Usually having a selection that’s a bit bigger than what you want to select here, works the best. For this photo, I will choose the Dark 3 selection
- Go back into the layers window. Click on the mask next to the brighter layer to select it. Choose the brush tool, white color, 0% hardness, 50% opacity. Hide the selection by pressing Ctrl+H. It is still there just not visible.
- Now that all is prepared, you can start painting into the mask. Everywhere you paint, you are painting with the brighter layer into the base layer. To get more brightness in, paint over the same spot multiple times.
- Continue doing this until all the areas are brightened as much as you want them to be. If you feel you overdone it, just switch to a black color and paint over the same spot to remove the blend.
Blending in the bright areas
- Fist deselect the selection you already have, with Ctrl+D. You don’t see it as it’s hidden, but it’s there. Same as before, make the darker layer visible and add a black mask to it.
- Go into the Channels window, and choose one of the selections, based on which one fits the photo the best. Again, go through all the bright selection starting from 1, and choose the one that selects the area you need to edit the best. Again, bo with a bit bigger selection to what you need. That results in a better blend. Here I have chosen the Bright 2 one.
- Return to the layers, select the mask on the darker layer, and start painting with the white brush on it, until you recover all the bright areas.
Blended photo
And we end up with a photo that has the dark areas brightened and the bright areas darkened. Of course, this is not the finished photo. There are still thing one would have to correct, mostly the contrast. As I mentioned with the other edits, contrast is lost anytime you work with bright and dark areas of a photo.
This explains the basics of blending. If you need to blend more exposures, you do the exact same thing. You choose the base you want to work with and blend other exposures into it as I showed here. The only difference is, that you have to recreate your selections. As they are created from the base layer, once you blended in something into the base layer, they will no longer be as accurate as you need them to be.
So if I had a photo taken at 0EV, and I blend in a -1EV exposures to darken the highlights, I would have to create new selections if I wanted to blend in the -2EV photo to darken them even more. This is where Photoshop extensions like Raya pro and TK actions make the whole process much easier.
This was supposed to be the last article on Luminosity selections, but I will do one more, on the concept of matching exposures. Stay tuned :)


Leave a Comment