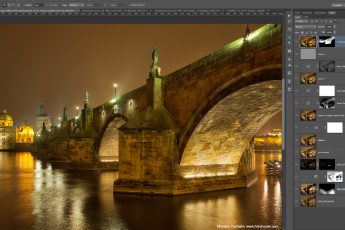
If you looked at my photos, you would notice that I use Photoengine quite a lot. Over the last few years, it became one of the main tools that I use. And each time I post a process post, I also mention that I used Photoengine to blend the photos and I only tweaked few settings. To make this a little more elaborate, today I will go more into this, and show you my exact process of how I work with Photoengine.
Always before I get into Photoengine, I correct few things in Lightroom. Lens distortions and chromatic aberrations are the ones I correct the most, but from time to time I also correct the white balance. One can of course do this also in Photoengine, but doing that will make it harder to blend in parts of the original exposures back into the photo.
Thats why I always use 16-bit tiff files as Photoengine input, as I want all these tweaks already be included. Then I select what files to use. If a series is exposed properly in the middle, the Photoengine result will nicely exposed from the start. But if you include some very bright, or very dark exposures, the base will be either too bright or too dark, and you then have to spend longer time tweaking the settings to get a good result. Much easier to just leave those exposures out, and correct possible over or underexposed areas later.
If there was wind while I took the exposures, I turn on Auto Align. I don’t use the ghost removal as it can result in strange artifacts around the photo, and it makes it just harder to correct later, as it just not even enough.
Once in the HDR tonemaping, I start with changing the strength, usually to something around 40-60. Almost never more. You will see, that when you move the slider, first the shadows will get brighter, and after a certain point, the bright areas will become darker. I would stay lower from this point, and just leave the bright areas as they are. Making them darker, will just make the photo more unrealistic, and creates ugly borders around the dark areas.
You will notice that this will also remove all of the contrast from the photo. So the second thing I change, is the first contrast slider. It’s hard to say exactly how much, but if I see that I’m gong very high, and still don’t have enough contrast, I add a little Low dynamic tone contrast. That one usually adds more contrast more quickly.
Sometimes this will make the photo look a little dark, and that can be easily corrected with fine exposure. The last step I do is to check what effect the Natural HDR mode has, if I like the colors more with it on or off. Sometimes I even save both versions, and then blend them together in Photoshop. This is when I like some areas from one with it on, and some areas from one with it off.
And that’s all. From here I save the file as a 16-bit tiff, and continue in Photoshop. Feel free to ask any questions about this in the comments.


Was going to check out the program, but just saw that it’s not available for Mac at the moment. Nice to see another workflow from a fellow photographer. Thanks for sharing.
It’s a shame that there is no mac version, as this is a great piece of software, and more people should give it a try. Currently it’s possible only through an emulator on a mac.
super thank you miroslav tutorial I made a lot of progress by following your blog
Glad I could help :)
Thank you Miroslav for your generous advice. I have been checking out your site a while now and have learned a lot, considering having scratched the surface of your blog. There is really a WEALTH of info here. You also have great taste: your HDR images are realistic rather than hyperreal. Every time I visit your site, I get inspired and re-energized all over again. Thank you!!!
I hope there is :) I’ve been posting for over 5 years now :) I’m glad you find it useful.