I forgot to post a process post last week, but here is a new one for today. This time it’s the Pannonhalma monastery crypt in Hungaria.

So to get to this result
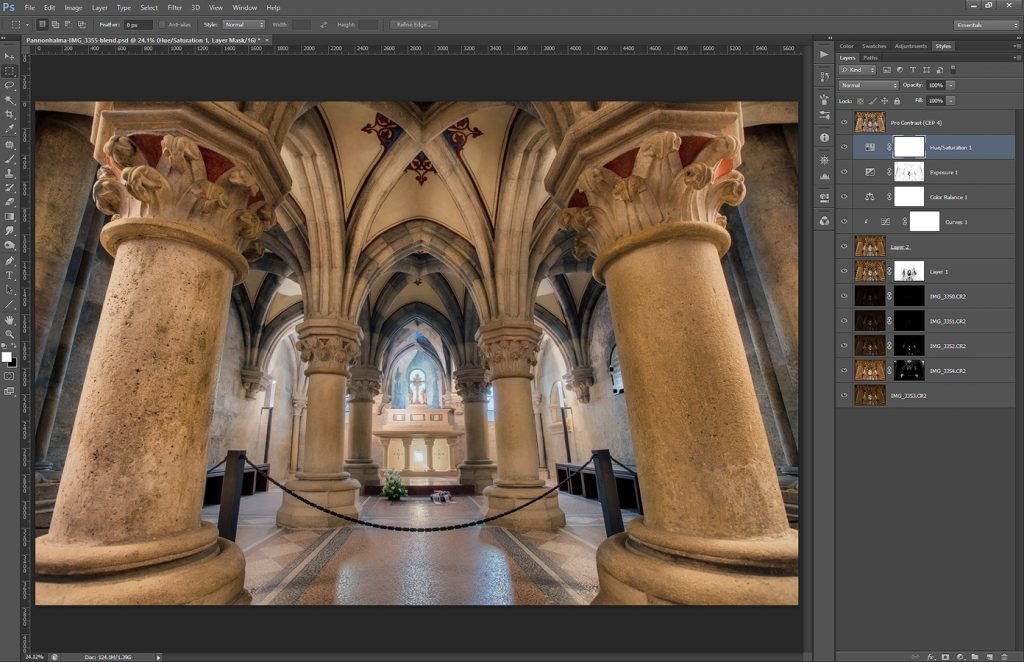
Pannonhalma Monastery crypt

I took 6 exposures, just to be sure that the light are not overexposed. In the end I used files form -3 EV to +1 EV and had no need form the +2 exposure.

So in photoshop I did the following (layers numbered form bottom going up)

1. -1EV exposure
2. 0EV exposure to brighten few areas
3. -2EV exposure to darkend the ligts
4. -3EV exposure to darken the lights even more
5. -4EV exposure, created in Lightroom from -3EV, to darken few lights even more
6. Color Efex Pro contrast to brighten image and add more contrast
7+8. Blured layer and a curves layer to add more glow
9. Color balance to remove the yellow color cast
10. Added 0.7 exposure to brighten the image more
11. Added a little saturaton (around +15)
12. Pro contrast once more, there was still a little colorcast

You will also notice that I corrected the perspective using the Perspective Crop tool in Photoshop

Pannonhalma-Monastery-crypt-process

Continue to the full post to see the original -1EV photo, as that’s the one I started with.

And again something for those who don’t have a good camera, but still want to experiment with HDR. You can download the original raw files for this photo from here https://www.dropbox.com/sh/xeaj3in493k5kmu/FysTgnR8XW and try to edit them. Feel free to share you results on my Facebook page.

No contest this time, this time it’s just for the fun of post-processing.

You can also find brackets I shared last time in the folder “other” under the same link

Feel free to share you results on your facebook/flickr/blog, but please don’t forget to give me credit for the photo and link back here. And of course, please don’t use this photo for any commercial purpose (I’m still the author )

Have fun
Paris-brackets

And it’s Monday again, so a new process post for you. Today it’s a little more complicated shots, as I used different techniques here.

So here goes. To take this shot:
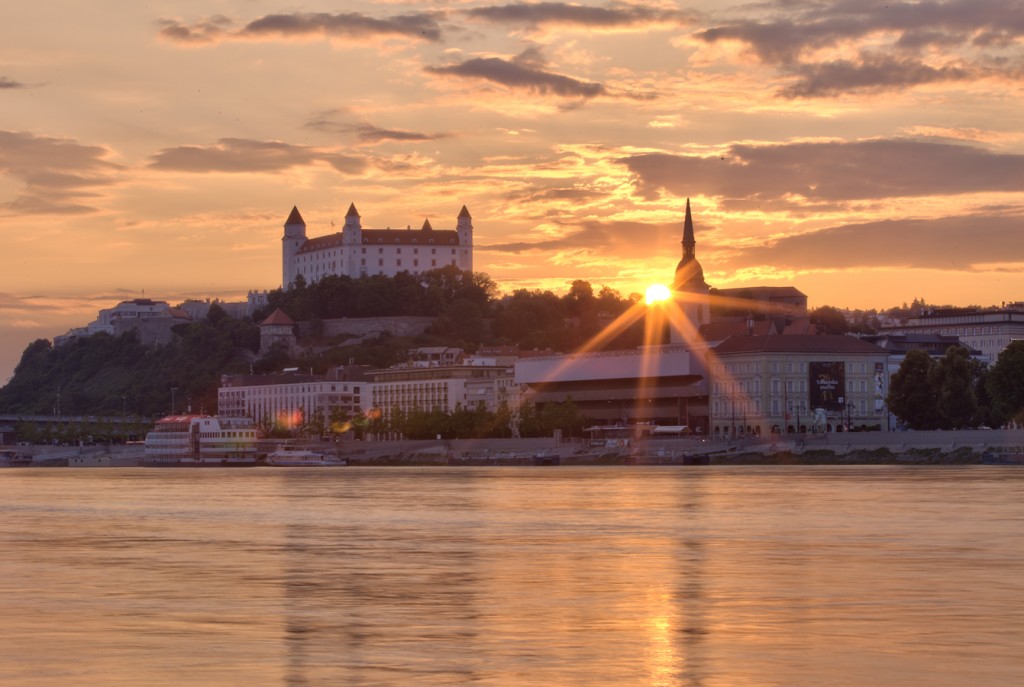
The setting sun in Bratislava

I did the following. I took two series of 6 exposures. One normal, and one with my finger in front of the lens, to block the sun. At first I combined the original photos in Oloneo Photo engine to get this:
Sun-oloneo

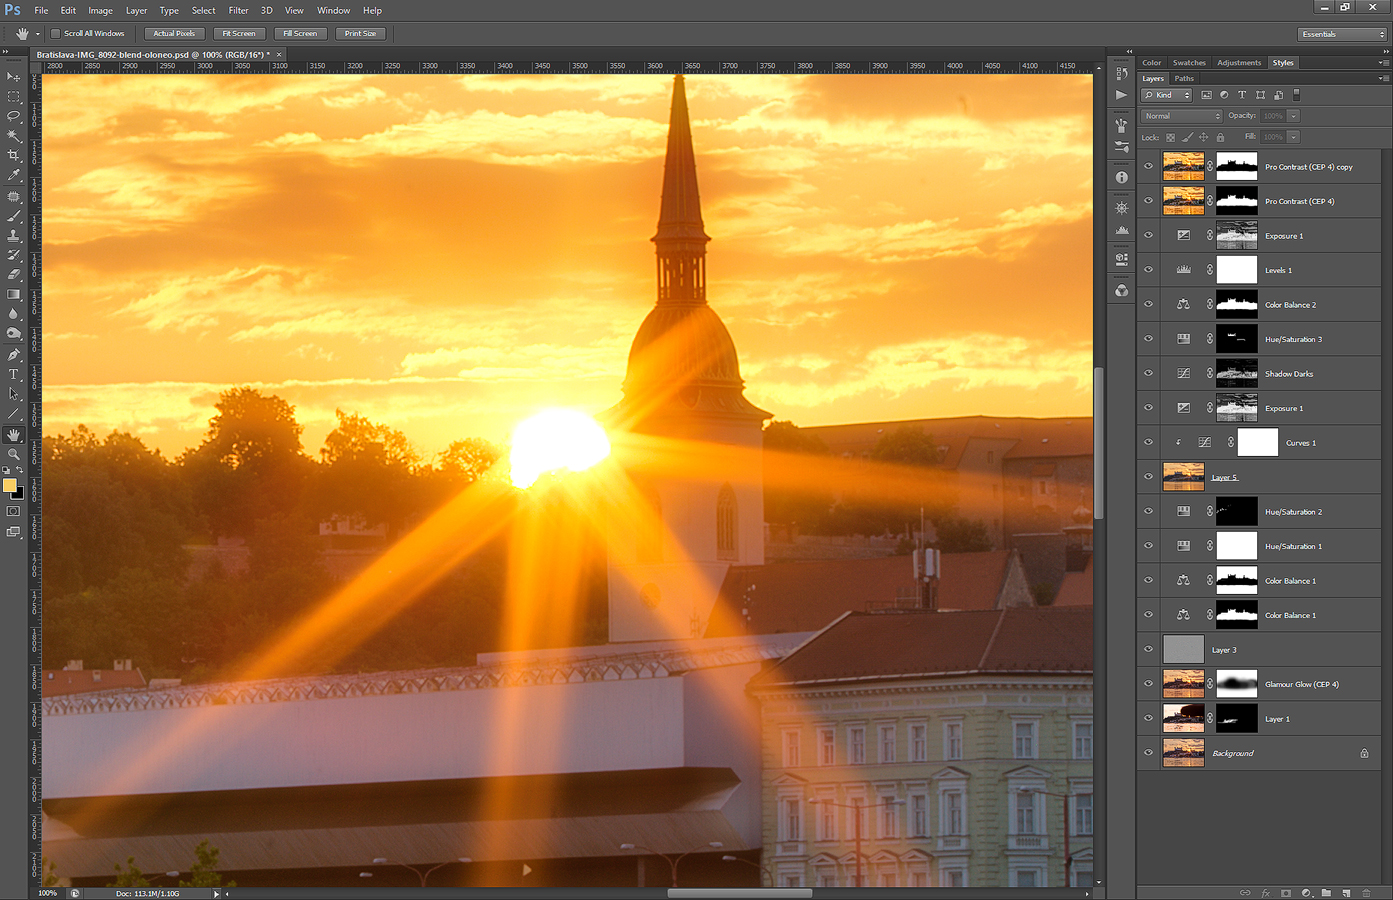
after that I used Photoshop to blend it with original shots, and to correct the colors. So the layers I used, from bottom up, were:

1. Oloneo blended image
2. +1EV exposure from a second series, where I held my finger in front of the sun, to remove flares
3. Color efex glamour glow, used only on the clouds
4. high pass to add more details
5+6. separate color balance for the sky and the castle to remove the purple tint
7. added saturation to yellows
8. corrected colors on the trees newar the castle
9+10. added glow using a bluerd layer
11+12. brightened the dark areas to even the image
13. removed color cast from the whites on the castle
14. more color balance on the buidings, they were still too purple
15. added more blacks to the image
16. more brightening to the dark areas
17+18. Color efex Pro contrast, used more on the building and only a little on the sky
Sun-process

Continue to the full post, to see the original 0EV from both series.

Tomorrow I will be back home from Prague, but until then, I got for you another process post for today. This time it’s a photo from a rainy day in Paris. So to get to this final result:
Returning to La defense

I did the following (layers numbered from bottom up)
1. 0EV exposure used as base
2+3. -1EV and -2EV exposure to darken the middle area
4. +1EV exposure to brighten the buildings
5. -1EV exposure once more, just for the sky (I didn’t like the result of blending)
6. retouched out the crane in the corner
7. used the +2EV to brighten few more dark spots
8+9. blurred layer and curves that brighten it to add glow to the photo
10. exposure to brighten the dark areas further
12. added a little saturation
13. pushed the color balance more towards green

LaDefense-process

Continue to the full post to see the original 0EV photo

This post is for those who missed my two tutorial videos. They are not about how to edit photos, but about how to take them.

The first one is how you can use Magic lantern firmware on your Canon camera to get the brackets you need.

The second video describes different way you can take multiple exposures.

I hope you will find them booth useful :)

FREE EBOOK!!!
Subscribe to my newsletter and get a free Capturing fireworks ebook. 
Subscribe