contest-side

Last day to join the contest

Tomorrow is the last day you can join my photography contest sponsored by OLONEO. After that the voting will start. The raffle will continue for one more week, so don’t forget to join. To find all the info about the contest, please go here: https://www.hdrshooter.com/2013/11/18/photo-contest-sponsored-by-oloneo/

10 basic Photoshop shortcuts to make your work easier

While editing photos, I use Photoshop all the time. And making it easier and faster, one has to use as many shortcuts and possible. So I thought that some of you, who are just beginners, would find useful a short list of 10 shortcuts, I think one should know and use in Photoshop. There are of course many more, but these are the ones I think everyone should start with.

  1. Space – pan image. This is the one you should get used to first. When you hold the space bar, your cursor changes into a hand and you can move around the photo. This make all edits so much faster than hawing to use the tool or scroll bars.
  2. Ctrl + Space – zoom in/zoom out. This is another one that makes all your work so much faster. Instead of having to choose the zoom tool, just use this shortcuts instead. While holding these two buttons, press your left mouse button and drag up/down to zoom in/out. This is the fastest way to zoom around the photo.
  3. F – full screen. Make you work easier, and hide all you don’t need. It cycles through three modes, so choose the one you like the most
  4. D – reset colors. This resets the foreground color to black and background to white. This is very useful when you work with masks, and you need to quickly reset you chosen colors.
  5. X – switch colors. Switches the foreground and background color selection. Great for when you are painting a mask, and you need to switch a lot between white and black.
  6. Ctrl – move. Move tool is very important in Photoshop. And so you don’t have to always select it, there is a quick access to it. In almost all other tools, when you hold down Ctrl, you will be temporarily switched to Move. When you release the key, you will continue with the tool you had.
  7. Ctrl + Shift + V – paste in place. Everybody knows what Ctrl + V does, and this is and advanced version of that. It will paste your selection on the same place from where you took it. For instance if you copy your watermark from one file to another, it will appear on the same place as it was.
  8. Ctrl + Alt + Shift + E – merge visible. While you are editing your files, quite a lot of steps need to be performed on a merged copy of all the layers (like high pass sharpening). This shortcut makes creating such a new layer much faster, even if you have to press 4 keys at once
  9. Ctrl + Alt + Z – step backward. Ctrl – Z is the usual keyboard shortcut for step back, but if you want to go more than one step back in Photoshop, you have to use this one
  10. Shift + Backspace – fill. Always when you need to fill a layer, or a mask with black, white, 50% grey, or you need to use content aware fill on the selected area, just press this and select what fill you need.

A cold evenings light

The weather looked so promising today, so I went out shooting with Pedro Kin from www.pedrokin.com. And we got a nice sunset, with interesting clouds, just the color wasn’t there. I just could not get the look I hoped fore, even after quite a long edit. So I have to be satisfied with the photo how it is. It has to be better next time :)
A cold evenings light

topaz

Cyber Monday and Black Friday sales

Black Friday and Cyber Monday are just few days away, and as it is the best time to buy new software, I thought I share with you some interesting deals I came across. So here is the first one. For the next few days Topaz Labs has discounted the whole Topaz plugins Collection almost by 50%. It’s really worth checking out. The amount of all the available effects here is just stunning. You can find them all on the Topaz Labs site.

5000 likes

My fan page on Facebook just reached 5000 likes. Thank you very much everyone who follows me there and I hope that over time there will be many more of you :)
facebooklikes

Color therapy

Some time ago I was thinking, how would my photos looks without structure. I mean, when you do a B&W photo, you keep the structure, but remove the colors. So what if I removed the structure and kept the colors. I just wondered what I would get. And with a little playing around in Photoshop, I got this little series of very colorful minimalist images. It’s funny that even without any subject in them, I still get a similar feeling from them, as I did from the photos they were created from. The sunset, sky, grass colors are so unmistakable, that even on their own you feel like you see the objects :)

Podersdorf-IMG_9914-blur
Podersdorf-IMG_0012-blur
Budapest-IMG_8176-blur
Podersdorf-IMG_9956-blur

What do you think?

Cold evening by Danube

For today I chosen for you a photo I took two weeks ago by the SNP bridge in Bratislava. The water level at this time of the year is quite low, which really allows one to get down under the bridge, so getting also all these rocks into the shot. The light was not that great, but that is normal for this time of year. Hopefully it gets a little better, as I would so like to go out and get some new photos.

This is a HDR created in Oloneo Photoengine and then blended with original exposures in Photoshop.
Cold evening by Danube

Photography contest sponsored by Oloneo

The first week of my photography contest has passed and until now 90 entries have been posted overall. You still have one week to enter and have a chance to win a copy of Oloneo Photoengine. Just head over to the contest announcement here https://www.hdrshooter.com/2013/11/18/photo-contest-sponsored-by-oloneo/ and grab the source images.

And the raffle for another copy is also still running, so feel free to join there also, to have a bigger chance to win :)

The giveaway is over, the winners have been notified

At the party

I know I promised to get back to landscape shots today, but with the quantity of photos I still have to process from this weekend (three parties until the morning worth of photos :)), I just had no time for HDR. But instead, I have for you one of the photos I took during the party. And as I really like portraits, its a portrait.

This is a single image edited in Lighroom and Photoshop. I bounced the flash off the ceiling to get a nice light here.

Big thanks to Dominika for letting me share a photo of her :)
At the party

I’m just crazy busy this weekend, as I’m taking photos at the Bratislava Sensual Dance Festival (you can see them on my personal FB profile), so I had absolutely no time to edit photos. So for today I chosen another photo of the lovely Alexandra, which I edited few weeks ago. Will try to get back to the landscape shots on Monday :)

This is a single exposure edited in Photoshop and Lightroom.
Beauty in the park

Another week has passed, another process post is here. For today I chosen a little older photo, one from start of this year (as you can easily see by the snow in it :)). As I no longer have the PSD file of it (I started keeping them only few weeks after I edited this one) I will go more into the overall steps I took to get it. So here goes.

First of all the finished photo itself. You can see, it’s quite a huge panorama, with dimensions of 19649 x 5237 which makes this photo around 120Mpix.
Big one
You can view a zoomable version of this panorama in the Panorama section on this blog, or directly here.

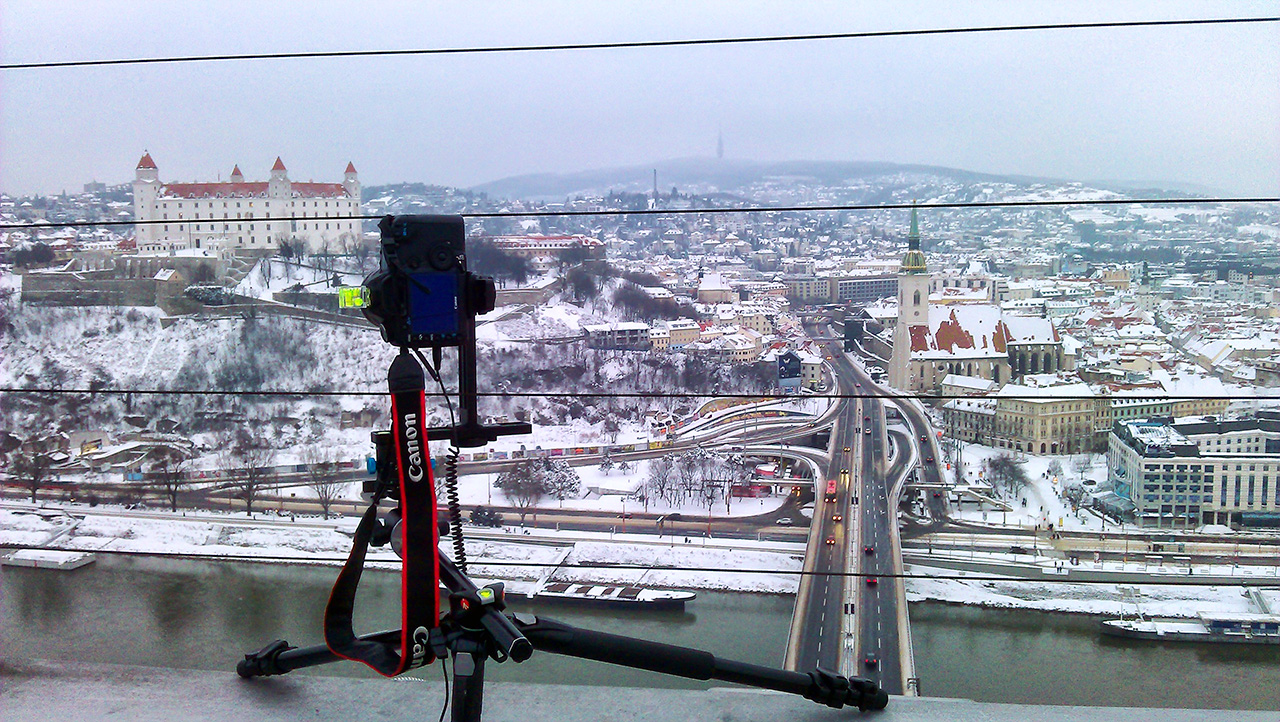
I knew I wanted this photo fro a long time before I took it, as this is the best view of Bratislava. I was just missing the needed equipment. But sometime before I took it, I bought the Nodal Ninja 4 panoramic head. And with the help of it, I could make this pano without any problem. Here is the setup I was using:
winterpano
So it was my Canon 5D mark II, with the Canon 16-35mm lens, wired remote, the bubble level all on the Nodal ninja 4 head.

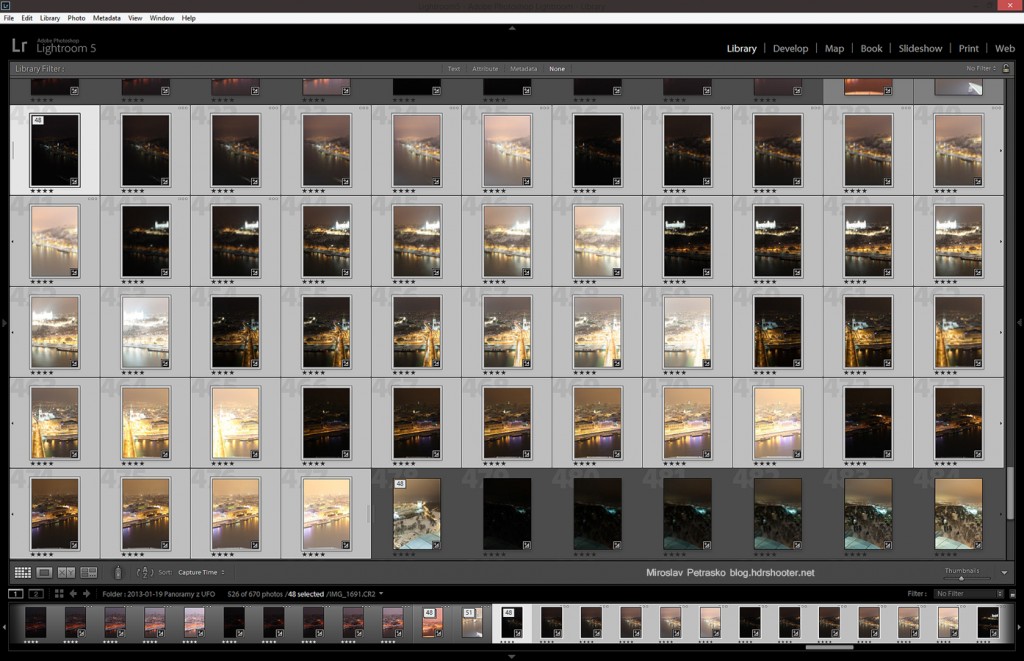
Overall I took 8 shots, all 6 bracket series. I imported them all into Lightroom, where I did few minor corrections. First of all I enabled lens correction. This is very important when doing a panorama, as it removes the vignetting from the photo and so helps it to be blended more seamlessly. I also removed the chromatic aberrations and corrected white balance in Lightroom.
big-one-lightroom

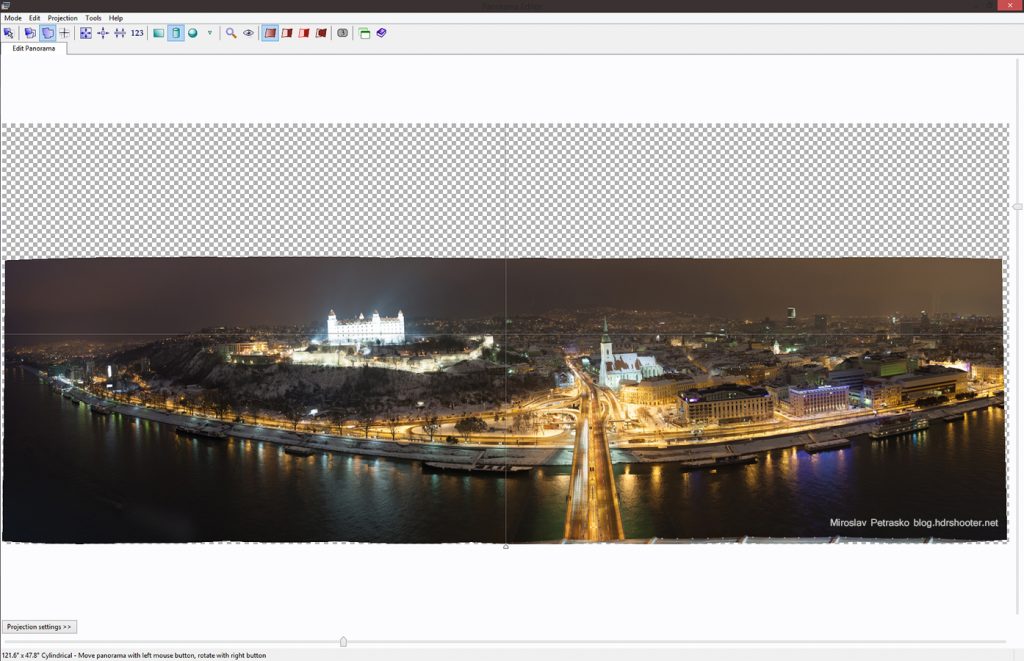
After that I exported all the 48 images as 16bit Tiff files and loaded them into PTgui. I merged them into a panorama and saved as their separate blended planes (check out my HDR panoramas tutorial for a more detailed explanation)
big-one-ptgui

After that I used Bridge to load all the files into one Photoshop file as separate layers. You can do this also manually, file by file, but using Bridge is much faster.
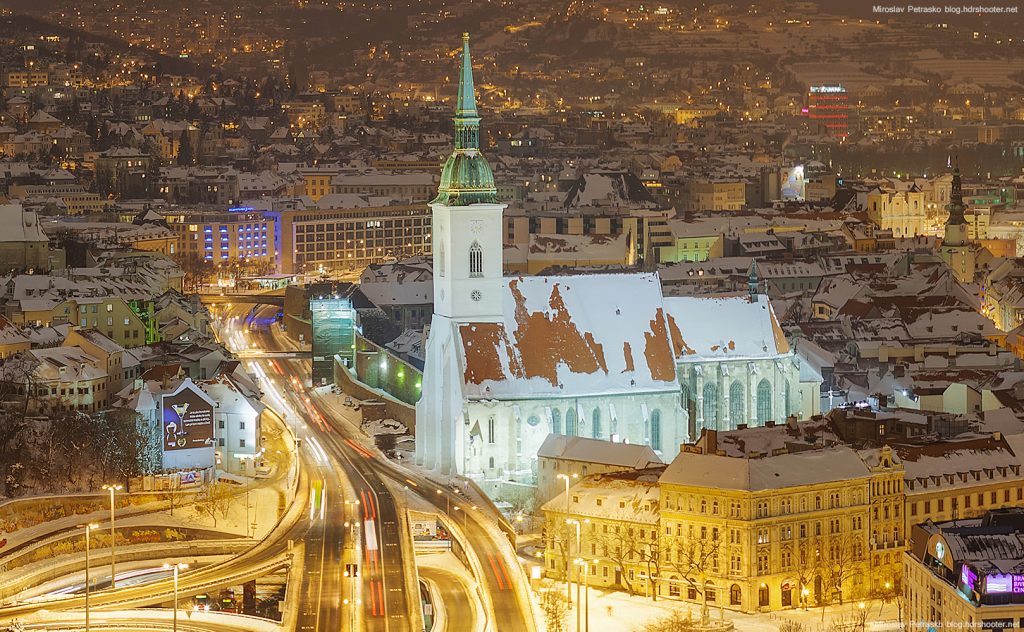
In Photoshop I blended the images, and corrected the angle. As I said, I haven’t saved the file, so no screenshot here, but instead here is a piece of the panorama taken from the 50% zoom
big-one-50
and from a 100% zoom.
big-one-100

Continue to the full post to see two of the original 0EV exposures.

FREE EBOOK!!!
Subscribe to my newsletter and get a free Capturing fireworks ebook. 
Subscribe