Flares are one of those things that can add to a photo, but usually you don’t want them. Especially if you are doing a nice landscape shot, flares can completely destroy your photo. There are multiple ways of avoiding them and removing them, so lets take a look at those.
Avoiding lens flares
The best approach is to avoid lens flares in the start. This is not always possible, but few simple steps will help you.
1. Use a lens hood – even if you think you don’t need it. Lens hoods are specially designed to block stray light getting into you lens. And that’s exactly the light you need to avoid. Also when you are doing night photography, a lens hood can help you avoid stray light from street lamps and similar sources.
2. Be aware of the suns position – when shooting landscapes, you should always take into account where the sun is. If its anywhere else than behind you, check for lens flares. You will not see them through the viewfinder, but they will be visible in live view. You can even take a test shot, to check for them.
3. Don’t use filters you don’t need – this is especially true for UV filter. These filters can create much more flares, than you would have without them
4. Get a better lens – I know this is not cheap, and should not be your first approach, but better lenses catch much fewer lens flares than the budget ones. They have special coatings that prevent this.
Removing them using Photoshop tools
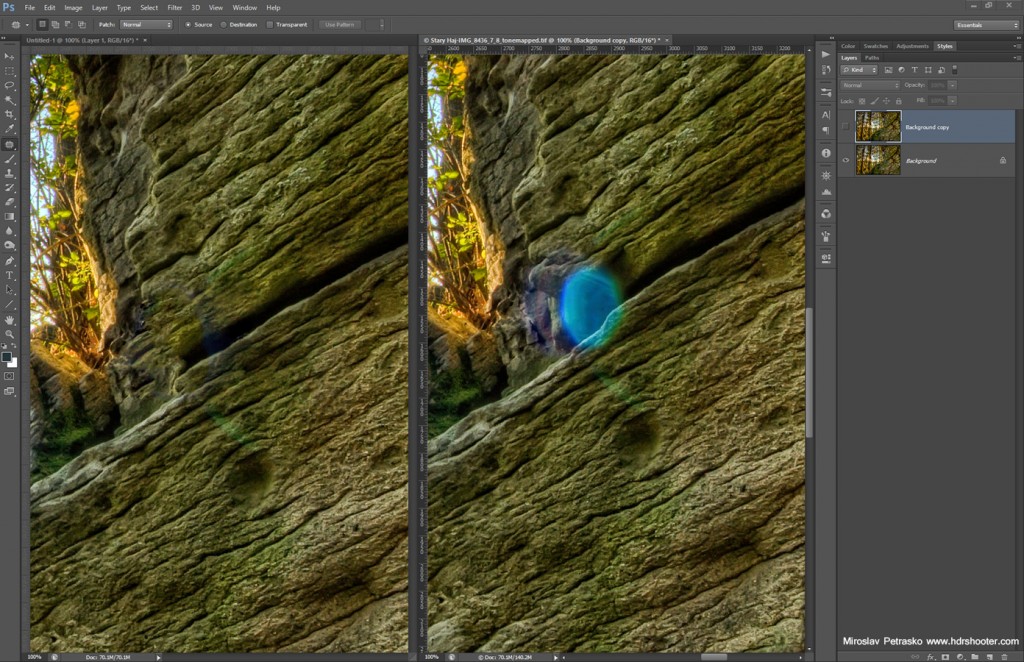
If you didn’t managed to avoid them, and you don’t like to have them in your photo, you can remove them in Photoshop. Photoshop has many tools for photo retouching and some of them can also work on Lens flares. The most useful are Patch tool, Healing brush tool and Content aware fill. In a way, they all work the same, you just select the area you want to replaced and then either move it over a clean area (Patch tool), Fill it using content aware fill (Shift + Backspace and select content aware fill) or you paint over using the Healing brush. This works well only in some cases, having a flare over a very detailed part of the image can cause problems in retouching.
Here you see an example of this. I used the Patch tool to select the flare and drag it over the area to the right. Don’t worry, you don’t have to be absolutely accurate, because with the size of photos, any error you leave will be only visible at 100%, so not even if you print the photo.
Blocking the sun
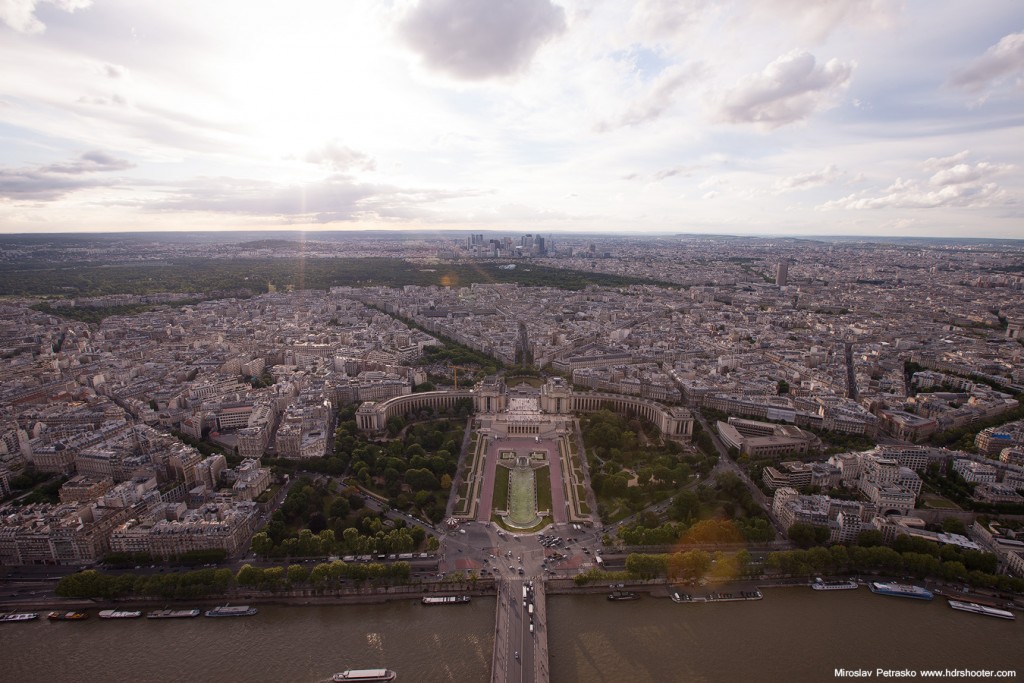
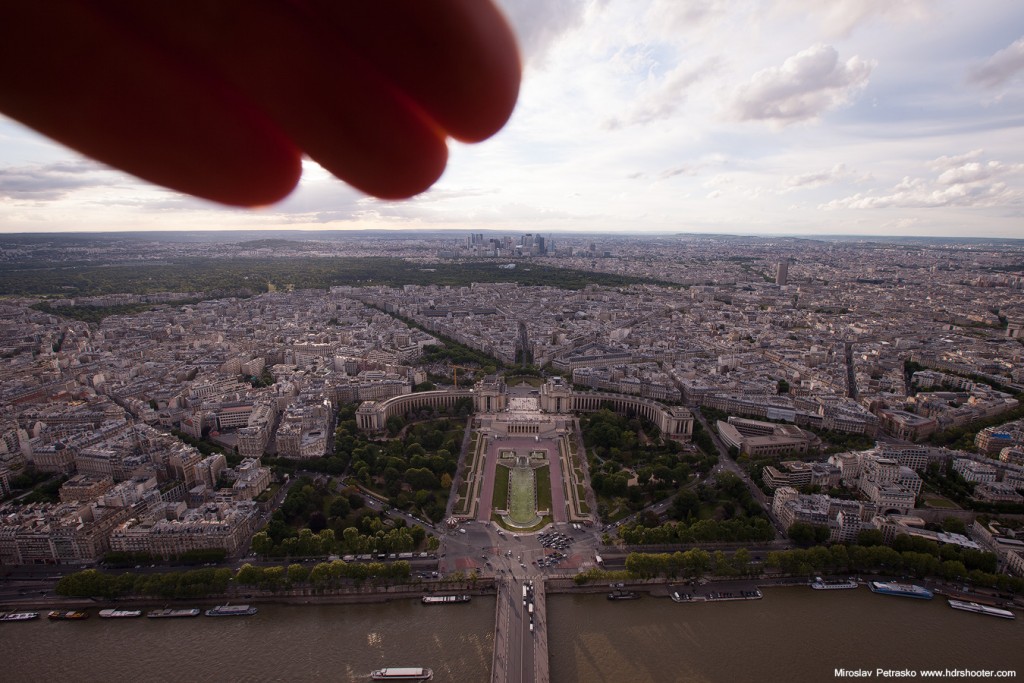
An advanced approach to dealing with lens flares, is to prepare for their removal right during the photo shot. This works for photos taken from a tripod, not so well for handheld shots. What you need to do, is shade the sun with your hand (or something dark) if its to the side of you camera, while taking the shot. If the sun is in your shot, than take two shots, one normal and one with your hand in front of the sun. This two should have the same settings, as you will need to merge them later. This works best if you are in Manual mode. Here you see an example of two such shots:
These you can then load into separate layers into Photoshop and easily using layer mask (check my tutorial on those here) correct the problem. Be careful with the color cast, as the shaded photo can be a little colder than the one with the sun. This can happen even if both photos have the same white balance and it has to be corrected.
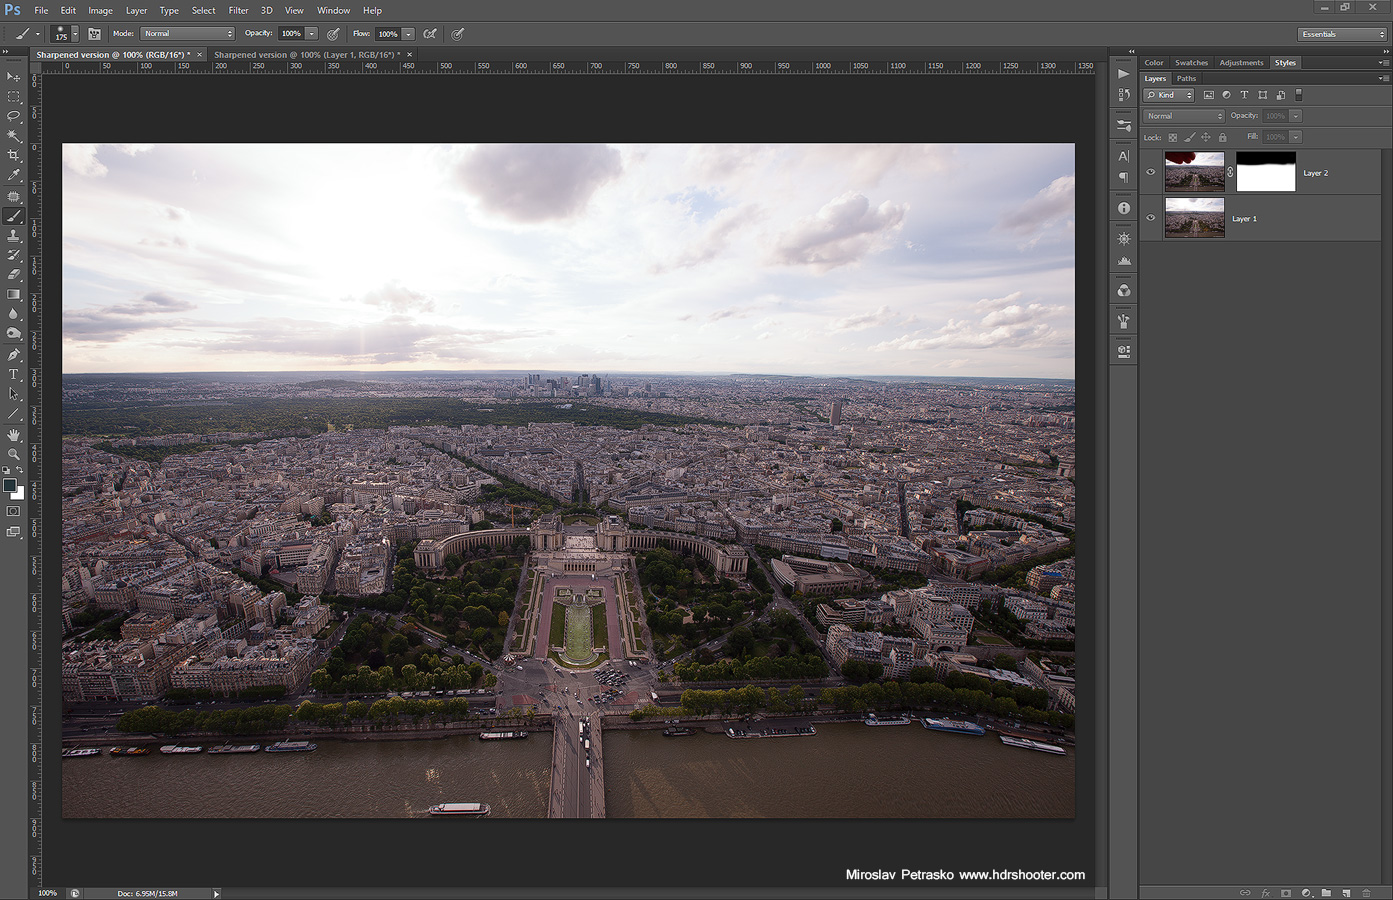
If you are doing a HDR bracket series, you do the same, you just take one series normally and one series with your hand in front of the lens. You usually need only one photo with the shaded sun, It just hared to say which one, so its better to take the whole series. Here you can see a sample series of this:
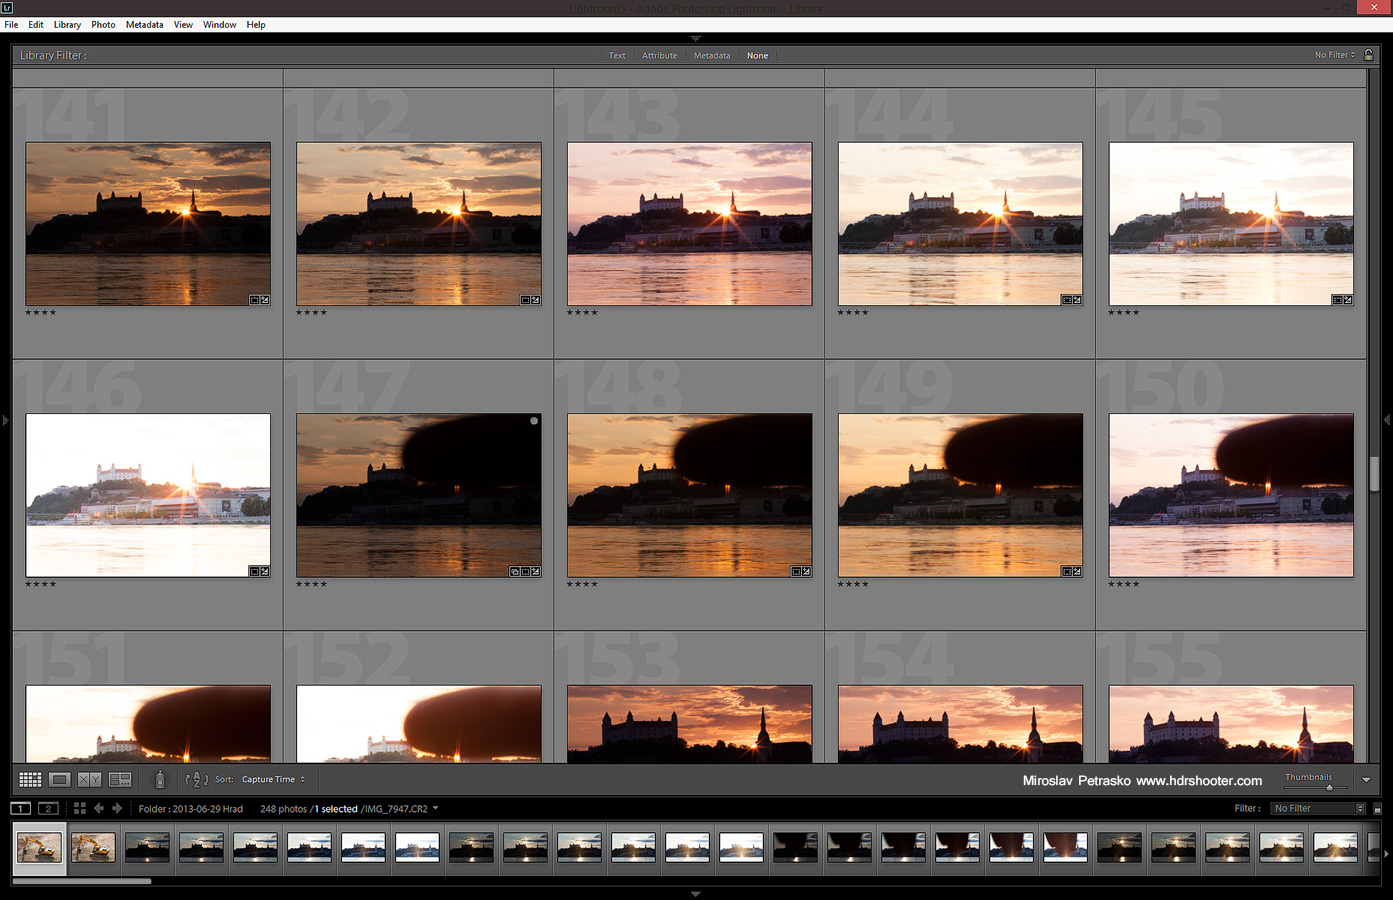
After that you continue as before, jut merge the normal exposures as you want (Oloneo, Photomatix, Manual blending) and then repair the lens flares from the shaded shot.
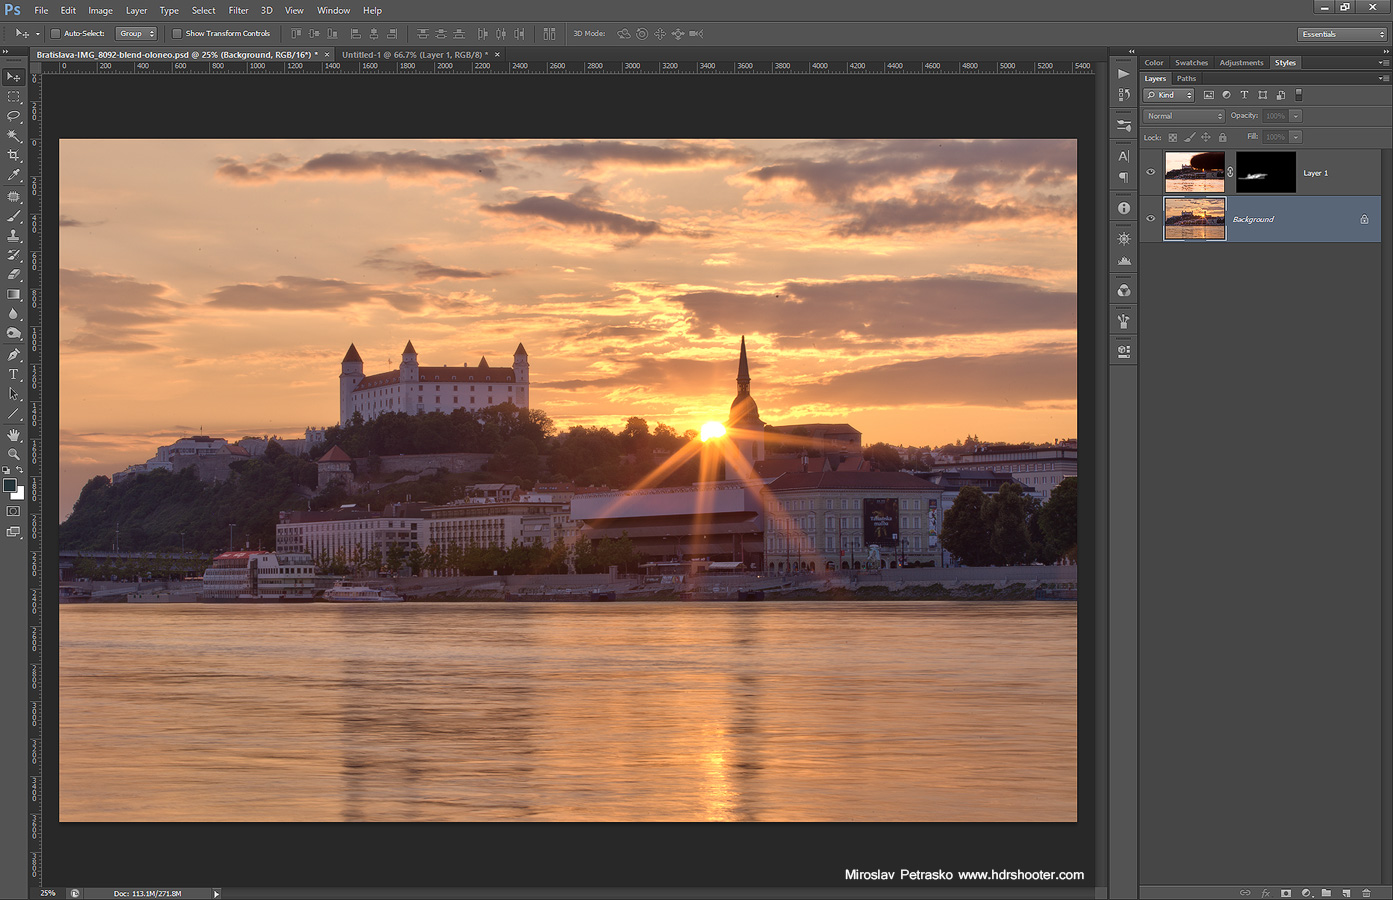
And here you can see the finished photo, nice and flare free :)

I prefer the third method, which gets all my photos flare free. I hope you find this guide useful, and if you have any questions, feel free to ask.
And here you have a video where I go through all of this together in one spot :)




Hi Miro! I have been following your blog for some time now and I really appreciate what you are doing here! I am wondering if you have a post explaining how to expose for an image with the sun included, shot at small aperture to get the star shape effect, and then blend it with another exposure for the subject, shot at f8 for example. Thanks in advance!
Hi Hugo. Don’t yet have a post about that, there is one about how I expose my photos https://www.hdrshooter.com/2014/09/02/metering-the-exposure-for-hdr/ (and it’s the same when I shoot into the sun, just include a -3EV and -4EV exposure). I plan to write more about this, but haven’t yet finished any articles on this.
Hi! Thanks for your reply. Maybe something to write about in the future. I want to do a HDR image without using any tools except Photoshop and I want to do it manually. So I can both exposure and focus on the dark foreground for example, and in the next shot expose and focus for the bright background. Here is an example where I did this:
https://www.flickr.com/photos/69560028@N06/15396930207/
However it doesn’t work when including the bright sun..
So if I understand correctly, you want to manually blend a photo with the sun in the shot and also remove flares. That is possible, but usually not just from 2 photos. The difference is to big to be able to create a nice transition, and one or more exposures taken in between are needed. So you don’t do just two photos, but a whole exposure series, so the foreground, than a darker one, darker one.. until you get a good exposure for the background, and than you also do the blending in that order. So you take the foreground, and blend in parts of the little darker exposure. Once that is done, you add another exposure and repeat the process… and so on.. like this you should be able to get the whole dynamic range.
Hi!
I am not very experienced in these techniques but I understand what you mean. Do I do this by lowering the opacity of the layers one by one? Or which method should I use to blend the exposures in PS? Thanks!
Hi Miro,
I have a question and I think you can help me but before that, your work is very good and inspiring :)
I am attaching 2 pictures taken from my Tokina 17-35 f4 FX lens for Nikon. The first picture is taken vertically with right side of my camera being on the top. 2nd picture being the opposite, left side of the camera n top. You can see a not of flares from the light source on the 1st picture but not on 2nd one. The right side of my lens is producing this effect on every picture. Any reasons for this and any lens repair shop can recommend to me?
Thank.
These are the pictures.
I’m not Miro, but I may be able to help. The first thing that comes to mind is that you have a polarized lens filter on your camera. It will filter light in different ways depending on which way the polarized filter is turned. That is the reason that they are always mounted on a ring that allows you to turn them. If you set your camera up on your tripod and take a series of photos, rotating the filter a quarter turn after each shot, you will see a difference in your shots. The colors, most noticeably the sky, will be slightly different shades. You can also do this experiment with a sunset and compare the glare or lens flares there.
Hope that helps.