Capture HDR photos
So first thing first. If you take a bad photo, HDR will not help you. Composition is really the most important part of a photo. You can have a great subject, with great HDR treatment but without a good composition the photo will not work.
If I want to have better composition I use my tripod. Why? Because it slows me down, and I think more about the photo. Also I don’t have to crop much, if I take more time to setup my shot.
So always first think about the composition, than about the post processing.
In this HDR tutorial I will show all the steps on this photo, with few examples from other ones.
What do you need?
The only thing you really need for HDR photos is a camera. Any camera will do fine. You can use HDR process on any photo you take, even with your phone. But the results may wary based on the camera you use.
So in the best case you need:
- a camera – any camera with manual mode or AEB (Automatic Exposure Bracketing) will do, if you want to take HDR’s handheld AEB is a must. I will assume you have a DSLR in the tutorial, as there is little to set up on a compact camera. If you want to create HDR’s from a single shot, you can use any camera.
- tripod – you can make HDR’s handheld, but to get the best results you need a tripod.
- cable release – not really mandatory, but can help
Taking the shots from a tripod
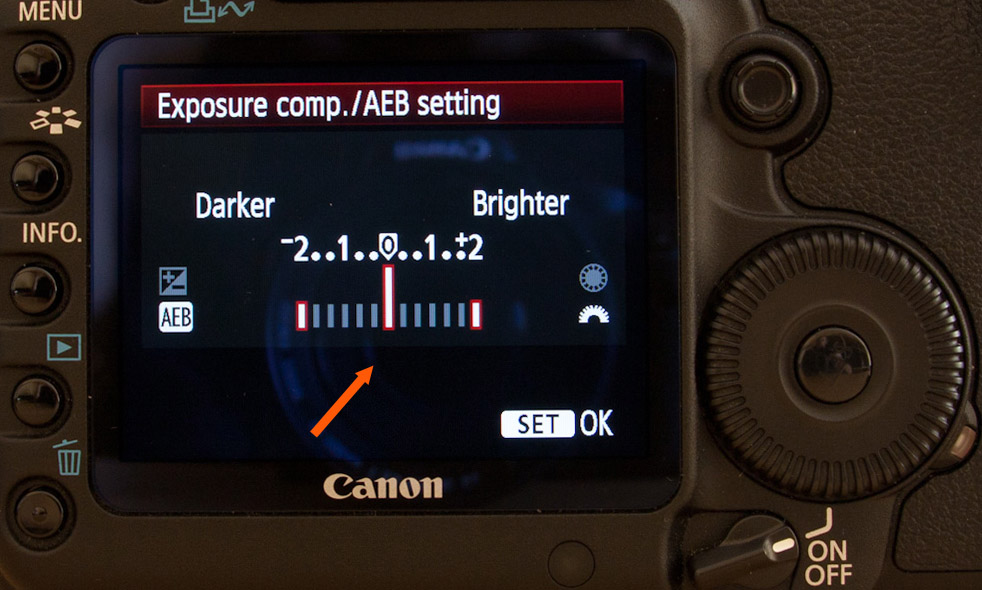
So after you set up your composition, you need to set up your camera. Turn on AEB and set it so you take shots at -2,0 and +2 EV (or -2,-1,0,+1,+2 if you have a Nikon camera). Switch your camera to AP mode (aperture priority mode) and using a self timer or a cable release take you shots. On the right is how the AEB setting looks on a 5D mark II, most cameras have a similar menu.
The ISO on your camera should be left as low as possible (100-200) if you want to avoid noise in your final HDR. Also the aperture should be lower (F5.6 – F11) if you want to have the whole image sharp and in focus. When you set this up you should check the time, the camera shows you for the first shot (0EV). This exposure time should be 8s or below. This is so the brightest shot is still below 30s. If it shows you a longer time, choose a higher aperture or a higher ISO (or both), until you have the required exposure time.
If you need more than three shots, the simplest way is to move you middle exposure. So you can just take shots at -2,0 and +2EV and then underexpose by one stop and take shots at -3,-1 and +1 (or overexpose, based on the situation). Like this you can take quickly quite a lot of shots.
Look at your camera manual, to find out how to turn on AEB and under/over-expose a foto on your camera.
Taking the shots using a Promote Control remote
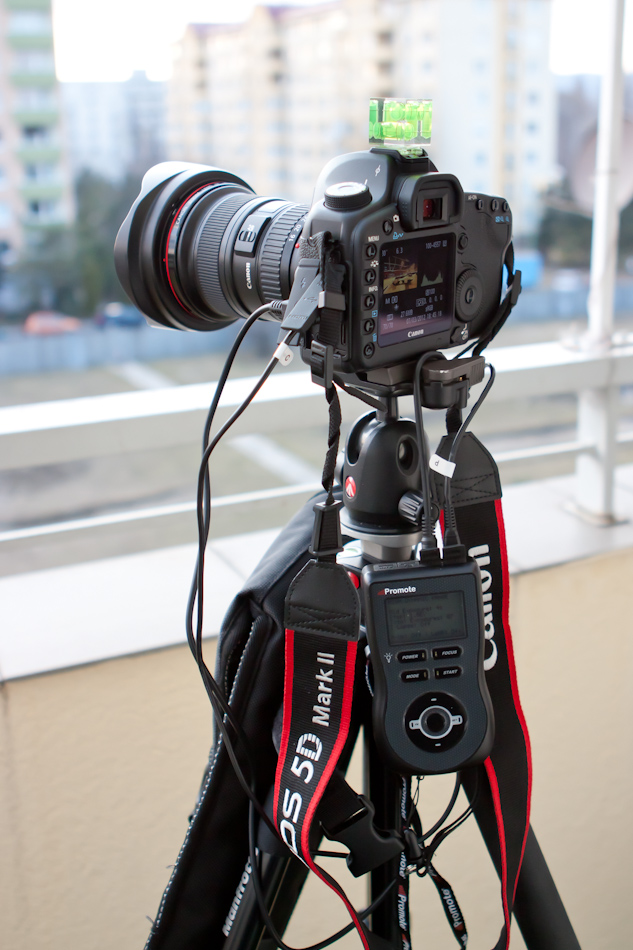
An advanced way of taking your shots from a tripod, is using the Promote Control remote. Most of the steps are the same, but to take the photos you just set up the starting time and number of shots on the remote, and it does most of the work for you. You can find out more on my Promote Control remote review page.
This is the sample bracket series I took from a tripod, with the help of the Promote. I could have had the same result, if I took three separate series at -3,-1,+1, the second at -2,0,+2 and the third one at -1,+1, +3, it just takes longer, and you have a much bigger chance, that your photos wont align properly. If I wanted to have a bracket with a time longer than 30s, the only way to get it is by using a Promote.
Taking the shots handheld
You want to get the same result as if taking from a tripod. So you have to have the exposure times as short as possible, so the photos align better. Use burst mode on your camera, this way you can take multiple shots simply by holding the shutter button, use a higher ISO, based on you camera an ISO 400-1600 is still acceptable, use a bigger aperture and try to hold the camera still. Don’t forget, that you can correct noise, but not an out of focus, blurry photo.
A good practice is to lean on something, or to place your camera on an even surface, hold it down and take the photos using a self timer. Also try to have your slowest exposure time faster than 1/the focal length you are using. So if you use a 50mm lens, the slowest exposure should be not more than 1/50s. This is that your shots should be max 1/50s, 1/200s and 1/800s if you take your photos at +2, 0 and -2.
This is a sample series taken handheld. It’s really much simpler when there is enough light. You can see the resulting HDR from these brackets here – Toledo reflection
Taking shots without AEB
When you need more than three brackets or you just don’t have AEB, you can still do it manually. You have to
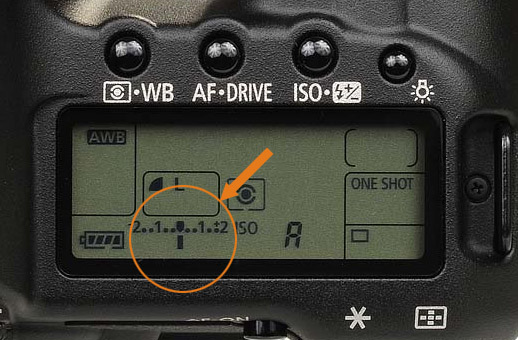 set your camera to manual mode, set your ISO and aperture
- find the normal (0EV) exposure (half press your shutter button, so the camera meters the scene and then change the time, until the small line is under 0EV, as in the photo on the right)
- decide what range you want to have, for each step, half the exposure time. If you 0EV is 1s and you want to start with -4EV, your starting time should be (((1s /2) /2) /2) /2 equals 1/15s (it’s really 1/16, but you can not set it on a camera :) )
- set up you camera for the darkest shot and take it
- double the exposure time and take the shot, repeat this until you have all the brackets you need. Each time you double the exposure time, you move your photo by 1EV
A little tip to make this simpler :) A lot of cameras can be set up, so you change your settings in 1/3EV increments or 1/2EV increments. This is usually in custom settings. If you change this from 1/3EV to 1/2EV, you have one step lees between two exposures, so you can change your settings faster. On Canon 5D this setting is called “exposure level increments”
I really suggest doing this only from a very solid tripod, and best with a cable release, so you touch your camera as low as possible. Also you should be really fast, so if there is anything moving, or the light is changing, you have similar condition in all shots.
Don’t forget to align images taken this way, as there can be differences in between them. You should look at them the same way as at your handheld images.
Here is a video showing different ways of taking your brackets
Always shoot in RAW
This is a really important point. There are many reasons, but just to name a few:
- you don’t have to worry about white balance, you can change it at anytime and as often you want
- you get better results, when creating a HDR from a single photo. RAW has much more information than a JPG file.
- even if you have overexposed areas in your darkest photo, you still can recover them if you shot in RAW
How many shots do you need?
This is a very common question. Most of the time you are fine with three shots, at -2, 0 and +2 EV. Taking more can help you to have cleaner color transitions in your photo (for instance in a sunset sky), but most people will never notice the difference. But when you definitively need more brackets, is when you shoot into the sun. Sometimes you can go as low as -4EV and it’s still not enough.
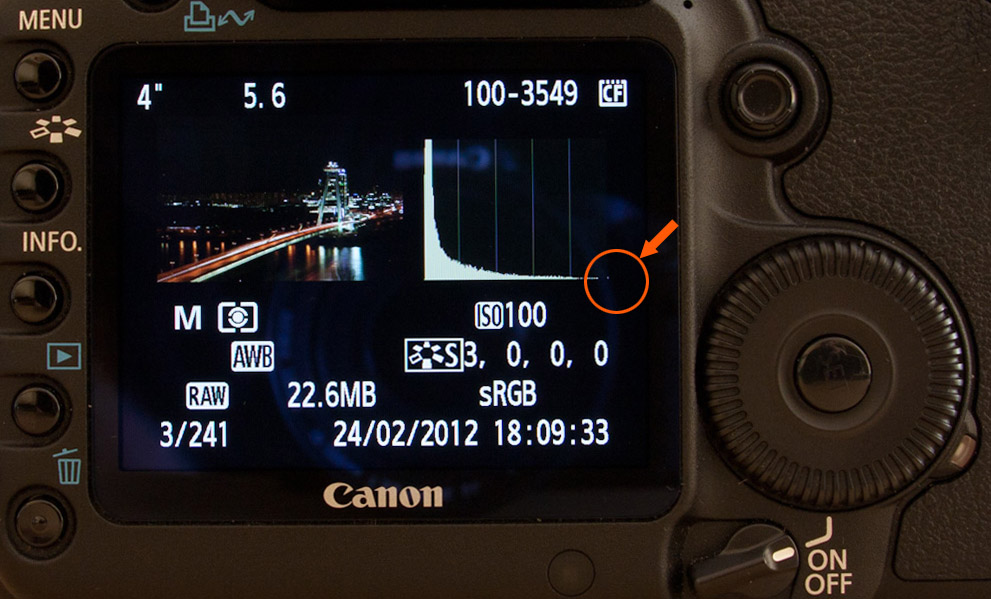
You can simply check your photos directly on your camera. The brightest photo should have no (or very little) complete black areas (histogram doesn’t touch the left side) and the darkest should have no (or very little) overexposed areas (histogram doesn’t touch the right side).
Organizing your photos
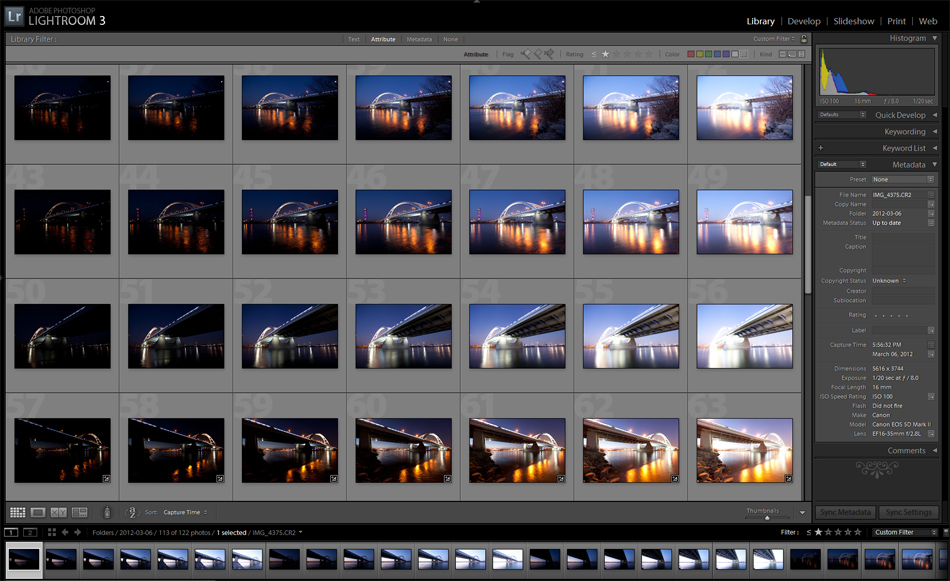
After I’m done taking my photos, I import them into Adobe Lighroom, where I make first few adjustments. I will do a separate tutorial on my organization workflow later on. But for everyone it really depends mostly on what program u use for it.
This is all for the first part, the next part will be about preparing your shots in Lightroom and merging them in Photomatix.






I look forward to the second part :)
I’ve done the tutorial from Stuck in Customs and have a good feel of how Trey does his shots. But I’m really liking the look of your shots, very clean and crisp. I’ve been doing 3 bracketed shots for a couple of years now, but reading what you’ve said about colour and clarity, I’m beginning to wonder if it’s worth the investment and buying a Promote Control (I’m using a Canon 7D). Would it give me that much of an advantage and that “clean look” I’m after if I could shoot 7 bracketed shots compared to just 3?. Your tutorial is very good and your shots are outstanding. Great work!
For a long time I also did only 3 shots, but then I changed my mind, as I always seamed to be missing something (and if you look a Treys photos, he also uses 5 and more brackets :) ). I would suggest you try the manual bracketing or taking multiple series from a single photo by under/overexposing. And then you will see if it helps your photos.
Great tutorial. Minor typo, “Always SHOOT in RAW”. instead of “shot”. Bookmarked. Interested to see what your approach to Photomatix is.
Oh, and for the record, I shoot a minimum of 9 brackets and for indoor situations with naturally lit windows or portals to the outside I do up to 21 exposures. The last thing you want is to sit down to process and find out you are missing a bunch of detail because you didn’t get the bracket you needed.
Thank you for catching the typo :) And yes, I fully agree, better safe than sorry, better take more shot and don’t need them, than taking lees and then regretting.
good introduction to hdri with some useful examples. I stop mainly at max 7 shots, depending on light conditions, but everyone has his personal prefernces in the post process.
Have you tried using Magic Lantern (http://magiclantern.wikia.com/wiki/Magic_Lantern_Firmware_Wiki) for 5D Mark 2 to take the brackets instead of the promote control?.
I’m just curious. I can see two advantages of using Magic Lantern:
1. it runs on your camera so there’s no need to additional cables and stuff
2. can do bulb ramping – you choose how many shots and the step size and Magic Lantern will take care of switching to bulb mode is necessary if you have any shots over 30 seconds
I was thinking about it, but decided against. My camera is only few months old, and I don’t want to risk the warranty. I’m also quite happy with the promote. It woks absolutely flawlessly :)
I am using a Sony A390…a lot of what you say as for the settings is not possable. That bugs me out because I like the work I see here. I am a begainer with photography but willing to try any & everything to inprove my pictues the best I can. What I don,t understand is are you changing the Aperture per shot or doing a time shoot with with light? I really want to understand how this works
I’m not sure about your camera, as I never used a Sony. But what you have to do is change the time between each shot. You never change the aperture. You need to archive shots with different amount of light in them by exposing them longer.
things are looking a little better … I want to thank you for all I have learned til now… looking forward to part 3 of this class …. also hoping that youe Easter Weekend was a nice one.
I am not too photography and getting into hdr images because it looks great imo. In your steps above under taking shots with a tripod, you mentioned the median (0Ev) shutter speed should be 8s or below. Is that 1/8 or 8″? Sorry for the newbie question.
Hi. No problem. If you use the camera settings to take the shots, it should be under 8s (not 1/8s) because if 0EV is 8s, then +1EV will be 16s and +2EV will be 32s, and no camera firmware supports exposures longer than 30s. So if your 0EV is under 8s, the +2EV will get under 30s and you get the right exposure.
dik za dobre summary ;) would be good to as well to mention the: (1) topic around locking WB (for those shooting in JPEG it can save some problems); (2) why it’s crucial to use the same Apperture for all shots (unless you do focus stacking); (3) disable the image stabilization (in lens or body). I do see some of those indirectly covered in this tutorial, but I think it can help the self-starters. I learned some of those (especially the IS) by my own mistakes.
I think I mentioned all of those points here and there :) But with all the stuff I already written fro the blog, it’s probably not here. An update to the tutorial would not be bad, bu I have no idea where I would find time to do that :)
it would be great were you to do a tutorial on shooting hdr raw. thank you
What do you mean exactly? As HDR and RAW are two different things. Do you mean in camera HDR?
Thank you for your reply. I meant do you shoot three orr more jgp shots with you camera to join with photomatrix or your choosen software or do you shoot one raw file and later create a number of jpgs from that raw file to create your hdr using photomatrix or other software. Thank you for all advice.
My camera, Canon 5D original, took three photos for HDR but only two of each shot is showing when I downloaded them…..????
Thats sounds really strange. Do you see them on the camera? Also, how do you download them? Are you using the Canon software, do you copy the files, or use directly lightroom?
I copied them directly from the card because I wanted to put them onto my Mac as well this Windows laptop. I’ve never seen this before, usually all three photos are there but not this time. I normally use Canon software for processing. They’re not on the camera or the card yet the shutter went three times every time I shot.
Here’s a grab of them.
This looks like it did all OK, and you have three exposures for every shot. What seem off, is that you have each photo twice, which I presume that you have your camera set up to take a JPG and also a RAW photo. That’s why it shows all as double.
Oh lol. I took two shots of each in case there was movement but normally I see three photos with the same number. OK, still learnin LOL. Thank you!
Thanks for the tips. It’s always good to see how other people achieve great images. All the best, I look forward to reading more :)
Hi Miroslav,
I was wondering why you import as jpeg into Photomatix, while importing RAW is also possible? Is it necessary to import pre-processed jpegs???
At the moment, I always import the RAW files in Photomatix, after tone mapping I save a TIF file and import this in Photoshop CS6. There I do the final processing (denoise, sharpen etc.)
Kind regards, Jurgen.
Hi Jurgen
that was then. Now I would suggest using a TIF. I never used RAW directly, as I wanted to use lens correction and chromatic aberration removal before Photomatix. I find the results better if you already have those removed before tone-mapping.