How to use Photomatix Pro
I use Photomatix Pro in this tutorial. There are other HDR software, that can be used to combine photos into HDR, but Photomatix is the most popular and widely used (and also my favorite). It can create stunning results if used properly. If you don’t have Photomatix, you can get a full featured trial version here http://www.hdrsoft.com/download.html or it can be also bought there.
If you want to buy it, don’t forget to use the Photomatix coupon code “HDRSHOOTER” for a 15% discount.
Preparing your shots
So you have your shots, and you have them in Lightroom (you can do this is many other programs, but I use Lighroom 4 here). You need to correct few problems before starting to combine the shots, as tone maping can make the more visible.
To correct the photos, go into develop mode and select all the photos in your series:
Correct chromatic abberations
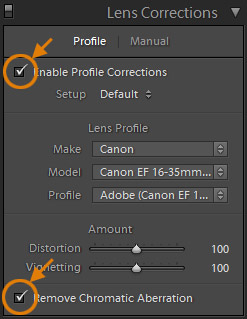
You want to correct the problems on one of the photos and using sync copy the same settings to all other photos. You should always correct the chromatic aberrations. This can be done either manually, or let Lightroom do this for you.
You can also turn on Enable Profile Correction. Lightroom will then remove some of the distortions in your photos. From my experience it does a really nice job.
(Small update/note: I have found that removing distortion can create color banding in the final HDR. Usually when you have a clear blue sky. It you see this happening, use photos without the profile correction enabled. You still can do the correction on the final HDR.)
Correct white balance
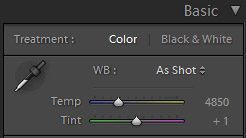
Based on the photo, if you need to correct the white balance, do it now. If you change the temperature in Photomatix, and then you have to merge your photos with the tone mapping result you color will no longer match up.
If you took shots in multiple series, not in a singe AEB, you also need to check that white balance is same in all photos. It can happen, that the camera meters different shots differently, and you get different temperature and tint on them. I you selected your own white balance on the camera, not AWB, or you already corrected the white balance, you don’t have to check this.

Correct noise
The last thing I do sometimes in Lightroom, is to correct the noise a little. Especially if you used ISO bigger than 400 this can help a lot in the final result. Same as with other problem, the HDR tone maping process will make noise more visible. So not having too much of it to start with makes the whole process easier.
Synchronize settings
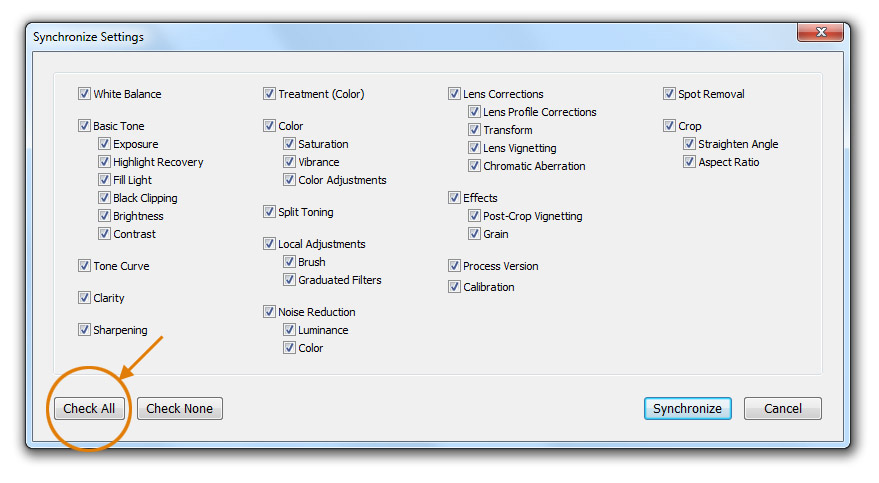
After this is all corrected, synchronize the settings to all photos in the series. Just press sync in bottom right, then check all and synchronize.
Export brackets
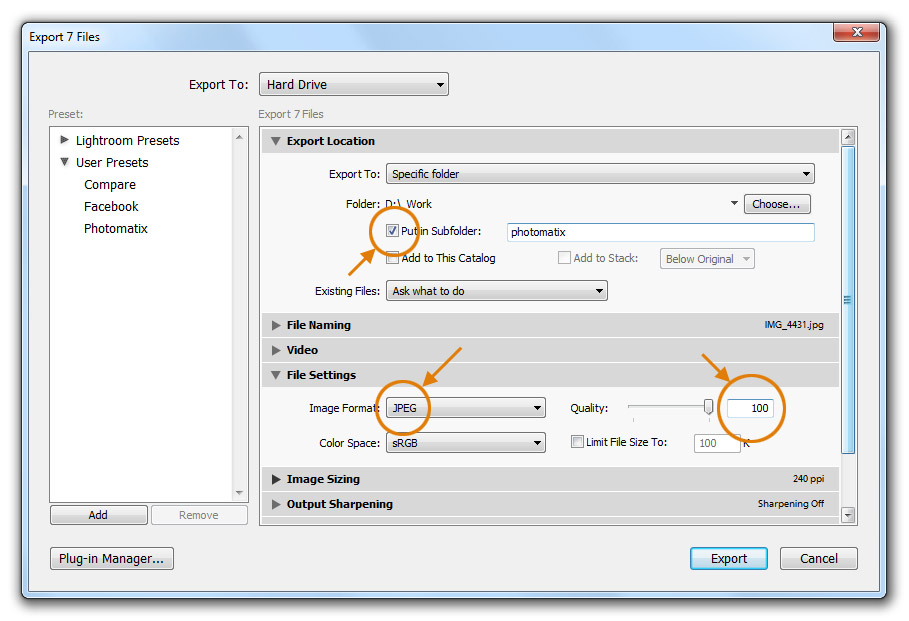
Now you can export you photos as 100% quality Jpeg files to be used in Photomatix. You can also use Tiff files, but it will take you computer longer time to process and you will see little or no difference in the result. I export the files into a work folder, from where I delete them once I’m done. I really suggest creating a preset for this export, as it’s something you will do a lot.
A plugin can be used to export directly into Photomatix from Lightroom. I don’t use it, as I close Lightroom before I start combining my shots. Lightroom takes really a lot of computer resources, when it’s running.
Combining in Photomatix
Open Photomatix Pro and select Load Bracketed Photos. Drag and drop your exported images into the dialog or browse for them and choose OK.
Now you have preprocessing options in front of you with the following checkers:
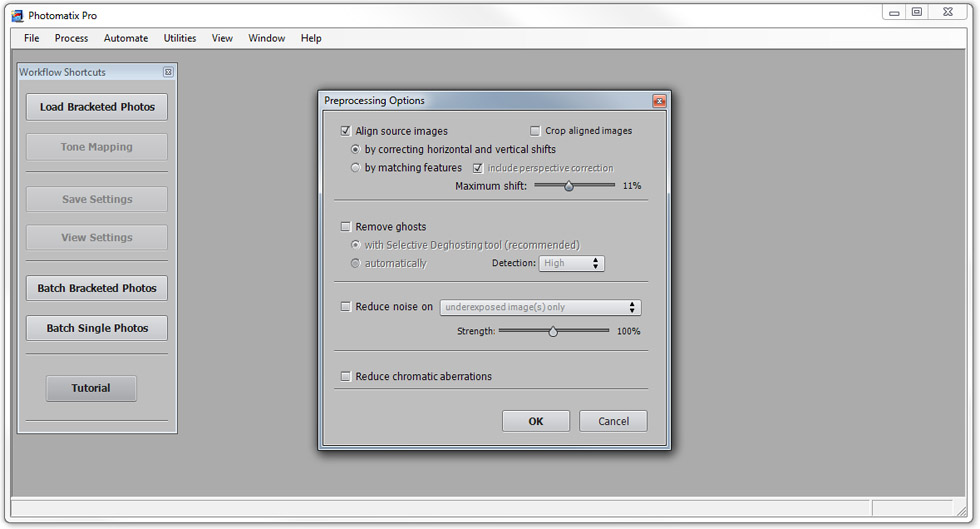 align source images – use the correcting shifts when you used a tripod, use matching features when you shoot handheld. Don’t select that you want to crop. Even when you used tripod, sometimes you have to select to align by matching features. This can be for instance when there was a lot of wind or you were standing on a busy bridge. Also using a bigger maximum shift can help you, if you took handheld brackets with a wide-angle lens. It can deal with the distortion better that way.
- remove ghosts – turn on when you have moving objects in your photo Always use the first option. It gives you the option to select the areas you want to deghost. The automatic option never worked for me. It always created really strange results, like it didn’t used all of the brackets.
- reduce noise – you can use this if you have no other options to remove noise. But there are better Photoshop plugins available which do it much better.
- reduce chromatic aberrations – if you followed this tutorial, you don’t need this to be turned on, if you didn’t, turn this on
Select OK
Tone mapping in Photomatix
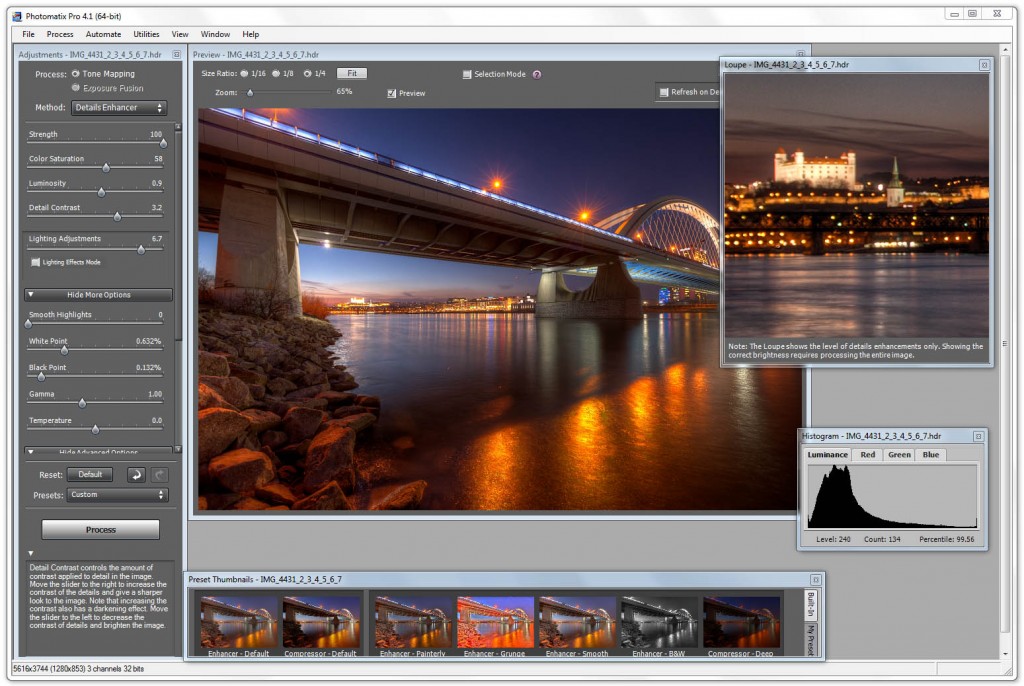
Now you have all your options to tone map your HDR photo. I skipped the 32bit view, as it has no real use here. I always chose Tone Mapping and Details Enhancer as the method.
When your photos are combined, you get your HDR with the default settings. When you are a first time user, its good to start from the default settings. As you get more used to Photomatix, you don’t need to reset anymore, as you will know what to expect.
You have the following settings:
- Strength – the higher the number, the more HDR look you have. It adds more detail and contrast to your photo. It also gives it a more unnatural feel, so if you like more realistic look, avoid 100 here. I usually use a settings between 70 and 100 here. If you compare the photo at strength 0 and strength 100 you see that a lot of detail is added as you go higher.
- Color saturation – If you want to have too much colors in you photo, you can add it here. But for most of the times, leaving it at 50 will work nicely. Really move it only when you see the need for it. I stay somewhere between 45 and 65 here.
- Luminosity – Makes the dark part of your photo lighter. Great to show more details. A high setting can make you photo look a little washed out, but a higher black point or more contrast later on can help a lot here. I usually have this anywhere between 0 and 10, based on the photo. Also note that a high value here can make you photo look more like a drawing than a photo. For a more realistic photo, use a smaller number. If you compare this setting at -10 and at 10 you can see, that there are absolutely no black areas in the +10 image.
- Detail Contrast – ads more contrast to details in the picture, using higher values here will pull out more contrast in your photo, it also makes the photo darker, so counter it with luminosity or white point. I usually stay anywhere between 0 and 10 here, it really varies.
- Lighting Adjustments – moves the light in the photo from the light areas to the dark areas. So the lower you go here, the more are the shadows lighter and the light areas darker. So it’s more unnatural (more artistic). The higher you go the more natural the photo looks. I’m usually between -1 and 5 here. I never use the Lighting Effects Mode, as I feel it gives me lees control of the final look. If you compare this setting at -10 and 10, you can see how the bridge becomes lighter and the sky brighter at negative settings. I would never use a very low setting for a photo with a sky in it, but it can work really well for an interior shot, to give ti more detail.
- Smooth Highlights – rarely used by me, stays at 0. This smooths out the lighter areas in you photo, making them lighter, less noisy, but usually removes a lot of detail. Only sometimes helpful, when you have a lot of halos around objects in your photo.
- White point – chooses what is still considered as pure white in you photo. If you have a lot of overexposed areas in you photo, use a lower number, if you photo is to dark use a higher one. I stay between 0 and 1 usually. You should check your histogram when changing this, so you don’t loose any detail because of a very high white point.
- Black point – same as white point, moving changes, what points are considered pure black. This adds nice contrast to your photo, so it shouldn’t be left at 0. I have it somewhere between 1 and 2. You should check your histogram when changing this, so you don’t loose any detail because of a very high black point.
- Gama – the overall brightness of the photo. If you photo is too dark, it’s sometime better to change this than luminosity, as it stays more realistic.
- Temperature – makes your photo cooler or warmer. Quite rarely used by me, as I think it’s better to correct the temperature in Lightroom, before Photomatix.
- Micro-smoothing – cleans out the photo, smoothing it out on smaller scales. Can help a lot with noise, but can also remove a lot of detail. Keep it low, arount 2 to 4 here.
- Saturation Highlights – adds more color to the lighter parts of your photo. I have never used this option.
- Saturation Shadows – adds more color to the darker parts of your photo. I have never used this option.
 Shadows Smoothness – same as highlight smooth but for shadows. Also this I have never used.
- Shadows Clipping – cut out dark areas, so can help with too much noise there. I use Photoshop to correct this, so I have never used this option.
The biggest effect on you photo will have strength and lighting adjustment. Other than that, I change only luminosity, detail contrast, black and white point. Most of the time, the other options can stay at default values.
So I set up my settings for this image, to get to the result shown to the right
Be careful with the loupe. It shows you the detail, not the brightness, so it’s not the same as a processed image.
When your done, select process and then save you image as a full quality JPG (you can go with a TIFF if you want, but most of the time you will see no difference)
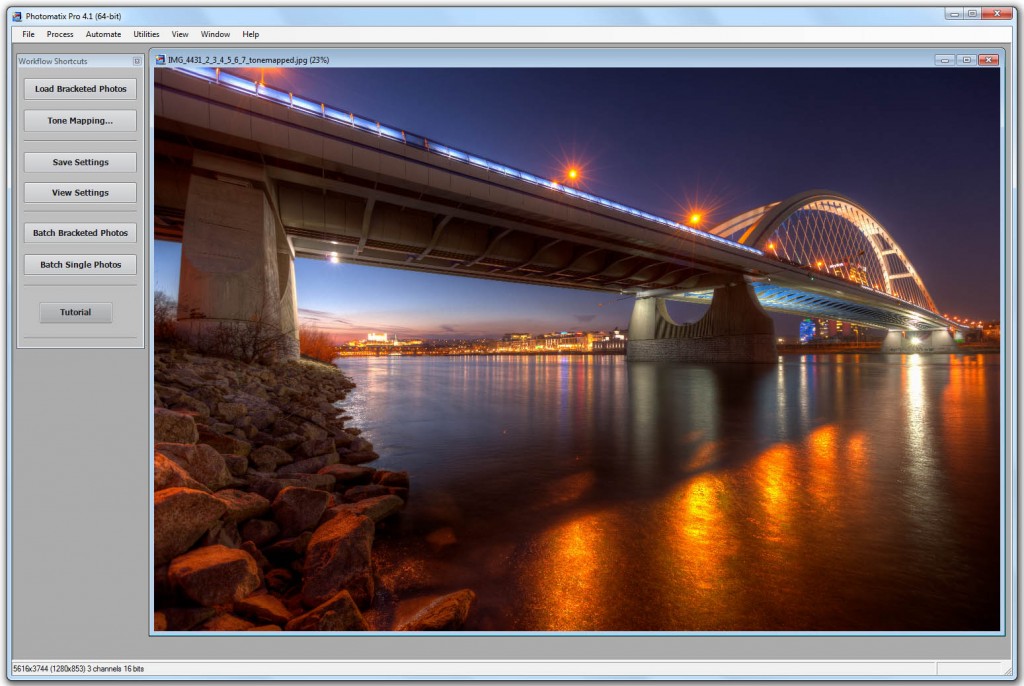
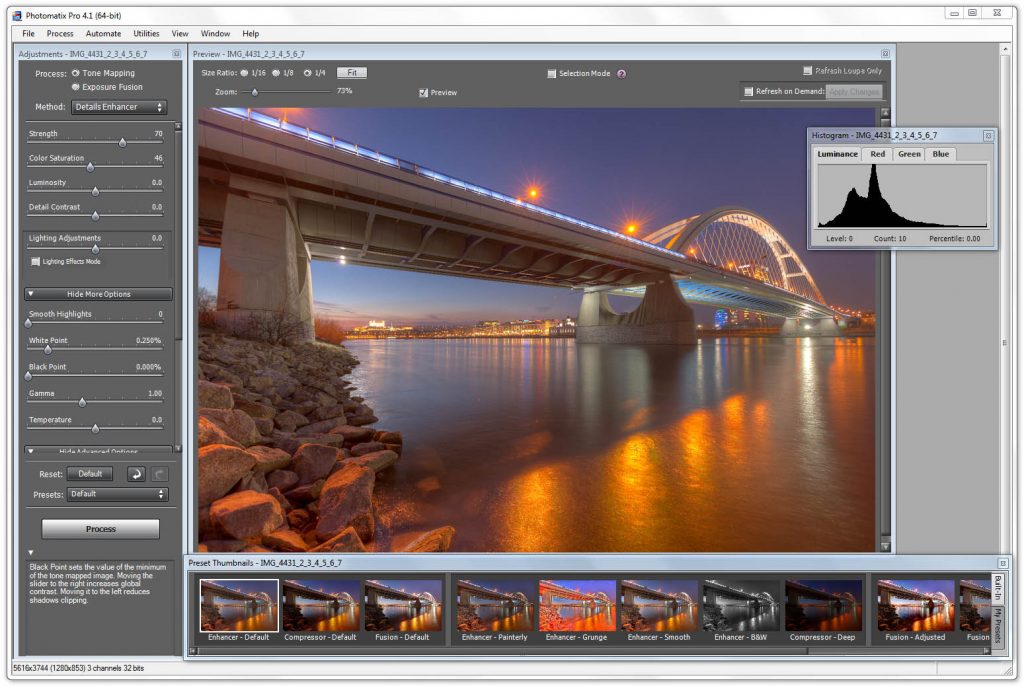
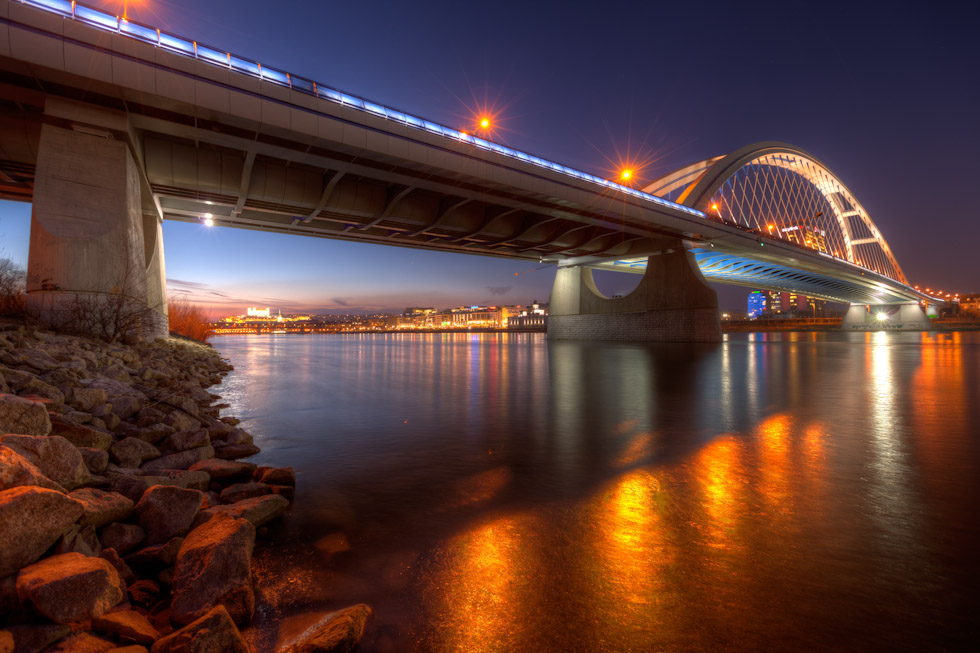
So my final tone maped image looks like:
It’s already quite good, but still there are few problems which need to be fixed (noise, sharpening, some overexposed areas, movement in the water and similar). This will be covered in the next part of the tutorial.
A note about all the suggested numbers. If you read a tutorial from somebody else, you will get a different set of numbers. This is because everyone likes a different look. You should try them for yourself and see what suits your taste and your photographs.
Double tone mapping
One technique in Photomatix, you can try out, is the double tone mapping. What you have to do is:
- load you photos into Photomatix
- do standard tone mapping steps on it
- process your photo, so you are back in the main selection of Photomatix, but still with the photo open
- select tone mapping one more time
So you select tone mapping when you are back in the screen shown to the right
When you do this, Photomatix will tone map the already tone mapped image once more. This will give it a very grungy, super detailed look. Now you can again play with all the sliders, to modify it. There are no preferred values, but usually going down with fill light gives a better result.
When you are done here, just click process and then save your final double tone mapped image. I personaly save both, the normal tone mapped and also the double tone mapped image, and mix them together in Photoshop.
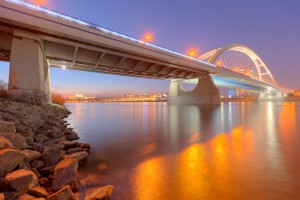
When this photo is double tone mapped with the same settings, you will get this result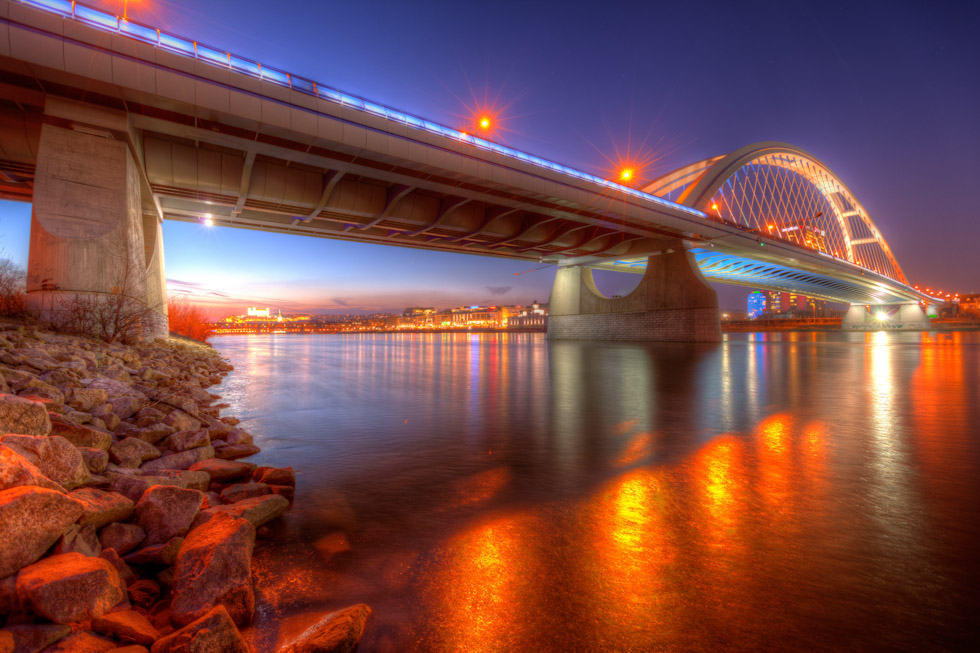
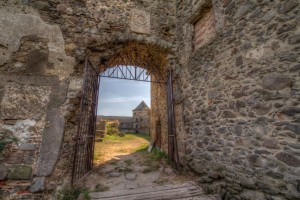
This is not a really good example for double tone mapping, as it doesn’t fit this image. A much better use for this technique are images with a lot of detail, like stone wall, church interiors an similar. For instance this one is a much better, an you can see how the stones have much more detail. You can even go further, and give it a more grungy look, but I don’t want to do that.
HDR from a single image
You can use the HDR process on any photo you take. Either it is a multi-bracketed series or a single one. You can even do it on a single photo if taken in JPG format, but the results are not so good, as the information you need is just not there.
There are two ways how this can be done. You either:
- split your photo into three separate ones by changing the exposure to +2,0,2 respectively, and then export each setting as a separate photo. Then continue the same way as having multiple brackets.
- open the RAW file directly in Photomatix and continue with tone mapping as with multiple brackets
I personally prefer the first option, as it gives me the possibility to do some corrections before tone mapping (chromatic aberrations, noise reduction). There is no other big difference between these two methods.
What to do if you photos don’t align properly
There are multiple approached one can try when the brackets don’t align properly in Photomatix. I use:
- create the tone mapped HDR from a single raw, usually the middle exposure
- create the tone mapped HDR from a single raw and correct all problems (like overexposed areas) in photoshop from the remaining brackets
- combine the brackets in Photoshop and save as a .hdr file, without any tone mapping. You can then open the file in Photomatix and tone map it there.




part 2 is even better, very good tutorial!
Thank you :) Let’s hope that part 3 is even better (when it’s ready :) )
Waiting for your Part 3 tutorial on PS processing. looking forward very much, I keep checking in. When do you plan on getting this one out?. Many thanks for your beautiful work, You are so very inspiring, Cheers Lyn
Hi Lyn. Thank you :) I’m a little busy with traveling and work right now, but I’m hoping to add it sometime after Easter.
Fantastic” Looking forward. Have fun abroad and safe travels. Can’t wait to see your beauty in Photos from your trips, Cheers Lyn :-)
Amazing tutorial , I have started doing hdr but got lost . This has brought me back to life as I also use Lightroom , photmatix and photoshop. Looking forward to you step 3.
Amazing tutorial, I was forever just loading up my original bracketed jpegs into photomatix, the detailed explanation on using lightroom has transformed my images, a big thank you, Miroslav :-)
Thanks for the tutorial! I just started using Photomatix after using Photoshop HDR and it’s a world of difference and requires a lot of experimentation, but that’s the fun part :) Keep up the good work.
Double tone mapping, well you learn something new everyday. : – ) Off to try now, wow thank you!
Thanks good tutorial
This is a great tutorial. It looks really effective when used and displayed in the right way
I am very impress in this the work.
Masallah, This is amazing!
Thanks for describing of Photomatix uses and features for graphic design. Lightroom or Photoshop is also great tool for HDR photo editing and manipulation.