Free HDR video tutorial

Free HDR video tutorial

MASTER EXPOSURE BLENDING

Find the best ones

Find the best ones

TOP PHOTOGRAPHY SPOTS

Free wallpapers

Free wallpapers

HIGH-RESOLUTION WALLPAPERS

canonello

Photographers on Ello

The list of photographers on Ello recently crossed it’s 500 entry, ant it still keeps on growing and growing. I think more and more photographers will be drawn there, as if you compare the quality of the photos there, no other social network competes at all. And you don’t even have to click on them to see them big :)

You can find me on Ello as @miroslavpetrasko, and you can find the list as always here: Photographers to follow on Ello.

Evening in Zurich

I didn’t had the best sunset while taking photos in Zurich, but one can almost always rely on the blue hour. Same here :) A combination of blue and yellow just works great.

This is a HDR from 5 exposures, created in Oloneo Photoengine, finished in Photoshop.
Evening in Zurich

One of the basic photo editing techniques is, using dodge and burn to brighten, respectively darken and area of a photo. Photoshop of course has specific tools for that, but using them has few downsides. The biggest one, is that you have to apply it directly of a pixels of a photo, and so the effect can not be tweaked or reversed (only undo helps :))

So as I mentioned in my most useful blending modes in Photoshop, you can also use the Soft light blending mode, as a way to do Dodge and Burn in a more control way. Btw. I used a little stronger effects on the sample images, to illustrate the effect.

Soft light

As stated before, Soft light blending mode will either darken or brighten the layer underneath, based on the layer it has been used on. So everything that is 50% grey (#808080) has no effect at all, everything that is darker, will darker the bottom layer, everything that is brighter, will brighten the bottom layer.

Dodge&BurnOriginal photo
Dodge&BurnDodged the foreground threes

Dodge & Burn

Once you know how soft light works, it’s easy to figure out how to use it to Dodge and Burn. What you do is:

  • Create a new empty layer
  • Set it’s blending mode to soft light
  • Take a soft brush, at around 30% opacity
  • Paint with white color on the new layer to dodge
  • Paint with black color on the layer to burn
  • Paint with 50% grey or use erase at a lower opacity, to undo what you have changed

You can also use shift-backspace, if you want to fill the whole layer with 50% grey. Just choose it from the option in the small window that will open.

Dodge&BurnBurned the top part of the photo
Dodge&Burn50% grey has no effect

Adding color

When you are using only white, black and shades of grey, you will only dodge and burn. But if you are using a colour instead of them, you will not only affect the brightness, but also the color of the area. This can help in a lot of situations. For instance, if you to paint more yellow into a sunset, or more green into autumn grass and similar. By using soft light, and a low opacity brush, you can create a very nice transition for most cases. You can of course also change the opacity of the soft light layer, to further tweak the strength of the effect.

Dodge&BurnDodged with yellow color the trees
Dodge&BurnBurned with blue color the sky

Using with luminance and color selections

One thing that works great with this approach, is combining it with different selections. Especial luminance selection work great with Dodging and Burning, and color selections (select/color range) with color painting. Just create yourself a Light selection and paint with black to make the areas darker, or opposite, create a darks selection and paint the area with white to make it brighter. With the selection active, you will only effect the selected bright/dark areas and nothing else.

Dodge&BurnBurnig with a luminance mask
Dodge&BurnColor selection to restrict the are affected

And that’t it. Feel free to ask any questions.

Vertical photos

Do you take many vertical (portrait) oriented photos? I somehow don’t. Not really sure why it’s like that. I’m just drawn more to wider views, and so my photos are mostly landscape. Also it looks so nice when all the photos are of the same size and aspect ratio. What do you like more? Vertical or horizontal shots?

Schwarzsee reflection

And while on the vertical photos subject, how about one from them. This is a reflection taken at the Schwarzsee under the Matterhorn. The sky was not the best behind the mountain, but the reflection was great, so I took the shot :)

This is a HDR from 4 exposures, created in Oloneo Photoengine, finished in Photoshop
Schwarzsee reflection

For today I chosen to show you how I edited this photo from the Grand Mosques in Abu Dhabi. This was the main entrance area, so quite busy. That why I chosen this compositin, trying to look more up, so getting a shot over everyone heads. It was also a scene with quite a high dynamic range, so I used 6 exposures, with a -3EV taken for the lights.

So lets look at the final image and the original 0EV exposure.

Entrance to the Grand MosqueFinished photo
Entrance to the Grand MosqueOriginal 0EV exposure

I started as always in Ligthroom. I corrected the lens distortion, removed the chromatic aberrations and corrected the angle. After that I exported all the files as 16-bit tiff files and loaded them into Oloneo Photoengine.

Entrance to the Grand MosqueAll exposures taken
Entrance to the Grand MosqueDistortion corrected in Lightroom 

In Oloneo I just changed the strength and contrast, as I do most of the time. From there I loaded the HDR result and the original exposures into Photoshop, and did the following edits (layers numbered from bottom up):
1. Photoengine result
2.-3EV exposure to darken the lights
3. Curves to brighten the overall image
4. Just a merged layer I needed for Color efex plugin
5. Color efex Detail extractor, to get more detail from the photo. Set to default settings and then 50% opacity.
6. Curve to darken the brightest lists in the photo.
7. Merged layer for noise reuduction
8+9. Added contrast to the whole image
10+11. Desaturated the red color and added more saturation to yellow.
12. Color balance for the shadow areas to remove the red cast.

Entrance to the Grand MosqueHDR in Oloneo Potoengine
Entrance to the Grand MosquePhotoshop editing

And that’s all I did with this image. To find out more on how I edit, check out the guides and before after categories on this blog, or check out my video tutorial series here:
banner-master

90mm TS-eWe have quite a lovely autumn for the last few days, and I somehow missed more autumn color on the blog. And since I also have a Canon 90mm tilt shift lens borrowed right now, with which I wanted to play around more, I though I combine this, by taking some crazy bokeh shots with autumn color.

The 90mm tilt shift is a very nice lens, just not so great for landscapes. The focal length is just to much. But it’s very nice to get detail with a very small DOF and even with blured parts of the image, if one takes advantage of the tilt. So instead of doing landscapes, I visited the Botanical garden here in Bratislava, and took few shots. All are single exposures, edited in Lightroom. Btw. would these make nice phone backgrounds?

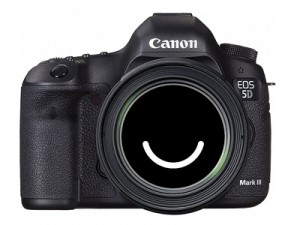
And if you don’t know how a 90mm tilt shift lens looks like, I’m including a photo of the camera :) It does not have auto-focus, so it’s quite a lot of fun when taking photos with it handheld.

Autumn Bokeh
Autumn Bokeh
Autumn Bokeh
Autumn Bokeh
Autumn Bokeh
Autumn Bokeh
Autumn Bokeh
Autumn Bokeh
FREE EBOOK!!!
Subscribe to my newsletter and get a free Capturing fireworks ebook. 
Subscribe