Free HDR video tutorial

Free HDR video tutorial

MASTER EXPOSURE BLENDING

Find the best ones

Find the best ones

TOP PHOTOGRAPHY SPOTS

Free wallpapers

Free wallpapers

HIGH-RESOLUTION WALLPAPERS

moo-7

MOO cards – review

Moo cards are my favorite way of creating business cards, and in this review I will tell you why. Continue to the full Moo cards review.

Last moments of sunset

I haven’t posted a panorama for a while, so for today I have one for you. This is another shots take in the middle of the summer last year. This is one great place above the city Hainburg in Austria, from where you get this great view of the city and this S-curve in Danube. And another great thing is, that you can get there by car, so no walking up the hill :)

As you can see, this was taken right around sunset. The sky was a little boring that day, so I comped more for the scenery. This is a Panorama from two shots, each one from 5 exposures. I used my standard technique of combining the panorama, which you can see in my panorama tutorial. I also took another set of 5 exposures with my hand in front of the sun, so I can remove the flares. I used the approach as shown in my How to remove lens flares tutorial.

Last moments of sunset

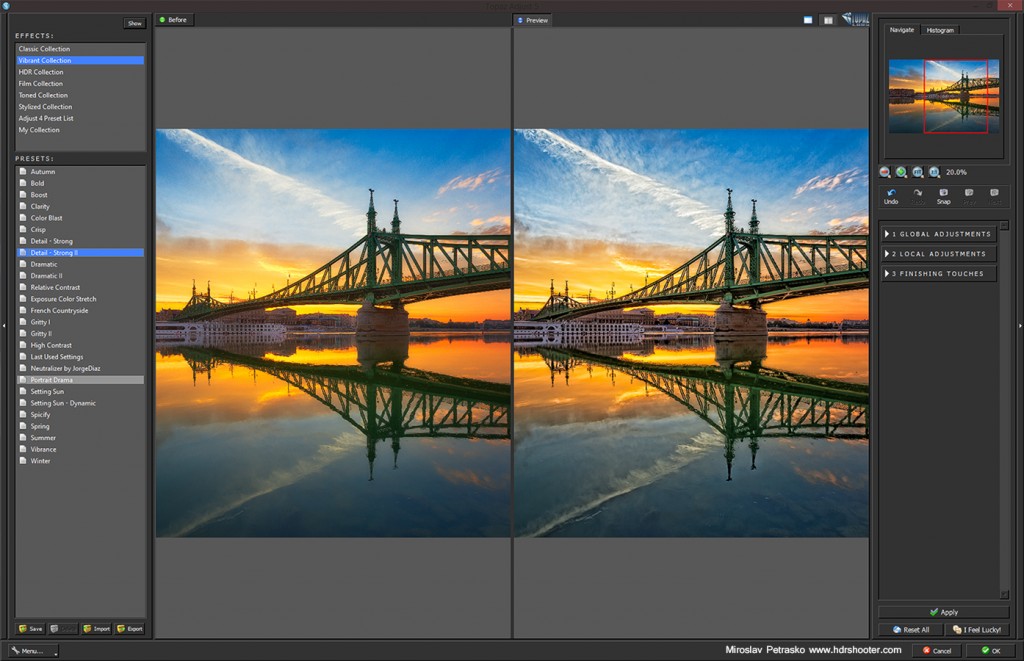
Topaz Adjust is another very popular Photoshop plugin, used to enhance the look of photos. Similar to Nik Color Efex Pro, it’s a huge set of presets, but different to it, here are all the presets done using the same set of adjustments. And there are quite a lot of those.

You can either start by choosing one of the presets, or jump directly into the specific adjustments. There are split into three categories: Global Adjustments, Local Adjustments and Finishing Touches.
Topaz-Adjust-01

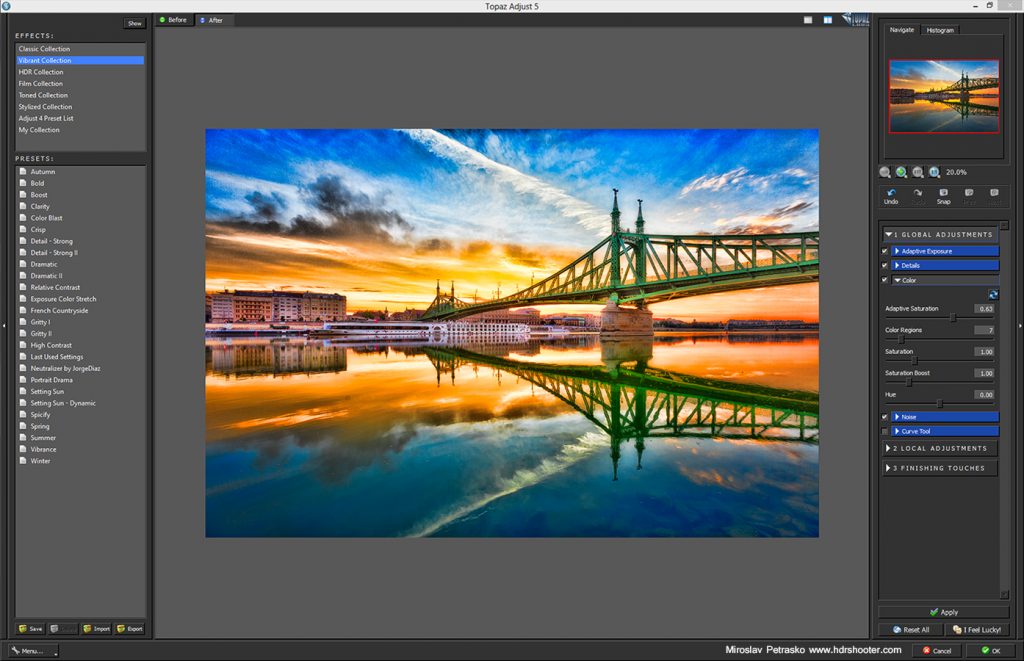
Global adjustments are the once you will use the most here. You can use Adaptive Exposure to balance the images tonal values and to add more color and local contrast. You can use the Details sliders to give you photo a crazy amount of detail. Similar you can use the Color adjustments to add more color. Topaz adjust also supports adaptive saturation, which is similar to vibrance in Lightroom.

Under local adjustments you can find adjustments like burn or dodge. It is debatable if this is useful. If you are using this plugin from Photoshop, you can do the same directly there, if you are using it from Lightroom, maybe then they are more handy. You can also selectively brush out the effect from the photo, but I think using Photoshop layers for this is much easier.

As finishing touches you can add a Vignette, Grain, Warmth, Border and more. This are all classic adjustments, that can be done in many different ways, but if you are unfamiliar with advanced adjustments in Phtoshop or Lightroom, this can make your work easier.

Topaz-Adjust-02

The most unique feature of Topaz Adjust is the Adaptive exposure. It can pull out a lot of detail and tonal range from a single exposure, so you can even fake a HDR look with it. But if you do, I really suggest you tone it down later in Photoshop. The results of Topaz Adjust are usually quite strong and very prominent in the photos. You can think about it as, if you can recognize the used filter from the look of the photo, than you have overdone it.

Here are few of my favorite presets from Topaz Adjust 5:

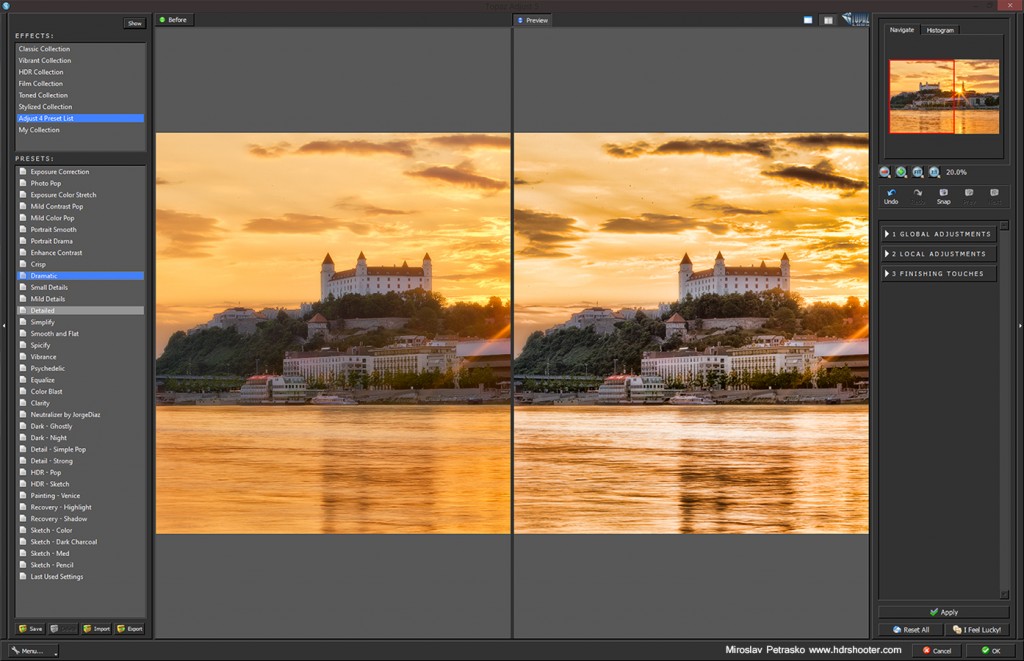
Dramatic:

Adds a lot of drama to the photo. If blended properly, it will bring out detail and local contrast in the final photo.
Topaz-Adjust-03

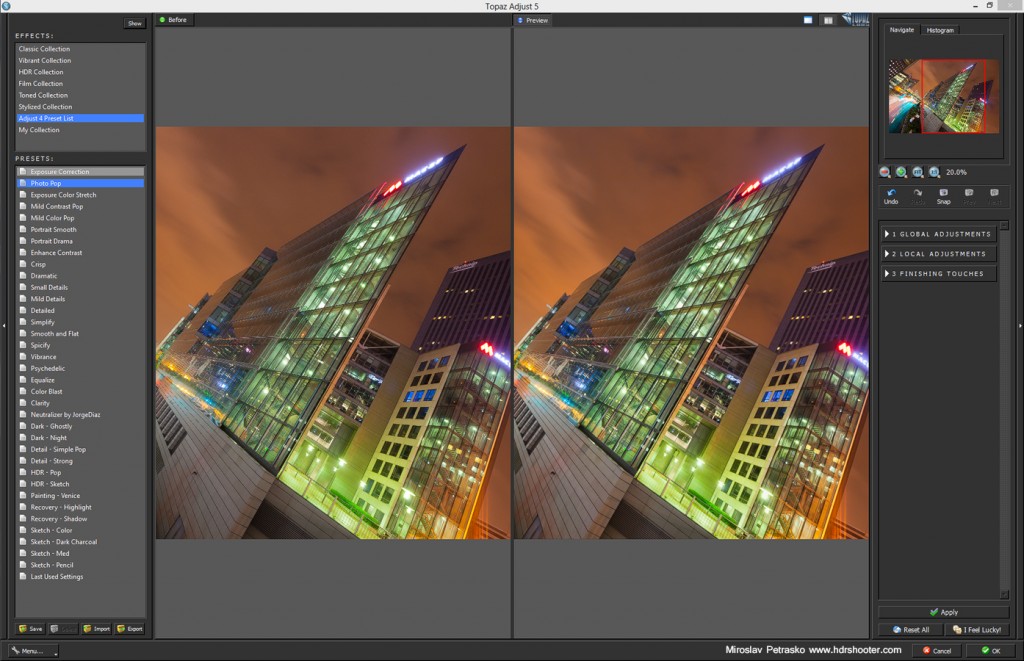
Photo pop:

Probably the most useful preset. Adds a little color, contrast and detail. Makes the photo “pop”. Can help a lot of photos to stand out. The effect is usually very subtle, but noticeable.
Topaz-Adjust-04

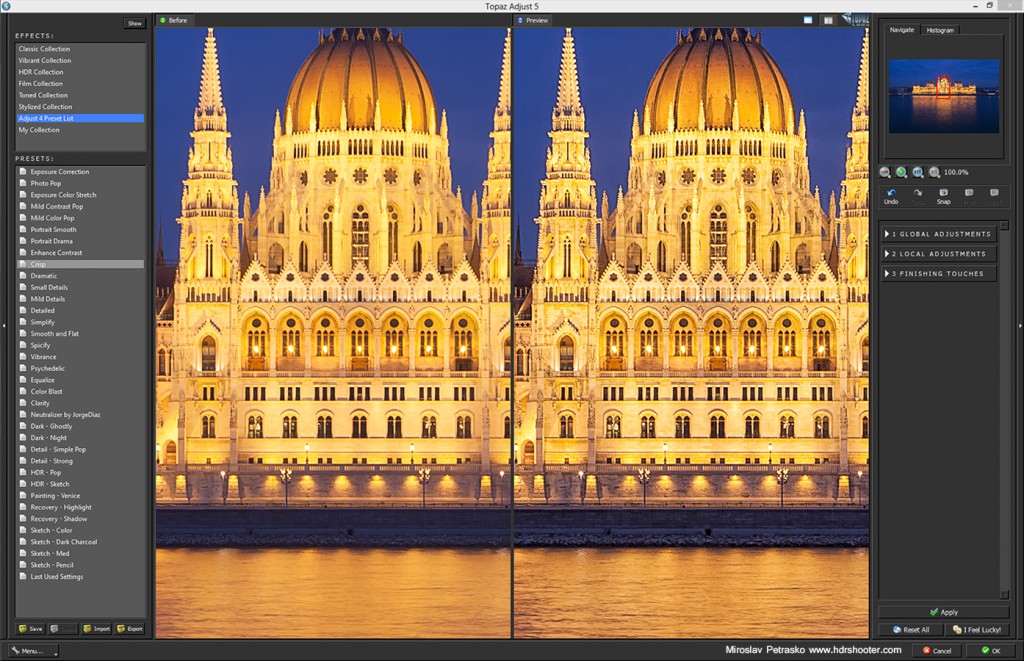
Mild detail:

This is similar to unsharp mask in Photoshop, or structure in Nik Viveza. Adds a lot of sharpness and small details.
Topaz-Adjust-05

Overall the Topaz Adjust plugin can create stunning results. But if you want to use it, use it gently. I really advise blending its results with the original images.

For more information, please visit the Topaz Adjust page.

View all my other reviews here.

Second issue of the HDRshooter newsletter

Yesterday evening I send out the 2nd issue of the HDRshooter newsletter. It included a lot of whats new on the blog, but also a link to the Capturing fireworks eBook and also a free set of brackets to play with (for the photo I described in the yesterdays post). If you have missed it and don’t want to miss again, feel free to subscribe now. In the welcome email you will get the link to the eBook, and also a list of all the recent issues. Visit the newsletter page to subscribe, or use the form in the sidebar.

And those who got it, please excuse the few typos in it. I have one in the predefined values and that reflected in the newsletter. That should teach me a lesson not to create accounts when I’m on my tablet :)
500pxfront

First page in popular and strange followers

I haven’t posted this yesterday, as I don’t want to include extra stuff in the process posts, but my photo Moving Underground got to the front page of 500px. I have to say big thanks to all of you who voted, liked and commented on my photos there.

On the other hand, since I got a photo selected for the 500px Editor’s choice, I got a big boost in new followers there. Whats strange is, that all of these look like new accounts, no likes, no favorites, no photos. That would be normal, but what is strange, all of these account follow the same people (mostly the last 10 from the Editor’s choice, few more or less sometime). So to me, these all look like fake accounts. But I just can’t figure out what good are they for. What do you think? Btw. to illustrate this, here is a screenshot, showing a page from my followers, and three of those accounts.

Summer evening in Budapest

Same as almost every winter, I just don’t have enough new photos to post on the blog. So as every time, I have to go back to earlier to choose new photos to edit. So for today I chosen one from my summer trip to Budapest.

This is a HDR created in Oloneo Photoengine from 5 exposures and then finished in Photoshop.
Summer evening in Budapest

And we have Tuesday again, so it’s time for another process post. As every week I have for you one photo, where I will go through the editing process from start to finish. Btw. I still don’t know what to call these posts. Processing Tuesdays? Edit of the week? Andy suggestions? :)

So for today, I chosen this manual blend of a nice aerial view of Bratislava.
View of the city

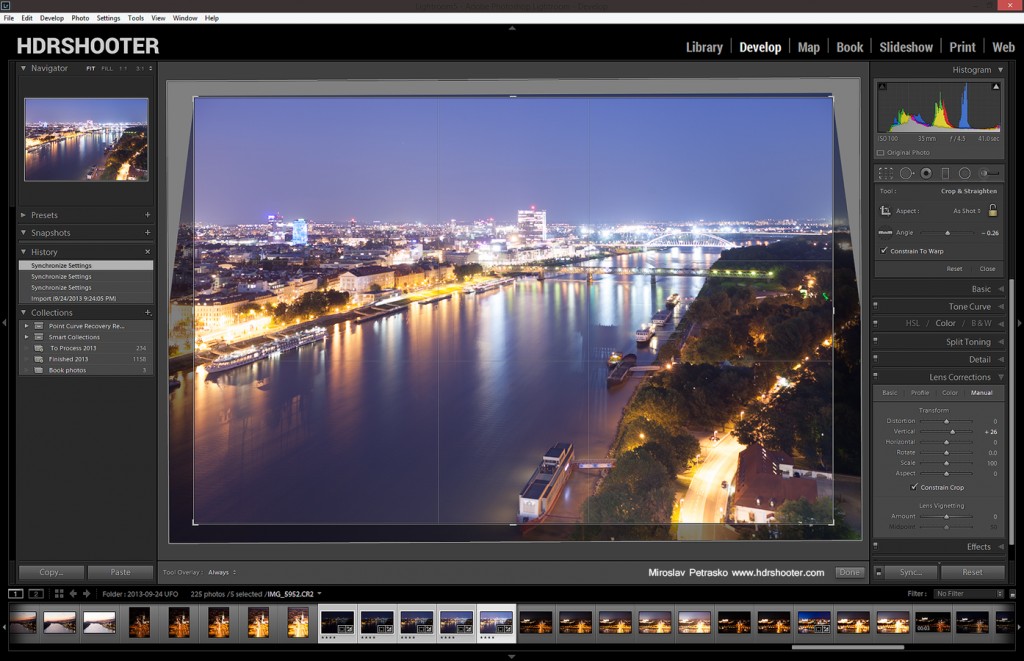
As always I started with Lightroom. For this one, I had to correct the white ballance, and do some perspective corrections, as I was pointing my camera down when I took this. In retrospect when looking at this photo, I could have done a better job cropping, as I haven’t noticed the ship in the bottom right at all before today.

View-of-the-city-lightroom

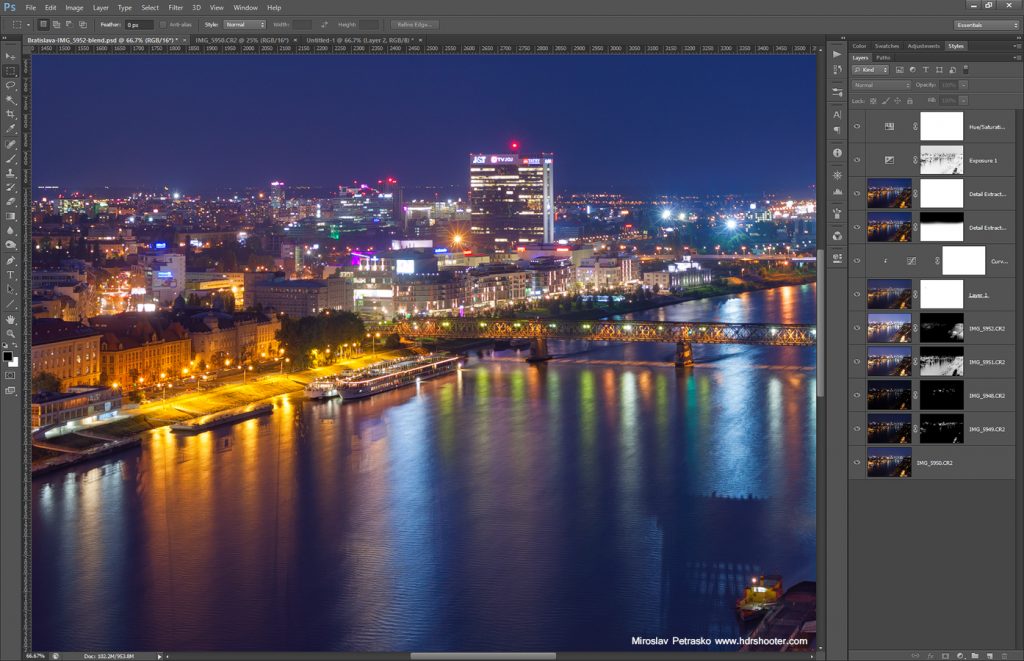
After that I loaded all the exposures into Photoshop. There I did the following edits (numbered from bottom up):
1. 0EV exposureI
2+3. -1EV and -2EV to darken the lights of the city
4+5. +1EV and +2EV to brighten the shadows, mostly in the bottom right
6+7. added glow to the photo, this recovers some lost contrast and also boosts the colors (view my glow tutorial for details)
8+9. this is something I don’t do often but it helps in certain situations. I used the Color Efex Detail Extractor to add more detail and color to the photo. But as I liked the color on the whole image, but the detail only on part, I did the following. I duplicated the layer, set one to Luminosity (so it only affects the detail) and used masks to limit what it affects. Then I set the second one to color for the whole picture.
10. Added 0.5 exposure to the darkest parts of the image
11. Added a little saturation to the whole image

View-of-the-city-process

And that was all. Here you can see the original 0EV exposure, and to see the camera settings, please visit the original post here.

View-of-the-city-original

editorschoice

Photo selected for Editor’s choice

For the first time ever, one of my photos has been selected for the Editor’s choice category on 500px. Recently I’ve been posting there more and more and my photos get quite a good response there. So it look like more photos will find their way there :) You can see the selected photo here, or my account on 500px here.

Flooded by the sunlight

This looks almost nothing like what I got from the camera. This was such a low contrast scene. The sun with the low clouds and the air being full of moisture, just filled everything with light and it all looked the same. As the name says, it was flooded by sunlight :) When I edited it, I added a lot of contrast, but still wanted to keep the feeling of all the sunlight. I’m not really sure about the color. Somehow especially by photos like this, they look different on every monitor. Sometime the yellow is more red, sometime more green. One would think with all the standards, the manufacturers of screens could finally create all monitors with the same colors. But we can just dream about that.

This image is created from two shots, both 5 exposures. One taken normally, one with the sun covered, so I can remove the flares (check my tutorial on removing flares for more details). I then created two HDR images in Oloneo Photoengine and blended them in Photoshop.
Flooded by the sunlight

FREE EBOOK!!!
Subscribe to my newsletter and get a free Capturing fireworks ebook. 
Subscribe