Free HDR video tutorial

Free HDR video tutorial

MASTER EXPOSURE BLENDING

Find the best ones

Find the best ones

TOP PHOTOGRAPHY SPOTS

Free wallpapers

Free wallpapers

HIGH-RESOLUTION WALLPAPERS

As usually for the All saints day, I went to a nearby cemetery to take a few photos. With all the candles it looks so stunning, that for a moment you can almost forget where you are. I think photos of pumpkins and masks would be a little more cheerful, but for that I would probably have to be in a different country. And at least this is more spiritual.

This is a HDR created from 6 shots in Oloneo Photoengine and then finished in Photoshop.
All saints day

I just love this high up places. The view is always so great. And especially when the city lights up. This is of course from top of the Tour Montparnasse in Paris.

My trip to Paris this year was actually my second visit to Paris. First time it was 13 years ago, on a school trip. It’s really strange how I got a completely different feeling of the city now, than I had than. Probably I just notice more and different things than in my younger days :)

This is a HDR from 5 shots created in Oloneo Photoengine and than blended with original exposures in Photoshop.
Above Paris

I so wish I had more time in London and of course better weather. But still I try to get as many photos from that trip as I can. But I also want to get back to London and get many more. But this time I will wait at least until late spring for revisit. I will never ever believe anyone who says that there is no snow in London, as it snowed the day I was there, and it was April :)

This is a HDR created in Oloneo, taken during a very cold and cloudy April day.
Cloudy sky and yellow lights

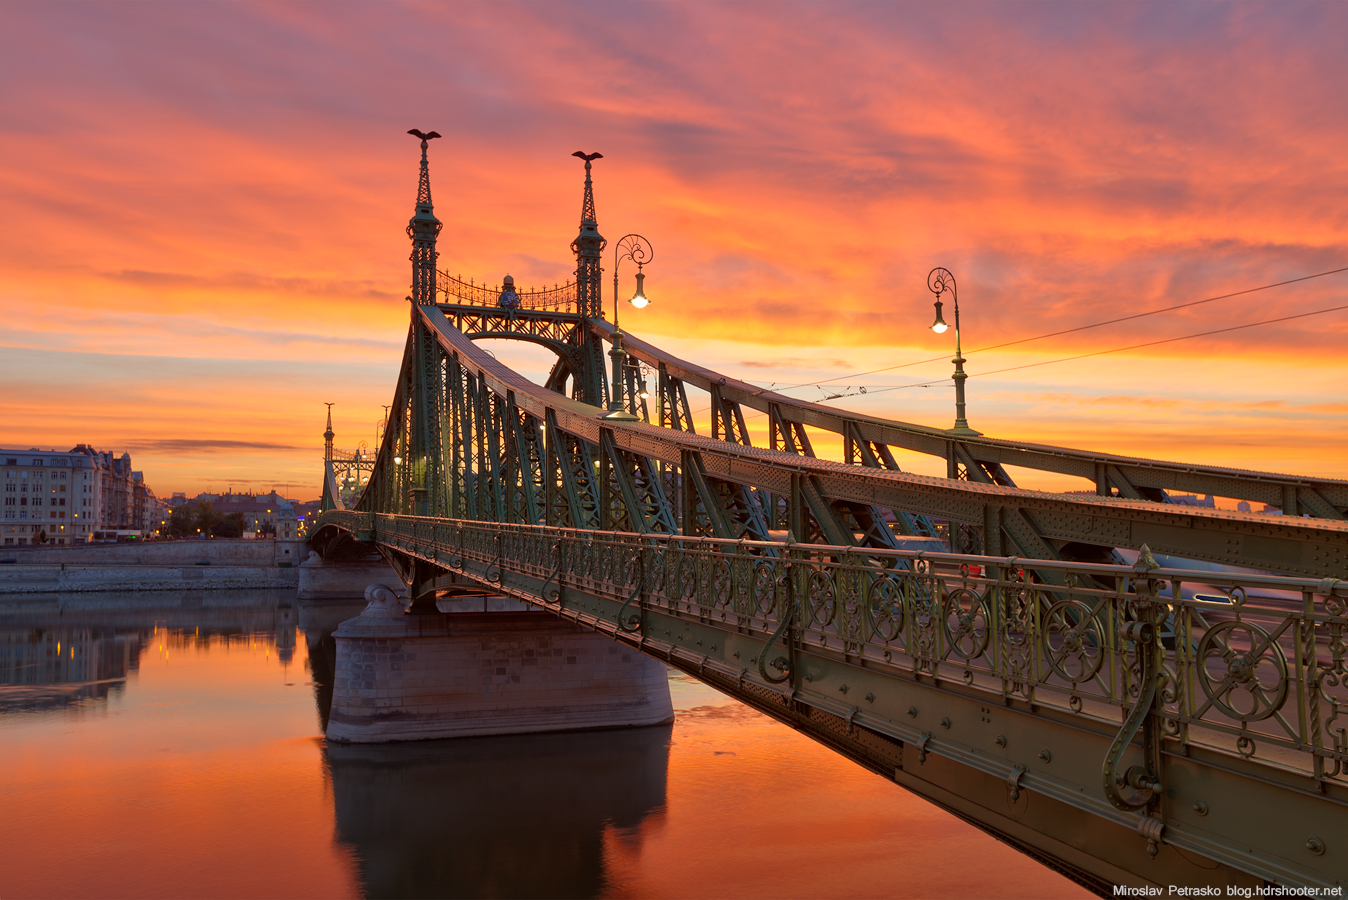
As usually, another Tuesday, another process post. For today I chosen a sunrise photo of the Liberty bridge in Budapest. So let’s get to it :)

To get this final result
Burning sky

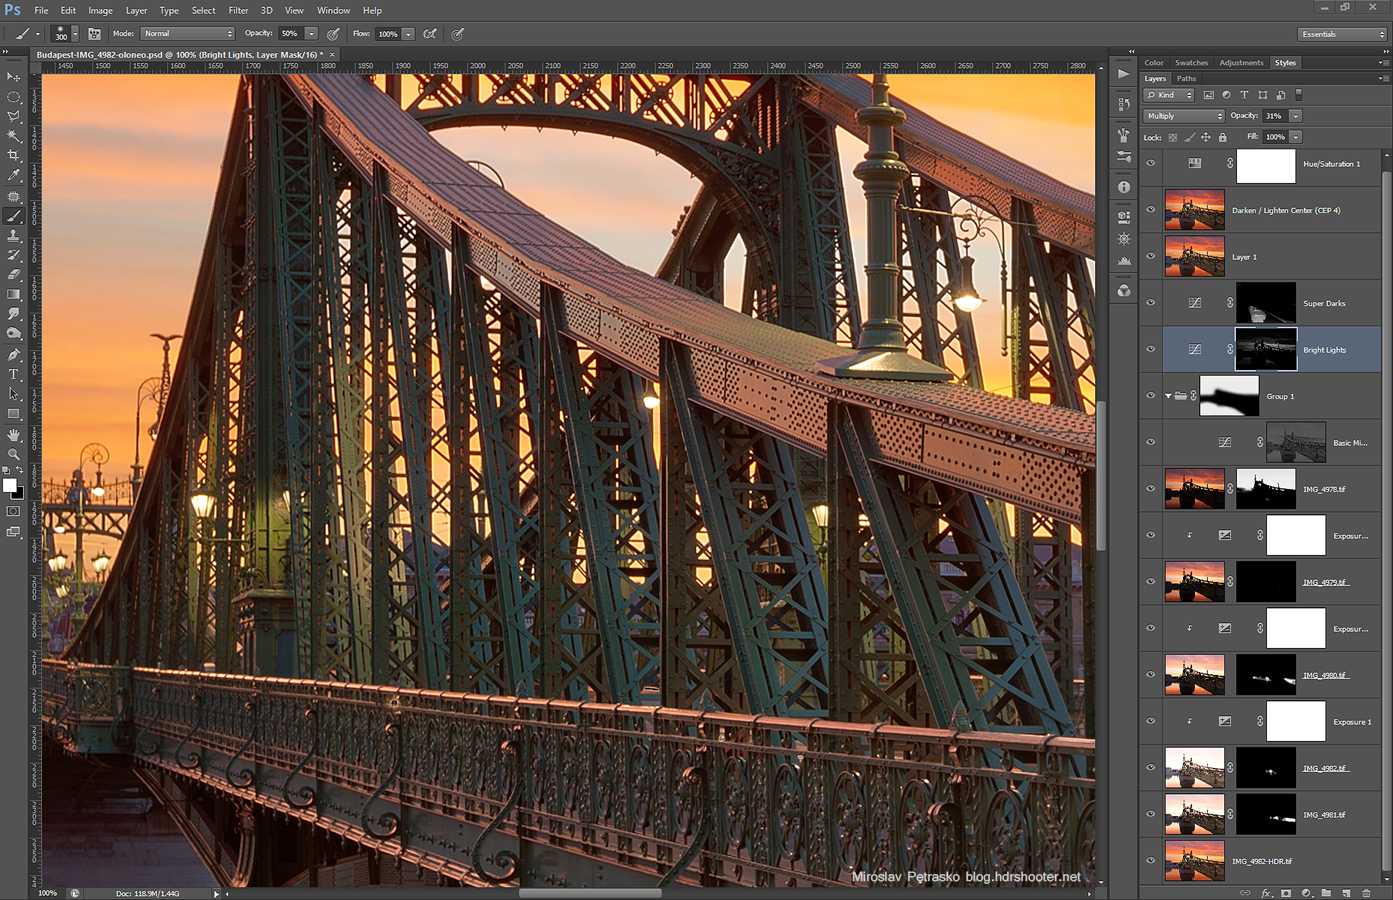
I first corrected the lens distortion and white balance in Ligtroom and exported all the files as 16bit tiff image. I loaded them into Oloneo photoengine and merged them. As always, I only change the strength, nothing else. I saved the result as another 16bit tiff file. After that I loaded all the files into Photoshop.

There I did the following (numbered from bottom up):

1. Oloneo result
2. +1EV exposure to get rid of the car in the shot
3+4. +2EV exposure and a exposure layer that darkens it by one stop, which I used to get rid of another part of a car
5+6. 0EV exposure and a exposure layer that brightens it by one stop, which I used to get rid of the rest of the car
7+8. -1EV that has been brightened by 2 stop, to correct a very small part in the image
9. darkened the sky from the -2EV exposure
10+11. added contrast to the basic mid-tones, and then the layer was put into a folder, so I can create a secondary mask, and remove it from the bridge
12. darkened the brightest light
13. brightened the bottom part of the bridge
14. a little bit of noise reduction
15. Color effex Darken/Lighten center to create a vignette
16. toned down the overall saturation of the image

Burning-sky-process

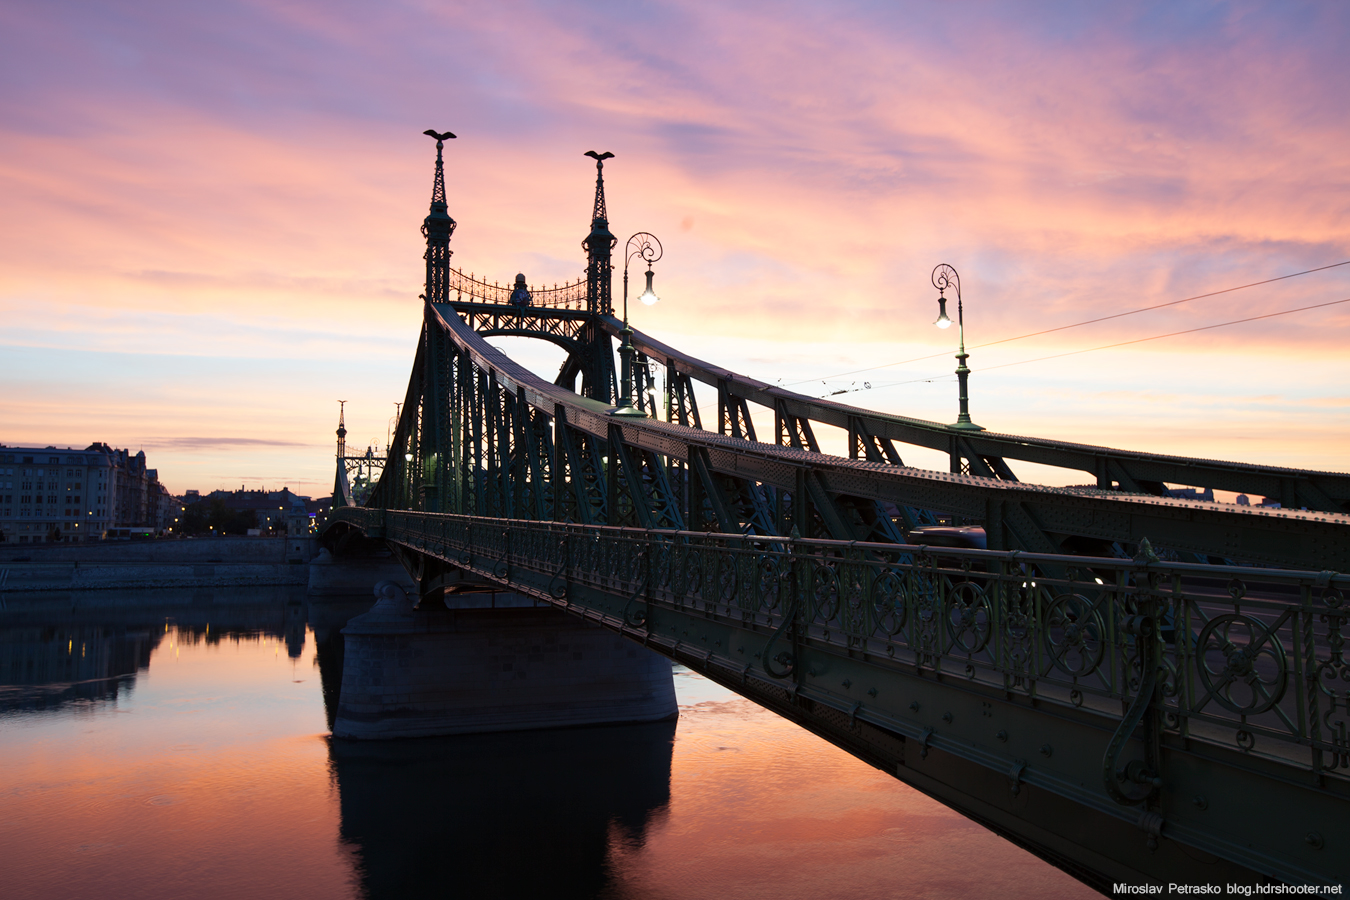
And that’s all. Feel free to ask any question and here is the oloneo result and the original 0EV exposure.

Burning-sky-oloneo
Burning-sky-original

I don’t know why, but according to wikipedia, this bridge has four names. Old bridge, State bridge, Main bridge and also Drava bridge. Look like they really could not agree on one name. And I thought I made an error when I called it the Main bridge in one of my posts and the Old bridge in another :)

This is a manual blend from 5 shots.
The bridge with four names

FREE EBOOK!!!
Subscribe to my newsletter and get a free Capturing fireworks ebook. 
Subscribe