Free HDR video tutorial

Free HDR video tutorial

MASTER EXPOSURE BLENDING

Find the best ones

Find the best ones

TOP PHOTOGRAPHY SPOTS

Free wallpapers

Free wallpapers

HIGH-RESOLUTION WALLPAPERS

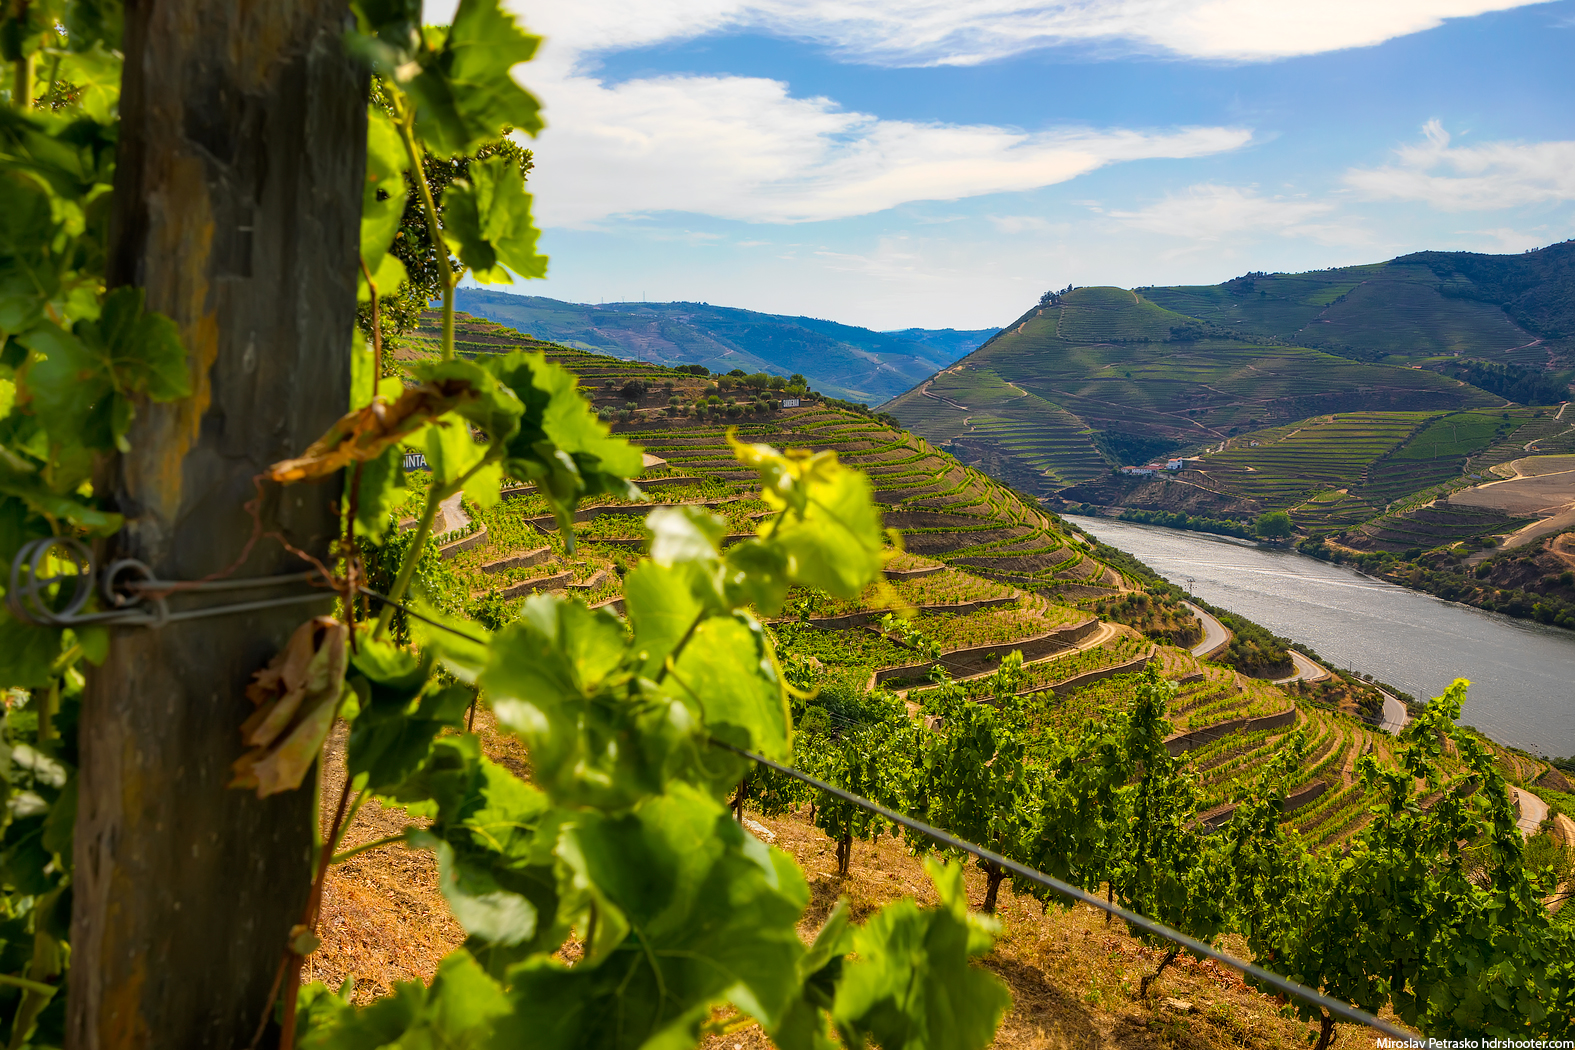
Hot day in the vineyard

It got a bit colder recently, so of course I will post a photo from a very warm day :) This one is from my trip to Portugal last year. It was in the middle of August and the temperatures were around 40-44 degrees all the time. Really not something I’m used to. But when one takes photos, one even forgets about that :)

This is a single exposure, edited in Lightroom and Photoshop. Taken at the Quinta da Roeda in the Douro Valley.

Hot day in the vineyard, Quinta da Roeda, Portugal

Double processing

With yesterday’s photo I mentioned that I used double processing, where I edited the photo twice and then blended the results. And I thought I show more about that. So today I will show you how exactly I edited that photo. So here goes.

First since it is a panorama I combined the shots together in Lightroom. As you can see the result, the photo is a bit bland. That normal, as it’s an undeveloped RAW file. They tend to be quite bland.

Double processing

I started with the first edit. Changed the white balance to make a more warmer photo, opened the shadows, darkened the highlights and added more vibrance. As you can see, the result was already quite nice. But since the lighthouse is white, the tweaks to highlights and shadows made it look dirty and too dark.

Double processing

So here where the second edit comes in. First I exported this one into Photoshop of course. For the second one I focused only on how the lighthouse looks. I removed the highlights and shadow tweaks, and I added exposure until the lighthouse was as bright I as I wanted it to be. As you can see this edit is really overexposed in most areas, but that’s not a problem as it will be blended into the first one.

Double processing

So when I had both, I opened both in layers, hidden the brighter one, used the want tool to select the sky, inverted the selection and painted over the lighthouse. Then I finished it with tweaking the opacity of the second layer, so it nicely matches the background.

Double processing

You can see the resulting photo in this post.

And that’s it :) You can do as many edits of a photo you want and then just blend them like this afterwards. In HDR this is used when doing a single RAW HDR, when you create multiple version of the same photo by under and over exposing it, so creating the other brackets needed. But that a quite ineffective approach. Rather edit the shot by focusing on the result you already want, but in just a selection of it.

Sun at the horizon

I really like the lighthouse at the Neusidlersee. Probably because it’s the only one that is relatively close. Not that many lighthouses in central Europe :). I took this photo few weeks ago during a very cold and windy evening there. I just set the camera to do a long exposure and tried not to freeze my finger off as I forgot my gloves. But the results were nice.

For this photo I did the double processing technique. That is you edit the photo twice from the RAW and then blend the results together. Here I did one edit to get the sky and most of the photo how I liked. But the lighthouse looked dirty. It’s white, so when it’s dark it does not look so great. So I did a second edit, just for the lighthouse, and the blended these two together using layers in Photoshop.

This is a two shot panorama, taken with the VFfoto 10 stop ND filter.

Sun at the horizon, Podersdorf, Austria

Selective edits in Color Efex

Color Efex is still one of the best photo editing plugins you can get for Photoshop, and with the recent DxO update, we hopefully will also get new features in it soon. But what I noticed is, that many times it’s filters are being used on the whole photo, where it’s very easy to be much more selective and use the filters only when there are needed. And you don’t have to do it with Photoshop with layers, but right inside Color Efex. So let’s have a look at it today.

Control Points

Each time you add a filter, you will see the control points under the filter settings. There are two options, + or -. You choose the one you want, and place it where you want it. If you choose the plus one, the filter opacity will be changed to 0% and only affect where the control point is. If you add a minus one, the filter opacity will be set to 100% and it will be removed where the control point selects.

On each control point you can change it’s size and opacity of filter. You will notice, it does not effect the whole selected area the same. This is because it works differently. It samples the area under the center point of the selection and then only affects all similar areas inside the selection. This works similarly as the wand selection in Photoshop.

Selective edits in Color Efex

If you click on the little triangle next to the Control points text, few more options will open. First you will see all the applied control points and you can turn them on and off. You see what size of the filter they apply, and if you click on the little square next to that, you will see the selection they effect.

There is also an opacity slider. This is the opacity of the filter effect overall, on spots that have no control points. The plus and minus actually adds or subtracts from this opacity. It’s actually easier to use just plus or minus, not both at the same time. Makes it less confusing. Just set the overall photo you want, and then just remove where it is too much. I do it that most of the time.

Selective edits in Color Efex

You can add multiple points quickly, just by holding down the Alt key and dragging a point. That will duplicate it with all it’s settings. You can also group points, that when you modify the fist one, all are changed.

When to use them?

There are many cases when to use this functionality. For instance, you want to use the polarization filter but it adds color to more things than the sky. Just use it, and then add the plus control points on the sky only. Like this that will limit the effect.

Or you want to add a lot of local contrast to one area, but not to other. Like in this photo of fireworks, I wanted more detail in them, but nothing else. So I used tonal contrast filter with high settings and using a plus point, I added it only on the fireworks.

Selective edits in Color Efex

There are many other situations, and I think you will find them yourself quite quickly. Btw. in the screenshots you can see which filters I set to be in my Favorites, that means I use them the most :)

Calm morning in Hallstatt

Let’s go with another very early morning photo. This one of course from Hallstatt in Austria. It’s again from the very famous spot there. I do have photo from different views, but since I have been here for the sunrise and sunset, the other ones are not that great. I will go definitively go back here, so next time I plan mostly to take photos of the other views :)

This is a two shot vertorama (but cropped down a lot), merged in Lightroom, finished in Photoshop.

Calm morning in Hallstatt, Austria
FREE EBOOK!!!
Subscribe to my newsletter and get a free Capturing fireworks ebook. 
Subscribe